Acrylic sheets are a multipurpose, sturdy, and attractive material that can be utilized in various manners such as DIY projects, home improvements, and even professional applications. The main issue here is the cutting of acrylic sheets which can be a difficult task if you do not know the proper ways and tools to use without cracking or chipping them. No matter if you are a professional artist, a daredevil DIYer, or just dealing with a temporary project, knowing the right way of cutting gives you the benefit of saving time and money, and also avoiding the frustration associated with it. This guide comes along with the experts’ tips, step-by-step instructions, and the necessary tools for making clean and precise cuts every time. Keep on reading to find out how to change your acrylic sheet cutting into a hassle-free and smooth procedure!
Understanding Acrylic Sheets
Acrylic sheets, or plexiglass as they are sometimes referred, are plastic materials that are durable, light, and glass-like, i.e., such a substitute. They are resistant to breaking and withstand various weather conditions. They are available in numerous thicknesses and finishes hence making them able to be used in both indoor and outdoor applications comfortably. Cutting, shaping, and polishing of acrylic sheets is so easy, which is why they are preferred in DIY undertakings, such as making signs, windows, and display cabinets.
What is Acrylic and Its Uses?
Acrylic is a transparent and lightweight thermoplastic material that is frequently used as a substitute for glass, offering shatter resistance. The scientific name for acrylic is polymethyl methacrylate (PMMA) and it is distinguished by its exceptional strength, high light transmission purity, and environmental resistance. Its great camerawork and ease of fabrication make it popular in many sectors.
Acrylic is a material employed in many applications such as lighting up signs, making aquariums, and producing display cases, where the mentioned features are essential. The same properties make it a standard material for windows, skylights, and safety shields offering resistance to weather and impact as well. Also, acrylic sheets play a role in interior decoration of furniture, partitions, and decorative elements thus combining functionality and aesthetics. Its ability to be cut, bent, and molded makes it quite usable for DIY projects and custom designs. Moreover, the fact that it is lightweight and cost-effective has ensured its continued use at both professional and personal levels.
Types of Acrylic Sheets: Clear and Colored
Acrylic sheets are made available in two main types—clear and colored—each with its own distinct advantages suitable for different uses.
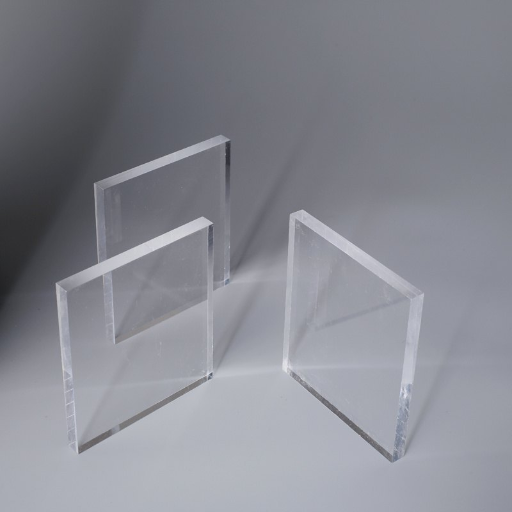
Clear Acrylic Sheets
Transparent acrylic sheets are those with the highest transparency and are often referred to as glass-like acrylic. Their light transmission is 92% at maximum, therefore they are very much suitable for windows, display cases, and protective barriers. Additionally, their low weight and high resistance to breakage make them ideal for use both indoors and outdoors.
Colored Acrylic Sheets
Colored acrylic sheets have an enormous variety of colors and light transmission that vary from fully transparent, to translucent, and opaque. Hence, these sheets are utilized in artistic and fun projects, such as signage, decorative panels, lighting fixtures, and branding elements. The great thing is that one can choose the material’s color/appearance, yet the material’s resistance to time and weather remain the same—this is why colored acrylic sheets are so widely used in various industries.
Both varieties can be easily customized through cutting, shaping, and fabrication to meet designers’ specifications, making them a must-have for professionals, manufacturers, and DIY enthusiasts alike.
Comparing Acrylic and Plexiglass
Acrylic and Plexiglass are both transparent thermoplastics with similar properties, but they differ slightly in terms of cost, durability, ease of fabrication, and weather resistance.
Tools Needed to Cut Acrylic
Essential Cutting Tools: Saws and Blades
Using the proper tools for cutting acrylic provides the advantage of achieving clean and precise results. Below are the best options:
Circular Saw
Best for straight cuts on thicker sheets. Chipping can be avoided by using a fine-toothed blade specifically made for plastics.
Jigsaw
The best tool for making curved or irregular cuts. To minimize the risk of cracking, choose a blade with small and sharp teeth.
Table Saw
Making the cutting of large acrylic pieces that require straight cuts becomes an easy task. The use of high-quality carbide-tipped blades yields smoother edges.
Laser Cutter
An accurate and high-tech choice that provides clean edges and sophisticated designs, convenient in detailed projects.
⚠️ Safety First: Always use the cutting of acrylic as an opportunity to implement best practices in safety, such as wearing goggles and securing the acrylic.
Recommended Tools for Different Cutting Techniques
Choosing the proper tools is essential for achieving clean and precise results when cutting acrylic, as well as preventing damage to the material. The following is a list of tools that are recommended based on the cutting technique used:
Hand Tools
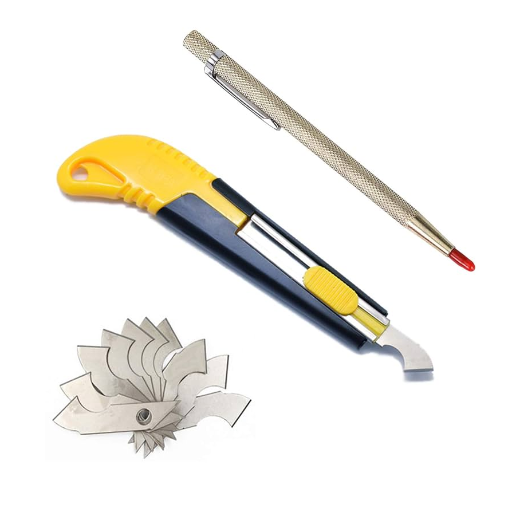
- Plastic Scoring Knife: The best tool for making straight cuts on thin acrylic sheets. Scoring and snapping can be done easily and without the need for specialized equipment while getting smooth edges.
- Coping Saw: A multipurpose hand tool for making either curvy or intricate cuts, usually accompanied by fine-toothed blades to minimize chipping.
Power Saws
- Circular Saw: Recommended for straight cuts on thick acrylic sheets. To avoid cracking and getting clean edges, a fine-toothed blade of the type for plastics should be used.
- Jigsaw: For best results, use a combination of a jigsaw and an acrylic blade to achieve smooth cutting of curves and intricate designs.
Laser Cutter
A laser cutter provides the highest accuracy for intricate patterns and precise edges. It is particularly advantageous for jobs requiring ornamentation or very meticulous work. Make sure that the acrylic can be cut with a laser and that a fume hood is used.
Router or CNC Machine
These machines can handle custom shapes or significant projects. They can create the finest cuts through the thickest acrylic and even achieve a polished surface with minimal finishing.
Heat Cutting Tools
Heating tools such as hot knives or wire cutters are capable of cutting and sealing acrylic edges simultaneously but need to be handled carefully to avoid excessive melting or distortion.
💡 Pro Tip: Never compromise on safety, and always wear the appropriate protective gear, such as safety goggles, and securely clamp the acrylic piece. An expert finish is guaranteed for your acrylic projects if you choose and handle your tools properly.
Additional Equipment: Clamps and Marking Tools
Acrylic cutting is a process that requires precision to avoid wasting material, thus the use of clamps and marking tools is vital for safe and clean cuts. Clamping the sheet properly on the work surface with clamps eliminates any movement during the cutting process that might cause uneven edges and accidents. The right size and type of clamps will provide adequate support and minimize the risk of the material cracking.
Cutting tools, such as markers with excellent tips or scoring tools, enable the creation of clear lines for cutting. Such finely done work guarantees that the cut will be a straight and clean one, thereby reducing the likelihood of mistakes. Before commencing the cutting operation, always verify that your marks are precise and clearly visible.
Step-by-Step Techniques to Cut Acrylic Sheets
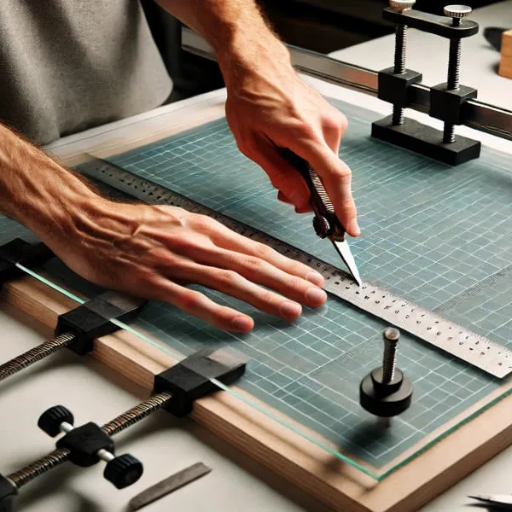
1. Measure and Mark the Cutting Line
Acrylic sheet has to be first measured and marked for cutting line accurately. The ruler or measuring tape will help significantly in determining the correct size for the acrylic sheet. A fine-tipped marker or scoring tool should be used to mark the cutting line clearly so that there would be no confusion in the later stages.
2. Secure the Acrylic Sheet
Secure the acrylic sheet on a flat surface and with the help of clamps keep it fixed there. This will avoid that any movement takes place during cutting and also a clean and straight cut will be formed.
3. Score the Acrylic
Layer of thickness less than 3mm should be cut with the help of a scoring knife. A deep groove needs to be made along the cutting line by repeatedly scoring the line to indicate where the break should be created.
4. Snap the Acrylic Sheet
The scored line should be placed along the edge of the working surface. Apply the same amount of pressure evenly and the snapping should take place with the sheet going along the groove. Care should be taken to avoid cracks or uneven breaks.
5. Use a Saw for Thicker Sheets
A jigsaw or a circular saw can be used to cut thicker acrylic sheets provided that the saw is fine-toothed and specially made for cutting plastic. The blade, too, must be sharp and designed for cutting acrylic material. Cutting must be done slowly and steadily to prevent overheating or chipping.
6. Sand the Edges
After the cutting, rough edges need to be smoothed out using fine-grit sandpaper or a sanding block. This step ensures that the edges are safe to handle and have a professional finish.
7. Clean the Acrylic Sheet
Microfiber cloths would be very effective in cleaning the acrylic surfaces as they can remove dust or debris left from the cutting process. This can help retain a clear, polished look.
✓ Success Guarantee: If you abide by these steps, you would be able to make precise and clean cuts on acrylic sheets which in turn would guarantee having high-quality results for your project.
Using a Table Saw: Best Practices
There are several effective methods for cutting acrylic sheets with a table saw, resulting in clean, safe, and precise cuts. One example is finding the proper slice—pick a fine-toothed, carbide-tipped slice particularly made for plastics. This not only causes less chipping but also protects the acrylic from damage. Next, mount the sheet tightly before cutting starts to prevent vibrations or shifts during the cut.
Adjust the blade height to 1/8 inch, ensuring it is above the acrylic sheet. This produces an edge that is less likely to crack and is generally smoother. Besides, the cutting of acrylic should be done at a slow and steady pace to prevent overheating which can lead to the melting or the warping of the material. Apart from the use of coolant or lubricant, heat may build up and good cut may not be achieved.
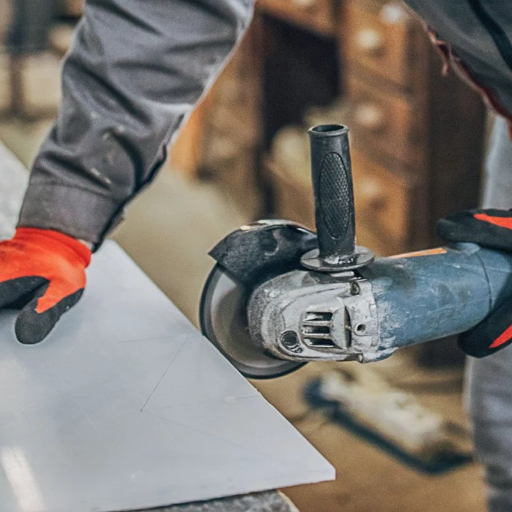
Finally, it is a must always to have the appropriate safety gear on, which consists of gloves and goggles, and operate in a place with good ventilation to keep off breathing the acrid smell from the heated acrylic. If you adhere to these guidelines, you will be able to achieve the same high-quality and precise results that professionals obtain when using a table saw for cutting acrylic sheets.
How to Cut Acrylic with a Circular Saw
Acrylic cutting using a circular saw demands proper groundwork and skill to yield clean and precise outcomes. The first step is to secure the acrylic sheet tightly enough so that it won’t move during cutting, which might lead to chipping or rough edges. A circular saw blade specifically designed for acrylic or plastics is recommended, and the one with fine teeth and carbide tips is the best choice for minimizing cracking and achieving smoother cuts.
Set the blade height so that it just goes past the material and also set the saw at a low cutting speed to avoid overheating. Overheating is the primary cause of acrylic melting or warping, so it is essential to apply constant pressure and not push the blade through the material. Besides, using masking tape on the cutting line will further prevent splintering and facilitate the acquisition of a clean edge.
For the sake of safety, it is essential to wear protective goggles, gloves, and a dust mask at all times. Make sure that your work environment is well-ventilated and clutter-free. By following these steps, you can cut acrylic sheets with a circular saw in a professional manner, achieving the same high-quality results.
Scoring and Breaking Acrylic Method Explained
The scoring and breaking technique is an uncomplicated yet highly efficient method for cutting perfectly acrylic sheets without any reliance on power tools. First of all, you should indicate the cutting line that you want exactly with a straight edge and a marker. After that, use a scoring tool or a utility knife with a razor-sharp blade to cut through the marked line, applying strong and even pressure. It is essential to perform this activity for a number of times to obtain a deep, clean groove which would ensure that the cut goes deeply enough into the acrylic surface.
When you believe the scoring process has been carried out adequately for the acrylic, the next step is to place the sheet on a flat surface with its scored line aligned with the edge of a table or workbench. Then, with great care, start pressing down on the part of the sheet that is hanging beyond the edge while holding the other side firmly in place. Eventually, the sheet should break along the scored line with the force coming through steadily. If necessary, clamps can hold the acrylic in place during scoring or breaking to ensure precision. This technique is particularly suitable for straight cuts and operates efficiently on thinner acrylic sheets.
Techniques for Cutting Acrylic Sheets Without Cracking
If you want to cut acrylic sheets without the risk of cracking, prioritise using the proper tools from the start, such as a plastic scoring knife for a straight cut or a fine-toothed saw for delicate shapes. After that, ensure the sheet is supported correctly and well-clamped to prevent any movement, which can cause cracks. When using power tools, always keep the speed low to reduce heat and minimize the risk of cracking. In addition, consistently score several times to make a deep guide line before snapping, and put on protective gear to prevent injury from sharp edges or pieces of glass.
Score and Snap Method for Thin Acrylic Sheets
The application of the score and snap method on thin acrylic sheets entails the following steps:
- Measure and Mark: Employ a measuring tool and a straight edge to trace the cutting line on the acrylic sheet with a fine marker or pencil.
- Score the Line: Move a plastic scoring knife along the marked line, using steady and firm pressure. Repeat this process several times until a significant groove is formed.
- Position the Sheet: Set the scored line on a flat surface, ensuring the larger part of the sheet has support.
- Snap the Sheet: Give a sharp downward push on the side of the sheet that is unsupported to break it along the scored line smoothly.
- Smooth the Edges: After snapping, use sandpaper or a file to smooth away any sharp or rough edges.
⚠️ Safety Notice: Always use safety goggles and gloves as protection from sharp pieces. This is a rapid and efficacious method for obtaining clean cuts on thin acrylic sheets.
Using a Table Saw for Thick Acrylic
Using a table saw is an effective method for cutting large acrylic sheets accurately and cleanly. Select a special plastic fine-tooth blade to prevent any chips or cracks from forming during the cutting process. The next step is a substantial and secure attachment of the acrylic sheet to the table saw to prevent any movement during cutting and also adjusting the blade height such that it just goes slightly above the thickness of the acrylic.
The next step is to align the blade and sheet correctly for an accurate cut. It is also essential to guide the sheet through the blade at a very steady, consistent speed; jerky movements may damage the material. Moreover, applying masking tape along the cutting line will greatly minimize edge chipping. Wearing protective eyewear and gloves is essential, as the acrylic fragments can be hazardous during cutting. With a table saw, one can achieve very smooth and professional results which makes it the best tool for cutting thicker sheets requiring precision cuts.
Circular Saw Techniques for Clean Cuts
- Select the Correct Blade: Pick out a fine-toothed blade made explicitly for cutting acrylic or plastics to get less chipping and smoother edges done.
- Fasten the Workpiece: Ensure the acrylic sheet is securely clamped to your workbench to eliminate the risk of cutting inaccuracies and promote safety.
- Utilize a Guide: Put a straightedge guide or a fence parts along the cutting line so as to keep the cuts straight and accurate.
- Cut at a Constant Pace: Run the saw at a uniform and controlled speed to prevent the blade or acrylic from overheating, which can cause melting or warping at the edges.
- Do Not Use Too Much Force: Let the saw cut with least application of force; going beyond the recommended force may result in cracks or uneven cuts.
Troubleshooting Common Issues
Dealing with Cracking and Splintering
Acrylic cutting is accompanied by cracking and splintering issues, however, proper techniques plus tools can reduce these issues. First and foremost, the acrylic sheet’s proper clamping is necessary so that there will no be any movement during the cutting process vibrations that lead to cracking. Additionally, using a specially designed for plastics fine-tooth saw blade helps make edges smoother and reduces the chance of splintering. Along with this, a constant feed rate and no excessive force on cutting material allow for unbroken and undamaged cutting. In case cracks and splinters happen; they can sometimes be fixed by sanding the edges lightly or using a plastic polishing compound for a smooth finish. Careful preparation and execution are necessary for the professional result while acrylic is being worked on.
How to Fix Mistakes: Repairing Acrylic Sheets
Whenever I commit an error with acrylic sheets, the first thing I do is to evaluate the extent of the trouble. For minor cracks or scratches, I use fine-grit sandpaper to rub the surface gently, then apply a plastic polishing compound to restore clarity. In the event of a larger crack in the acrylic, I use an acrylic adhesive to fuse the pieces, ensuring they are in the correct position before allowing it to cure. I always work slowly and meticulously, as the results can be worse if you are in a hurry.
Preventative Measures to Avoid Damage
- Use Proper Cutting Tools: Make sure that you are using the right tools for cutting acrylic like a scoring knife or fine-tooth saw, which will cut the risk of cracking or chipping down.
- Handle with Care: Do not put heavy things on acrylic sheets or let them be in a place that is frequently hit or knocked to avoid the formation of stress fractures.
- Store Appropriately: Keep the acrylic sheets in a location that is neither too warm nor too dry, but away from direct sunlight, to prevent them from warping or discoloring over time.
- Clean Gently: For regular maintenance, use a soft cloth with mild soap or specialized acrylic cleaner but be careful not to scratch the surface.
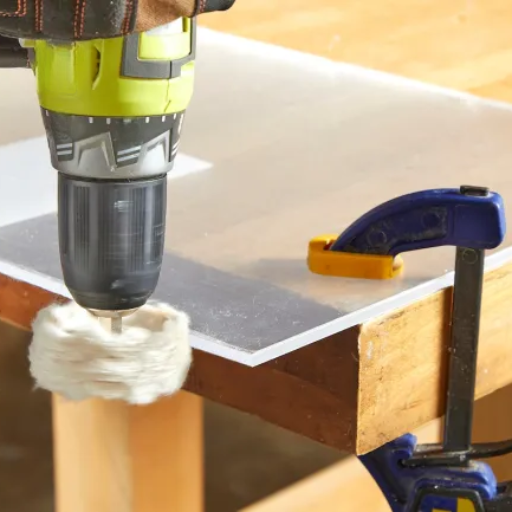
- Prevent Overheating: When cutting or drilling, avoid applying excessive heat, as acrylic may soften or deform when exposed to high temperatures.
✓ Prevention is Key: If you follow these procedures, you will be able to reduce the risk of damage considerably and at the same time prolong the life of your acrylic pieces.
Reference Sources
-
SendCutSend Blog: How to Cut Acrylic Sheets Like a Pro – This article provides tips on using the right tools and techniques for cutting acrylic sheets effectively.
-
Regal Plastics Blog: 3 Ways to Cut Plexiglass Sheets – A guide on different methods to cut acrylic (plexiglass) sheets, including scoring and cutting.
-
UVACRYLIC Blog: Best Guideline To Cut Acrylic Sheet in 2025 – Offers professional advice on tools like circular saws for cutting acrylic sheets.
- Top Acrylic Sheet Manufacturers and Suppliers in China
- Guide for Laserschneiden Acryl
Frequently Asked Questions (FAQs)
What is the best technique for cutting acrylic sheets without causing them to break?
The best technique for cutting acrylic sheets without causing them to break is to score the surface with a utility knife along the cut line and then snap the sheet along the score. If the sheets are quite thick, it is best to use either a jig saw or a bandsaw with blades that are specifically designed for acrylic to guarantee the cuts are clean.
How can I mark my cut line on acrylic sheet for a straight line?
To mark your cut line on an acrylic sheet for a straight line, utilize a very fine-tip marker or a sharp pencil. The marking should be very clear and conspicuous, and employing a ruler will significantly improve the precision of your marking.
Can I use a glass cutter to cut acrylic without cracking?
Absolutely, a glass cutter can be used to score the acrylic sheet. Just ensure that you put equal weight on all sides of the ruler and release the pressure once the sheet is snapped along the scored line. This method does great for thin acrylic sheets.
What grit blade is ideal for cutting acrylic sheets?
A blade with fine teeth and the correct grit for acrylic is the ideal one for making cuts on the acrylic sheets. This not only ensures a neat cut but also reduces the chances of cracking or getting shards.
How do I keep the cut edges of acrylic clean and straight?
The cutting edges of acrylic will be straight and clean if one ensures the saw is adequately guided and uses a straight edge. When using a jigsaw or bandsaw, it is recommended to take steady hands and to not rush through the procedure.
What precautions should I take to avoid stressing the acrylic while cutting?
To prevent the acrylic from being stressed during the cutting process, always support the sheet adequately, especially if it hangs off the table’s edge. Clamping may be necessary; however, do not apply too much force, as this may lead to cracking.