
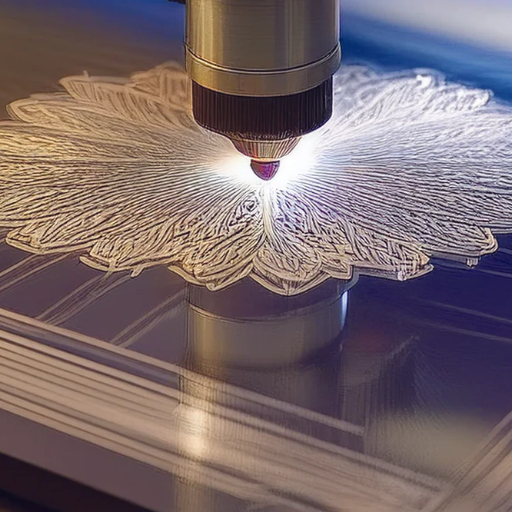
Laser engraving indeed has allowed the transformation of any surface, and acrylic is no different. In other words, acrylic can be described as a medium that is interesting because of its versatility, durability, and eye-catching finish. The opportunities that come with acrylic laser engraving are boundless- be it for the more complex signage, gifts, or art pieces that you want the world to look at. This guide illustrates the major acrylic laser engraving methods and approaches, as well as coach tips on achieving the highest level of finish. By the time you finish reading, you will be well on your way to understanding the process and with the confidence of further developing your engraving projects. Step into an exciting world where you get to discover the “Black Box” secrets!
Introduction to Laser Engraving on Acrylic
Laser engraving acrylic is an accurate and efficient method for creating intricate designs and patterns on a commonly used material. A laser beam is focused to engrave on the surface of acrylic, which achieves neat and precise designs. This process finds utility for signage, awards, decorative items, and customized gifts. Given the correct settings were applied, taking into consideration power, speed, and focusing, fine engravings could be made with detailed sharpness and a smooth finish. It’s only those who have either advanced skills or beginners in laser engraving who will find learn the basics of laser engraving on acrylic will open an inexhaustible ground of creative possibilities.
What is Laser Engraving?
The technique of laser engraving is exact and versatile. The laser beam gets used to carve designs, patterns, alphabets, or images onto the surface of any material. The process of laser engraving uses a fine beam of light to burn, melt or vaporize a thin film layer off of the surface of any object, leaving a permanent mark. It is used across various industries for product branding applications, custom signage, personalized gifts, and similar purposes. Contemporary laser engraving machines are quite technologically advanced, providing uniform results and work on an array of materials including acrylic, wood, glass, metal, and leather. As laser engraving is very cost-effective for producing intricate designs, it is being widely utilized for both commercial and artistic purposes.
Benefits of Using Acrylic for Laser Engraving
🔧 Versatility
The uses of acrylic are diverse, including signage, decorative objects, and awards, among others, due to its adaptability and ease of customization.
⚡ Implementation
Acrylic laser engraving ensures precision, sharpness, quality, and details within the image, presenting the picture in a professional appearance with very intricate designs.
💪 Strength
Acrylic is a very tough material that rarely shatters under any circumstances and also resists weather, making the product suitable for both outdoor and indoor situations.
🎨 Variety
Acrylics come in all colors, finishes, and thickness, thus affording maximum creative freedom.
💰 Cost-Wise
Acrylic is one of the cheapest materials that will ensure quality and appeal for their engraving needs.
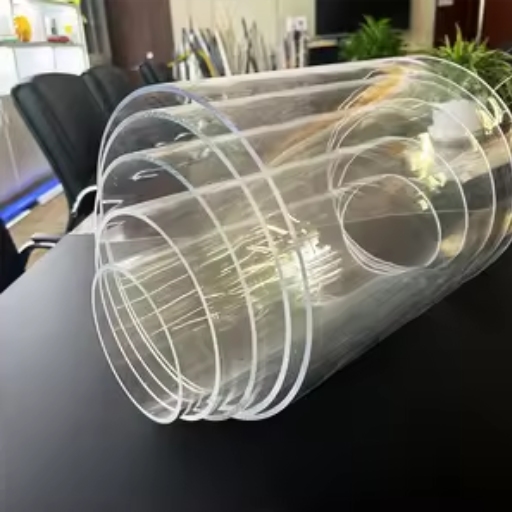
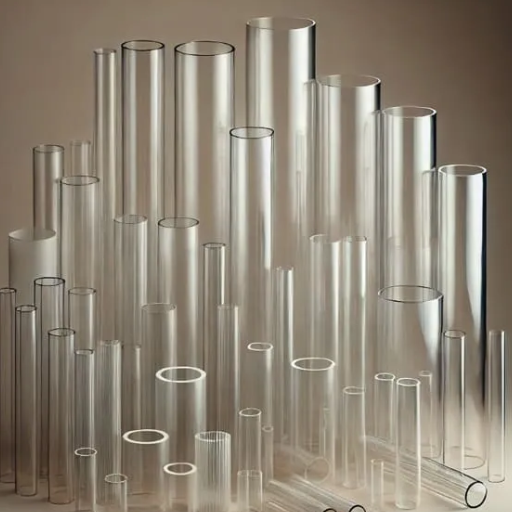
Types of Acrylic: Clear vs. Cast Acrylic
Clear and cast acrylic are the two primary types, each with distinct qualities and uses.
Understanding Acrylic Sheets for Laser Engraving
Considering the qualities of clear and cast acrylic is crucial when choosing acrylic sheets for laser engraving. Cast acrylic tends to be more favorable due to its rigid surface, which allows for very fine engraving details and improved clarity. Clear acrylic is cheaper but it is limited in the type of engraving it can do and would be suitable for fundamental projects. Cast acrylic, therefore, is the right choice when premium results and durability are desired.
Choosing the Right Acrylic Sheet
Select an acrylic sheet that meets the requirements of your project. In detailed and precise engravings, cast acrylic is preferred due to its clarity and high engraving quality. If the design is simpler and cost is a significant consideration, the less expensive sheet would suffice. Always select the type of acrylic that matches the level of detail and durability required by your project.
Best Acrylic Options for Laser Engraving
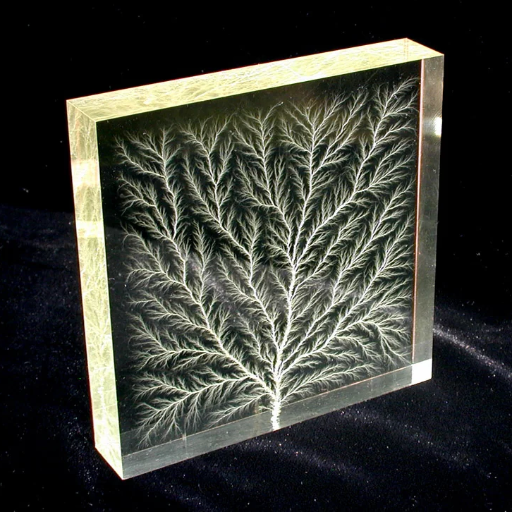
Laser engraving on cast acrylic is considered by many to be the best option, because the superior quality allows for versatility. Cast acrylic sheets are frosted during engraving while still providing that high-contrast finish. They’re ideal for complex designs, personalized items, and signage. They are also available in a wide range of colors and thicknesses, providing more options for customization and creative thought.
Being cheap is a factor making extruded acrylic less popular for laser engraving; it also does not create clean marks but instead clear and less noticeable marks. Nevertheless, it could still be considered by those whose primary concern is not the engraving finesse. To ensure your projects consistently receive high-quality results, look for specific brands or manufacturers.
Preparing Acrylic for Laser Cutting and Engraving
⚠️ Important Preparation Steps
A proper preparation of the acrylic ensures truly professional results with laser cutting or engraving. First, choose the right type of acrylic: cast acrylic is usually preferable for engraving, whereas extruded acrylic is an economical alternative for simple cut jobs. Always keep in mind never to use a sheet marred with scratches or with an imperfect surface, for they pave the way for bad cuts or bad engravings.
A surface cleaning with a soft lint-free cloth, using a mild cleanser, is necessary to get dust, small foreign particles, dirt, stains, or fingerprints off. If you have a large sheet, you should clamp or tape it to the cutting bed to ensure stability and prevent it from shifting during the laser process. The laser setting should be adjusted according to the material thickness: use slower speeds and greater power for thicker cuts, and lighter speeds for precise engraving. Always work with leftover pieces for performing test cuts or engraving, as it refines your settings and saves your project from being ruined.
Laser Engraving Techniques and Tips
- 💨 Use Adequate Ventilation: This should be provided in a working area to evacuate fumes and particles created during engraving. Safety and cleaner engraving are the reward of such a set-up.
- 🎯 Properly Focus Your Laser: Make sure the laser is properly focused; improper focus may cause bad burns or an uneven job.
- 🔧 Select Suitable Material: Different materials behave differently in laser engraving. Always use materials formulated and tested for laser processing.
- ✨ Clean the Surface of Material: Wipe the surface of the material to be clear of any dust or oil. Any contamination will result in uneven engraving or staining of the laser.
- 🎨 Layer for Effects: And for dynamic effects combine both engraving and cutting methods to give your projects depth and dimension!
How to Laser Engrave Acrylic: A Step-by-Step Guide
Choose the Proper Acrylic
Cast acrylic should be used for engraving, as it produces a frosted appearance, while extruded acrylic is better suited for cutting, yielding cleaner edge finishes.
Prepare Your Design
Either create or upload your design to a graphic design software compatible with your engraving laser. Make sure the file format it uses is supported and optimized for engraving.
Adjust the Laser Settings
The laser power, speed, and resolution should be adjusted according to the type and thickness of the acrylic. Check with the manufacturer for the best values.
Hold the Acrylic Firmly
Place the acrylic sheet on the laser bed and clamp it so it does not move during engraving.
Focus the Laser
Keeping the laser focused is essential for fine engraving work. You can set the focus using the focusing tool that comes along with your machine.
Test-Run the Engraving
Try engraving a scrap piece of acrylic to verify that the settings and results match those expected.
Observe the Operation
Watch the engraving without interruption to ensure it is happening correctly and adjust the parameters if they seem to be causing too much heat or affectionate damages on the material.
Clean the Acrylic
After the engraving procedure, thoroughly clean the engraved acrylic with a soft cloth or soapy water to remove any deposits or debris.
Poly Edges (Optional)
If you choose to, you can polish the acrylic edges with a tool or flame to achieve smooth, glossy edges for a final touch.
Common Settings for Laser Engraving on Acrylic
⚡Power
Set the laser power to a level that is high enough to engrave the acrylic without melting it excessively. Usually, the settings fall between 30 and 70%, depending on the thickness of the material.
🏃Speed
Set the engraving speed according to the amount of time allocated for engraving to achieve fine details. The higher the speed, the faster it is, but only for less intricate designs.
📡Frequency
Set the frequency within a suitable range for acrylic, such as 500-5000 Hz, to achieve the desired pulsing effect of the laser and obtain clean, unambiguous engraving results.
🎯Focus
Keep the laser well focused at the acrylic surface. The focal distance must be adjusted to suit the lens specifications for conferring a crisp acrylic engraving.
📊Resolution (DPI)
Set the dots-per-inch (DPI) resolution between approximately 300 and 600 for an appropriate level of detail, depending on the design complexity.
Designing for Engraving: Tips for Best Results
- 🎨 Choose High-Contrast Designs:
For best visibility, designs should be selected with sharp contrasts-for instance, solid fills paired with clear outlines-so the details are visible after engraving. - ⚠️ Kind of Details to Avoid:
Anything which may get overstretched or areas with too fine details would be difficult to work with for the acrylic engraver. - 📐 Work With Vector Graphics:
Use vector files, such as .AI or .SVG, for optimum precision and scalability. Vector files provide superior engraving results compared to raster images. - 🔬 Test Engraving Setup:
When your design is final, do not submit it directly on an expensive acrylic piece without checking the engraving set-up on some scrap material. - 🔤 Discuss Size And Fonts:
Text size should be comfortable for immediate reading; they should rather be bold fonts.
Applications of Laser Engraved Acrylic
Signage and Display
Laser engraving on acrylic creates professional, hard-wearing signage for businesses, functions, or just decoration.
Awards and Trophies
Custom acrylic awards and trophies are popular due to their glitzy, high-end appearance.
Decorative Panels
Intricate designs and patterns or custom accents make for interior beautification with engraved acrylic panels.
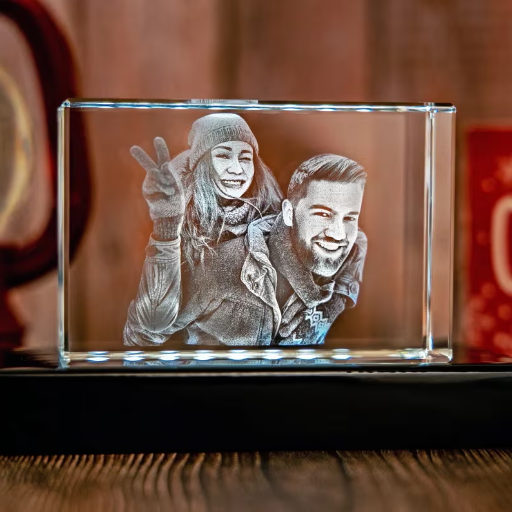
Gifts
Keychains, photo frames, and other items can be laser-engraved for a customized identity.
Industrial Use
Acrylic engravings in industrial setups are mostly control panels or labels and other functional components.
Creating Custom Acrylic Signs
Custom acrylic signs are manufactured through simple steps to make sure that the final product truly looks professionally made and is aesthetically pleasing:
- 1
Designing: From the start, lay out a design for the sign in graphics software; ensure that any text and/or logos are clear and well-positioned. - 2
Materials: Choose the appropriate thickness and color of the acrylic sheet, according to the result that you want and according to the use. - 3
Cutting and Shaping: Cutting must be carried out carefully to specification using laser cutters. - 4
Engraving or Printing: Abide by laser engraving or UV printing according to text or other decorative elements like patterns or images for clean and durable finish. - 5
Mounting: If needed, prepare holes for mounting, stand bases, or adhesive backing.
In having followed these steps, one can create their own suitable acrylic signs for businesses or events, or for home decoration.
Laser Engraved Acrylic Plates and Awards
Laser engraving of awards and plates on acrylic is ideal for the highest recognition due to its fine aesthetics and durability. The laser engraving process enables the creation of both precise and intricate designs, making it suitable for designs that incorporate text, logos, or complicated patterns. The qualities of being lightweight and strong give acrylic awards a touch of glass without being quite fragile. These awards are highly sought in business establishments, sporting events, and personal achievements.
Customization options are limited only by the designers’ imagination due to the use of state-of-the-art engraving machines. Companies can add branding and logos; thus, individuals are offered options for unique messages or creative art pieces. Acrylic being versatile and cheap is an excellent option for creating elegant and unforgettable awards.
Innovative Projects with Laser Cut Acrylic
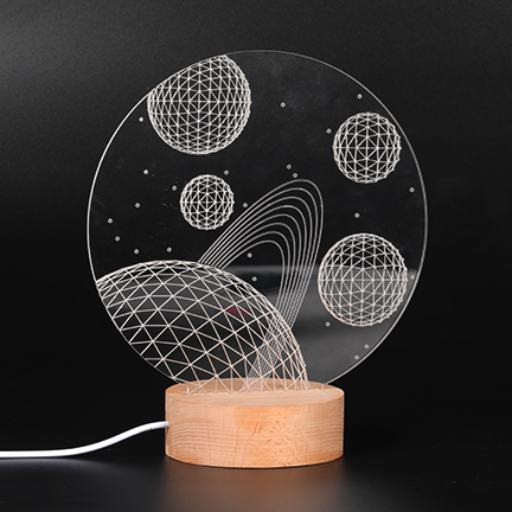
The possibilities for innovative projects with laser-cut acrylics are endless. Custom signs, inch-wall art, personalized keychain accessories, and home decor are creations borne out of the craft of laser cutting with which one can attain minute detail and customization in their designs. Acrylic is often used in creating modern lighting fixtures, where its ability to diffuse light elegantly enhances the space’s aesthetics. Moreover, designers who use laser-cut acrylic for prototyping purposes in architecture and product design tend to prefer it because of its durability and versatility. Whether for decorative or practical purposes, this is the medium with which designers can present these complex ideas with an extraordinary amount of clarity and style.
Maintaining Your Laser Engraver

🔧 Importance of Proper Maintenance
Proper maintenance of a laser engraver leads to a long life and consistent performance. The lens and mirrors should be cleaned regularly to prevent residue from affecting the engraving quality. Filters or exhaust components should be inspected for contamination. They should be replaced to allow adequate ventilation. The moving parts such as belts and rails should always be kept clean, lubricated, and free of debris as recommended by the manufacturer. Check the cooling system for efficient working to avoid overheating; also, do remember to adhere to the maintenance schedule that comes along in the user manual.
Routine Maintenance Tips for Laser Machines
- 🔍 Cleaning the Optics: The laser lens and mirrors should be inspected and cleaned regularly with the appropriate cleaning solution, otherwise, residues will build up and diminish the quality of engraving.
- 🌬️ Check and Replace Filters: Maintenance of the filtration system requires performance checks and replacement of air filters as necessary to ensure adequate ventilation.
- ⚙️ Lubricate Moving Parts: Lubricate your belts, rails, and other moving objects as per the manufacturer’s recommendations to assure smooth running of the system.
- ❄️ Inspect the Cooling System: Keep monitoring the cooling system regularly, checking fluid levels or any components to avoid overheating and any likely damages to the laser machine.
- 🔩 Tighten Loose Screws and Components: It’s advisable to occasionally examine and tighten all loose screws or fittings so that the machine can function accurately and safely.
Common Issues and Troubleshooting
❌ 1. Uneven/Weak Engraving
Cause: Laser lens/mirrors were dirty or misaligned.
Solution: Clean the lens and mirrors with a non-abrasive cleaning solution and check if all components are correctly aligned.
🔥 2. Burnt Edges on Acrylic
Cause: Power crank not correctly set, engraving speed too slow.
Solution: Set power and speed based on the material’s recommendations—that is, use low power or high speed to prevent burning.
✂️ 3. Laser Not Cutting Through Acrylic
Cause: Laser power is low, or laser focus is not correct.
Solution: Check the laser power level and restablish the focus for the thickness of the acrylic.
⚡ 4. Choppy or Jagged Cuts
Cause: Loose components or unstable material placement.
Solution: Tighten every screw and fitting; place acrylic sheets so that they can’t shift during operation.
🔥 5. Overheating
Cause: Cooling system not working or not proper ventilation.
Solution: Inspect the cooling system for leaks; check whether it operates properly; and ensure the area has sufficient air circulation.
By solving these common problems through regular maintenance and proper settings, your acrylic laser engraver will stay in good reliable working condition.
Upgrading Your Laser Engraving Setup
The laser engraving setup can be updated to improve performance further and thereby increase the number of projects one can complete. You should first consider purchasing a more powerful laser module for faster engraving and tougher materials. Newer and better cooling systems should follow, as overheating could compromise the durability of the equipment. Air-assist machinery will further guarantee fine cuts by minimizing smoke and dust generated during the cutting process. Last but rarely done with, software must be upgraded for advanced design features with enhanced precision for engravings that can be intricate yet professional-grade with ease.
Reference Sources
-
Acrylic Laser Engraving: All You Need to Know
This guide covers the acrylic laser engraving process, including the best types of acrylic and engravers. -
Tips and Tricks to Engrave Acrylic Like a Pro
A detailed tutorial on using cast acrylic for laser engraving, with tips for achieving professional results. -
How to Laser Cut Acrylic using xTool P2 White (YouTube)
A video demonstration of cutting and engraving acrylic with a CO2 laser. - Top Acrylic Sheet Manufacturers and Suppliers in China
- Guide for Laserschneiden Acryl
Frequently Asked Questions (FAQs)
🎯 Conclusion
Mastering laser engraving on acrylic opens up a world of creative and professional possibilities. With the right techniques, equipment settings, and material selection, you can create stunning projects that combine precision with aesthetic appeal. Whether you’re crafting custom signage, awards, or decorative pieces, the key to success lies in understanding your materials, maintaining your equipment, and continuously refining your technique through practice and experimentation.