
Laser cutting acrylic has revolutionized the approach to design, creativity, and manufacturing, offering fine precision and extreme versatility. One can say that manufacturers streamline their productions while hobbyists let their imaginations run wild-the art of laser-cutting acrylic simply opens the infinite door of possibilities. This guide is designed to be the ultimate reference tool for all things acrylic, ensuring that one never works with acrylic without achieving a flawless finish. We’ll explore the basics of acrylic laser cutting and some tips to increase precision. Most importantly, we’ll discuss some of the challenges faced through this process. By the time you’ve finished, you will likely be well-positioned to create those high-gloss, finished products that set your projects apart.
Understanding Acrylic and Its Applications

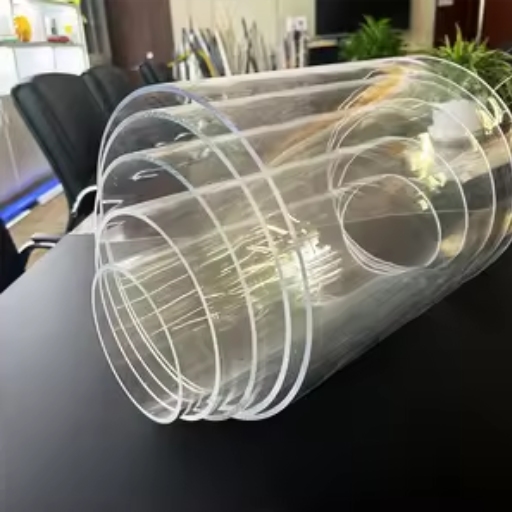
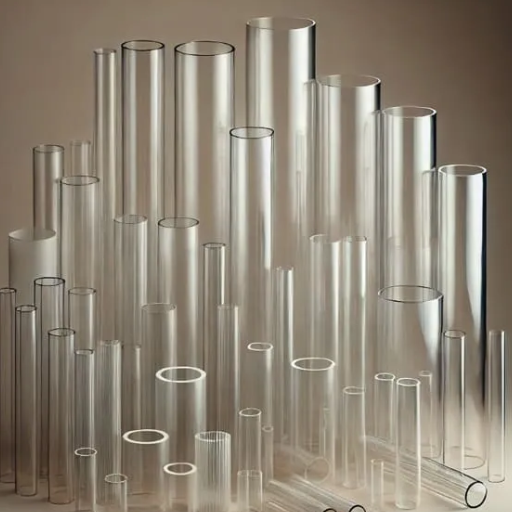
Acrylic, also known as plexiglass, is a versatile material widely used in various fields. It is known for being lightweight, colorless, and optical-grade, making it a substitute for glass in windows, displays, and barriers. Acrylic is available in various colors, finishes, and thicknesses, making it highly versatile for projects such as signage, decoration, and prototypes. It is easy to fabricate and is laser-cut compatible, which adds to its popularity and enables intricate designs, whether professional or amateur.
What is Acrylic?
Acrylic, also known as polymethyl methacrylate (PMMA), is a thermoplastic material with numerous applications, recognized for its strength, clarity, and weather resistance in the market. Usually regarded as a window pane alternative, it was invented in the 1920s and taught industries a lesson in using something behind-the-glass that is lightweight and shatter-resistant, unlike Rene Laikner’s 19th-century invention of glass. The relatively low cost of acrylics makes them reasonably economical to adapt to various shapes and moldings, as well as for cutting, bending, and other applications used in construction, automotive, or display manufacturing. Being resistant to UV rays, the acrylic also stays clear in the long run. Recent developments in acrylic production have enhanced its properties, facilitating futuristic applications such as 3D printing, medical devices, and sustainable packaging solutions. Together, these characteristic features make acrylic even more relevant as an industrial and creative medium today by offering strength, flexibility, and sustainability.
Advantages of Using Acrylic in Projects
- Lightweight and Durable: Acrylic is lighter than glass and offers excellent resistance to ensure sturdiness. Depending on a project’s characteristics, it may even be regarded as an option that requires robust yet easy-to-handle materials.
- UV and Weather Resistance: Resisting UV radiation and punishing weather conditions, the material remains precise and long-lasting even when subjected to outdoor applications.
- Versatile Applications: Acrylic allows for design ingenuity across various fields, as it can be readily molded, cut, and shaped.
- Eco-Friendly Options: Current versions of acrylic materials include recyclable and sustainable options that may help to create Green projects.
- Crystal Clarity: With its exceptional transparency and high light transmission, it can rival glass and is therefore utilized both functionally and aesthetically.
Common Applications of Cut Acrylic
Signage and Displays
Cut acrylic is used in general and aesthetic applications to create sturdy signs, displays, and point-of-sale fixtures.
Furniture and Home Décor
Acrylic tops the list in modern furniture pieces, tabletops, and decorative objects due to its smooth, low-maintenance surfaces.
Acrylic Glazing
Frequently used as a lightweight and impact-resistant glazing material for windows, protective barriers, and enclosures.
Lighting Fixtures
Due to its excellent transmission of light, acrylic is considered an ideal material for lamps, light panels, and other lighting components.
Aquariums and Terrariums
Acrylic is mainly employed in making leak-proof and transparent enclosures for aquatic and reptile habitats.
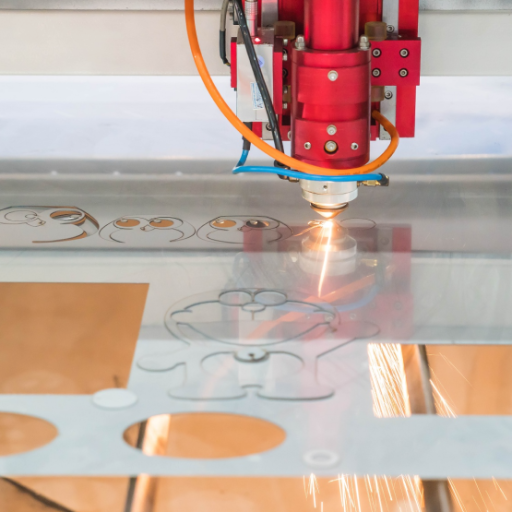
Laser Cutting Acrylic: The Basics

Important: Laser cutting Acrylics needs utmost precision and preparation. Choosing the correct type of acrylic is the first step. Cast acrylic provides precise cuts, whereas extruded acrylic tends to melt, making it unsuitable. Ensure the laser cutter is set correctly with the correct power and speed to prevent overly charred edges. Always use protection, ventilate well, and perform test cuts, which will aid in completing finer tasks.
How Laser Cutting Works
Laser cutting operates by directing the laser beam’s energy onto the surface of the material, melting, burning, or vaporizing it, allowing for accurate cutting. Inside the core of the technology, we have a laser source, a system of mirrors, and a lens to direct the laser. The laser is typically generated using CO2, fiber, or crystal technologies, depending on the materials and applications involved. Fiber lasers excel in cutting metals, whereas CO2 lasers are well-suited for cutting non-metallic materials, such as wood or acrylic.
When the high-temperature laser hits the surface of the material, it achieves unparalleled precision, even for complex shapes or thin materials. Assist gases are also used in the cutting process to help clear the debris, improve cutting speed, and reduce oxidation. Due to improved beam quality and automation systems, cutting at high speeds and with exceptionally high resolution has become a reality today.
📊 Industry Statistics:
In line with current data, laser cutting can achieve tolerances as narrow as ±0.1 mm, making it the preferred choice in the aerospace, automotive, and electronics industries. It has also been predicted that the global laser market will grow at a CAGR of 9.2% from 2023 to 2030 (source: Google Search, October 2023). The widespread adoption of laser cutting reflects the numerous attributes of laser cutting, including cost efficiency, versatility, and precision, in both high-volume manufacturing and small, customized jobs.
Types of Acrylic Suitable for Laser Cutting
Advantages of Laser Cut Acrylic
🎯 High Precision and Accuracy
Delivers highly precise and intricate designs with clean edges for detailed projects
✨ Smooth Edges
Natural flame-polished edges require no additional finishing
🎨 Versatility in Design
Can be tailored to almost any shape, pattern, or thickness
💰 Material Savings
Exact cutting ensures optimal material utilization
⚡ Swift and Energy Efficient
Fast and reliable method suitable for various production scales
Technical Considerations for Laser Cutting Acrylic

⚠️ Critical Factors to Consider
Material Thickness
The thickness of the acrylic influences the speed and power of the cutting that will be used. Lower power is sufficient for thin sheets, whereas thick acrylic may require the application of considerable power and slower cutting to cut cleanly.
Type of Acrylic
Laser cutting reacts in just the opposite way to cast and extruded acrylic. Cast acrylic is preferred for engraving, with extruded acrylic giving smoother cuts. Hence, a proper choice of type is essential.
Ventilation and Safety
Proper exhaust of fumes must be ensured while working. If your workspace is not sufficiently ventilated, the fumes could be dangerous. Ensure that you follow the safety guidelines to protect yourself from inhaling these fumes.
Edge Quality
Laser program settings for speed and power applications will immediately dictate the smoothness or coarseness of the edge finish. A balance of power with slow speed, however, will give a highly polished and smooth edge.
Focus and Calibration
Precisely focused lasers give precision cuts. Always remember to calibrate your laser and check the settings before starting with your project to ensure maximum accuracy.
Choosing the Right Laser Cutter
When purchasing a laser cutter for acrylic projects, several key attributes must be considered for optimal results and performance. First, the laser cutter must have sufficient power. A laser, preferably a CO2 laser, with 40 watts of radiation, would suffice to cut and engrave acrylic. The higher the power, the faster the cuts, and the thicker the acrylic sheets. Second, make sure the laser allows for fine-tuning of speeds and varying power settings. This is very important in achieving smooth, polished edges.
Other things to consider include the bed size. This is the amount of material the project can accommodate. For cutting acrylic sheets, a honeycomb bed is preferred. Cooling systems aid greatly, since heat management prevents distortion or even damage to the material. Also, opt for a machine that has a user-friendly interface and consistently receives good reviews for its performance. It will help smooth the learning curve and mutually enhance your experience.
Laser Settings for Optimal Results
When laser cutting acrylic, having the proper settings set up is necessary for neat and precise results. Begin by adjusting the laser power to about 60-70% for most standard acrylics, with thicker ones maybe requiring a higher setting. Speed should usually be set somewhere around 10-20%, depending on the material thickness. Use a focal point set right at the acrylic surface for the best cut. Ensure the air assist is on to avert heat build-up on the edge, which may lead to burning. Always perform a test cut on some scrap acrylic to adjust the settings to your specific laser cutter and material.
Cutting Speed and Power Settings
For venting purposes and to avoid the risk of charring and edge burns, the air-assist feature must be switched on while cutting. Another set of parameters to adjust is the focal point. Typically, it is adjusted to focus on the upper surface of the acrylic for maximum energy transfer. One should adopt test cutting on scraps of acrylic to determine the optimal parameters for their machine and material. This fine adjustment allows for smooth, precise cutting with minimal imperfections, while preserving the clarity of the acrylic.
Step-by-Step Guide to Laser Cutting Acrylic
🔄 Complete Process Workflow
- 1
Choose the Right Acrylic
Depending on the finish and application you desire, you may opt for cast or extruded acrylic. Generally, cast acrylic offers a cleaner edge after cutting.
- 2
Prepare the Design File
Use vector software to create or import the design of your choice. Ensure your design is in the correct scale and that lines meant for cutting are set with the appropriate stroke thickness.
- 3
Set up the Laser Machine
Place the acrylic sheet on the working bed of the laser machine, ensuring it is clean and free from dust. Dust may interfere with the cutting operation. Secure the material to avoid any movement.
- 4
Set Cutting Parameter
Set laser speed, power, and frequency according to the acrylic’s thickness and type or conduct test trials for the best settings.
- 5
Focus the Laser Beam
Ensure the focal point of the laser is on the surface of the acrylic sheet by using a focusing tool or manually adjusting.
- 6
Make a Test Cut
Make a small cut on a scrap piece of acrylic to check if your settings provide clean cuts without melting or charring. Adjust parameters if needed.
- 7
Start the Cutting Process
Send the design file to the laser cutter and start cutting. Keep an eye on the cut to ensure the machine is working correctly and that the material isn’t shifting.
- 8
Inspect the Cut
After successful cutting, remove the acrylic from the machine for inspection of the edges to ensure smoothness and accuracy. If changes are needed, adjust the settings accordingly.
- 9
Clean and Finish the Acrylic
Remove the acrylic’s protective film and clean it with a soft, lint-free cloth. If necessary, finish polishing with the edging tool.
- ✓
Test the Final Product
An acrylic piece in cut conditions has a function that should be tested for finish and specs.
💡 Pro Tip: Use this method, and you’ll have laser-cut acrylic expertise with precise and professional results.
Preparing Your Design for Laser Cutting
First, I verify that the design file is in a compatible vector format, such as SVG or DXF, which enables the laser to follow accurate paths. Then, I double-check that the dimensions fit within the material size and ensure that everything that should be cut is outlined correctly in the file, with lines distinct from engraving lines. I try to use the layout efficiently to avoid wasting material and include a kerf allowance—i.e., the thin strip of material that is lost during a cut.
Setting Up the Laser Cutter
To prepare for laser cutting acrylic, it is essential to adjust the laser cutter’s settings to achieve optimum performance and ensure a clean, precise cut. Begin with power and speed settings, which should be determined based on the thickness of the acrylic material. For instance, thicker acrylic generally requires higher power at slower speeds, while thinner materials usually require lower power and higher speeds. It is highly relevant to set the laser focus, with the laser beam focusing on the acrylic surface, to cut the acrylic with good consistency. It is also beneficial to have an air assist to reduce heat buildup, which enhances cut quality and reduces the risk of flame ignition. Additionally, it is essential to have your work area well ventilated, as fumes are emitted from acrylic when it is dissolved; these fumes pose health hazards. After testing the machine’s settings, perform a brief test cut on a scrap piece to verify accuracy before proceeding with the entire design.
Executing the Cut: A Step-by-Step Process
- Prepare Your Material: The acrylic sheet is securely fastened to the cutting bed, ensuring it lies flat to prevent movement or misalignment during the cut.
- Set the Focus: Adjust the laser focus according to the thickness of the acrylic sheet to achieve utmost precision while ensuring clean edges.
- Adjust the Settings: Adjust your machine to the power, speed, and frequency suitable for your kind and thickness of acrylic. Follow the manufacturer’s guidelines for best results.
- Activate Air Assist: If available, the Air Assist function reduces heat buildup along the cutting path, thereby improving cut quality and reducing the risk of flaming.
- Check Ventilation: Ensure the ventilation system is online to extract fumes and gases during the cutting process safely.
- Make a Test Cut: Use a little scrap piece for a test cut to check that the settings are correct and meet your expectations.
- Inspect the Test Result: Inspect the test cut for clean edges and the appropriate depth. Make adjustments to the settings if necessary before continuing with the main project.
- Start the Final Cut: Load your design file into the laser cutter software, and position it correctly on the material before starting the cutting process.
- Supervise the Cutting: Monitor the cutting process closely to address any issues or make necessary adjustments, ensuring safety at all times.
- Reveal and Clean: Once the laser cutting is finished, carefully remove the acrylic and clean any residue or dust, unveiling the finished product.
Engraving Techniques for Laser Cut Acrylic
Acrylic engraving involves adjusting the power and speed settings of a laser to mark the surface without going through the material. Designs can then be used in either vector or raster formats, depending on the level of intricacy required for the engraving. Raster engraving is well-suited for shading and intricate patterns, while vector engraving is ideal for thin lines that require higher precision. Always conduct a test run on a scrap piece to set the power, speed, and frequency for optimal results, as these parameters vary depending on the thickness and type of acrylic.
Difference Between Cutting and Engraving Acrylic
Cutting acrylic involves severing the material into separate pieces, while engraving modifies the surface without fully penetrating it.
Best Practices for Laser Engraving on Acrylic
Several factors must be considered when engraving acrylic to attain precision and professionalism. First of all, always use cast acrylic for engraving, as it offers that frosted, fine finish, while extruded acrylic tends to melt and cause undefined lines. Secondly, the acrylic must be clean and free of debris so that nothing interferes with the laser processing.
Setting the correct laser parameters is therefore crucial. For engraving, use a comparatively lower power and a high speed to avoid overheating, which can cause deterioration or distortion. Test your engraving on a scrap piece of acrylic to make the necessary adjustments for your specific machine and material.
Always pay attention to focus accuracy as well! Focus the laser beam on the acrylic surface to produce sharp and detailed results. Ventilate the workspace thoroughly to remove fumes and prevent residue buildup on the surface. These good engraving practices will assure clean, precise, and aesthetically pleasing engravings on acrylic.
Creating Stunning Acrylic Signs with Laser Engraving
Creating acrylic signs through laser engraving requires me to design artwork that is clear and detailed, select the appropriate laser parameters, and obtain high-quality acrylic. Ensuring that the equipment is maintained well and that ventilation is given utmost importance for a clean finish is paramount. With thorough attention to detail and precision, I deliver professional and outstanding results.
Frequently Asked Questions (FAQs)
❓ What are laser cutting and engraving on acrylic?
Laser cutting and engraving acrylic means using laser-cutting machines to cut and engrave different types of acrylic material with extreme precision. This process utilizes laser technology to produce wonderful edges with intricate details, making it ideal for acrylic projects, such as decorative items and signs.
⚡ What factors affect choosing a laser that cuts thick acrylic?
The first thing to consider is the power intensity of the laser in question while cutting thick acrylic. The stronger it is, the better, so a high-power diode laser, such as a 40-watt diode laser, a 60-watt laser, or even a 100-watt laser, can generate the intensity to cut through thick acrylic. Laser settings, such as speed and power, need to be adjusted accordingly.
🔍 What types of acrylics are fit for laser applications?
The two main categories typically used in laser applications are cast acrylics and extruded acrylics. Cast acrylics have better optical clarity, although they may be prone to melting. In contrast, extruded acrylics are easier to cut and engrave, but do not produce a smooth finish.
✨ How to get cleaner cuts while laser cutting acrylic?
Clean cuts in laser cutting acrylic ensure that the laser settings, specifically wattage and speed, are kept very close to or at the optimum. A high-power laser, clean material, and correct focus will help reduce burn marks and ensure that the edges are clean, without leaving melting marks or blemishes.
🎨 What are considerations for engraving on laser-cut acrylic?
Depending on the region, engraving on laser-cut acrylic is dependent on the thickness of the acrylic and the laser’s wattage. For finer engraving on thin acrylic, a 5-w or 10-w laser may be suitable, whereas a higher-power laser is preferred for deeper engraving on thicker materials. The speed of engraving can be adjusted to achieve the desired finish.
🧽 What post-processing can be required for laser-cut acrylic?
Post-processing may include cleaning the edges of laser-cut acrylic with a microfiber cloth to remove any residue or burr left from the cutting process. Sanding and polishing may be required if there are imperfections on the decorative pieces.
📚 Reference Sources
-
Laser Cutting Acrylic: the Ultimate Guide – Covers how laser cutting acrylic works, the types of laser cutters, and suitable acrylic materials.
-
Acrylic Laser Cutting – Complete Guide 2025 – Provides insights into mastering acrylic laser cutting with the right machines, settings, and techniques.
-
Expert Guide to Laser Cutting Acrylic: Techniques, Best Practices – Offers expert advice on techniques, best practices, and recommended machines.
-
Laser Cutting Acrylic: The Complete Guide – Discusses the safety, efficiency, and precision of laser cutting acrylic for creating various designs and shapes.
-
A Complete Guide to Laser Cutting & Engraving – Explores the benefits, applications, and processes of laser cutting and engraving acrylic.