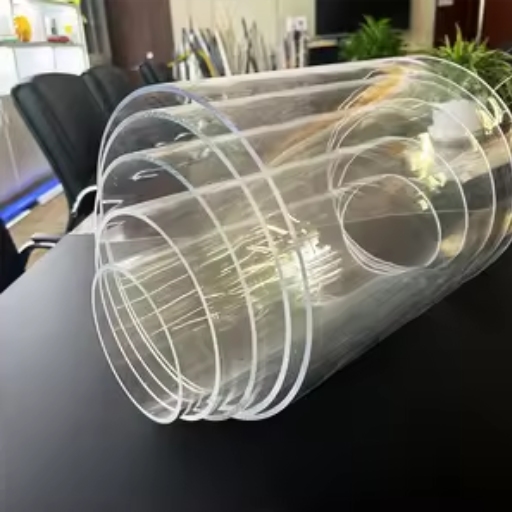

Plexiglass cutting into a circular shape with precise measurements may be a difficult task, especially if you are not accustomed to working with the material that has versatile yet fragile characteristics. Regardless of whether your project is a DIY one, a custom-made design, or home decor improvement, safe and accurate plexiglass cutting skill is a must. The present guide is to lead you through the process in a systematic manner, giving tips, tools, and techniques that will make the job easier and more precise. By the time you finish reading the article, you will have acquired the confidence to cut even the most complicated shapes and, thus, create a perfect circle out of a flat piece of plexiglass. What a journey it will be and we shall unfold everything that is required to know along with the techniques that suit perfectly for both learners and expert DIYers!
Understanding Plexiglass and Acrylic
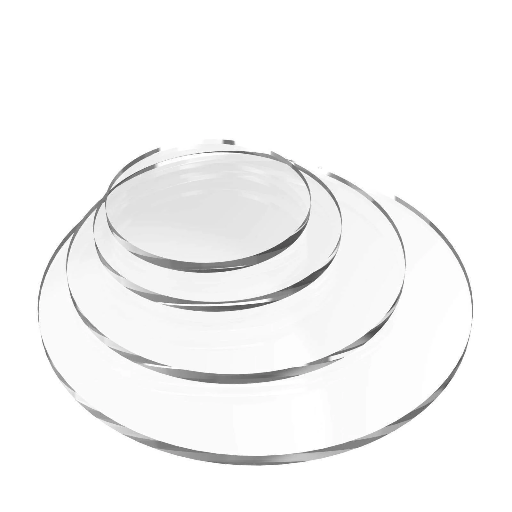
Plexiglass and acrylic are terms often used interchangeably to refer to a single type of light, transparent plastic material. Both terms refer to the same product, which is polymethyl methacrylate (PMMA), a strong and multiple-properties-bearing glass alternative material. Amongst the terms being used, Plexiglass is the correct term for one of the manufacturers, while acrylic is the one commonly used for the whole industry. Currently, acrylic due to its transparency and tough-wearing properties, is very well acquired for windows, displays, and DIY projects. It is of low weight, convenient to cut, and comes in a range of thicknesses and finishes, which makes it the material of choice in many situations whether they are professional or personal ones.
Importance of Cutting Plexiglass Accurately
Accurate cutting of plexiglass is indispensable in ensuring that projects meet the required level of functionality, aesthetics, and most importantly, safety. The expectation is that precise cutting will reduce the risk of forming cracks or splinters, thus compromising the final product’s integrity. Accurate cutting also allows the fitting in such applications as windows, frames, or safety barriers to be seamless thus creating a professional and polished look. Besides, incorrect cuts can result in wasted materials and increased costs, especially when dealing with custom-sized or expensive sheets. Clean and precise lines are achieved through the use of the right tools and techniques, such as scoring knives or laser cutters, resulting in better project outcomes and long-lasting durability.
Difference Between Plexiglass and Acrylic
Plexiglass and acrylic are essentially the same material, both made of polymethyl methacrylate (PMMA), but differ in manufacturing processes, brand names, and some specific properties.
Key Points
| Key Points | Acrylic | Plexiglass |
|---|---|---|
| Material | Polymethyl methacrylate (PMMA) | Polymethyl methacrylate (PMMA) |
| Clarity | High clarity | High clarity |
| Strength | Strong | Slightly stronger |
| Surface | Scratch-prone | Scratch resistant |
| Price | Slightly cheaper | Slightly expensive |
| Flexibility | More flexible | Less flexible |
| Brand | Generic | Trademarked |
| Cutting | Easy to cut | May chip when cutting |
| Use | Wide range | Specialty applications |
| Durability | Durable | Highly durable |
This concise comparison highlights the subtle differences that users need to consider when choosing between acrylic and plexiglass for various applications.
Common Uses of Plexiglass
- Windows and Glazing: Plexiglass has the advantage of being a light, shatter-resistant substitute to glass that can be used in the manufacture of windows, skylights, and doors.
- Aquariums and Tanks: Its light purity and toughness make it ideal for producing aquariums, terrariums, and other water-based enclosures.
- Signage: The great light transmission and weather resistance features of Plexiglass have made it a popular choice for illuminated signs, displays, and advertising boards.
- Furniture and Decor: The transparency of Plexiglass, along with its sleek and polished look, encourages designers to use it in modern furniture, tabletops, and interior design elements.
- Protective Barriers: Its strength and clarity make it suitable for manufacturing sneeze guards, protective shields, and barriers in offices, retail spaces, and public places.
Preparing to Cut Plexiglass
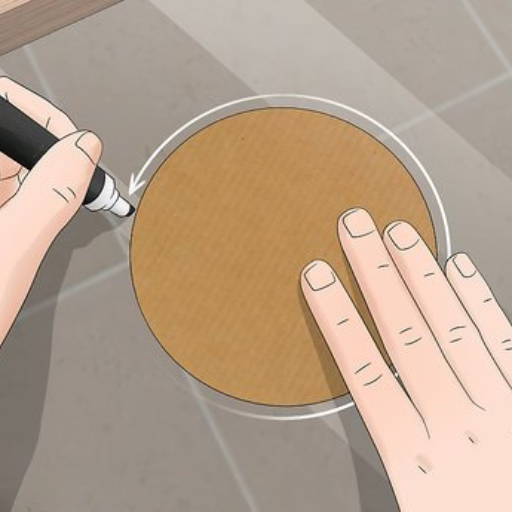
To start the cutting process of plexiglass, one must first ensure that the necessary equipment is available, specifically a scoring knife for thin sheets or a jigsaw or circular saw equipped with the correct blade for thicker ones. It is vital to hold the plexiglass in a secured position such that it won’t shift, and then, using a ruler, draw your cutting line for accuracy. Do not forget to use safety goggles and stay in a well-ventilated area to avoid breathing in the dust from cutting.
Selecting the Right Thickness and Type
Selecting plexiglass with different thicknesses and types depends mainly on the purpose of the project. So, for little projects or decorative applications, thin sheets (about 1/8 inch) will do just fine. For structural and other projects requiring durability, thick sheets (1/4 inch or more) will work well. Also, consider clear, tinted, or frosted plexiglass depending on your artistic and practical needs. If the material is to be in sunlight for a long time, make it UV-resistant. As a rule of thumb, always let the specific task determine the type of plexiglass for the best result.
Measuring the Diameter Circle Accurately
To obtain the circle’s diameter with high accuracy, the first step is to locate the circle’s widest area. Then, with the use of a straightedge or measuring tape, place it across the circle’s center, making sure it goes through the center point. The important part is to measure directly from one side of the circle to the other side. To be more precise, it is advisable to use a measuring tool that has a calibration and take several measurements to ensure the exact value is obtained. If the circle edges are unclear or irregular, it is better to outline paper for more straightforward calculation. It is very crucial to be accurate while measuring as this is especially needed in projects that require exact dimensions or parts that need to be fitted together.
Gathering Essential Tools and Safety Gear
The correct tools and protective gear are essential for cutting plexiglass efficiently and safely. A fine-tooth saw or a utility knife made specifically for acrylic is the primary tool needed, together with a straightedge or ruler to ensure accurate measurements and clamps to hold the plexiglass in place while cutting. A file or sandpaper is also handy for smoothing the edges after cutting. On the safety front, it is a good practice to wear protective goggles to shield against shards or debris, gloves to prevent cuts, and a dust mask if the operation produces fine particles. If you have these tools and safety equipment, they will not only enhance the quality of your cuts but will also significantly lower the risk of injury.
Techniques for Cutting a Circle in Acrylic
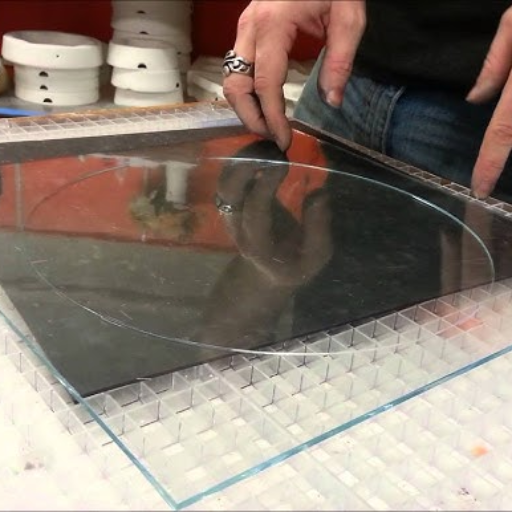
A power drill with a hole saw attachment is one of the most effective methods to cut a circle out of acrylic. First, it is essential to secure the acrylic sheet very well to ensure there is no movement during the cutting process. Then, the center of the circle should be marked on the acrylic, and the drill should be fitted with a hole saw of the corresponding size. Finally, the marked path should be cut very carefully. If you need to make a circle with a diameter larger than usual, a router with a circle-cutting jig will help you achieve very accurate and smooth results. Always remember to take your time while working with the acrylic to prevent it from cracking and to get a clean cut.
Using a Jigsaw for Curved Cuts
Cutting curved shapes in acrylic with a jigsaw is an effective method. The first step is to outline the desired curve on the acrylic sheet using a marker or a template. Then, clamp the sheet tightly on a table so it won’t move while you are cutting. To reduce chipping or cracking, use a blade with fine teeth and meant explicitly for plastics. Move the jigsaw slowly and steadily along the line you marked, applying the same pressure all the time. If you want to have smoother lines, take short breaks now and then to straighten your angle and do little corrections if necessary. It’s a must to have safety goggles on and to work with the tool at a speed that is not too fast so that you can control and make precise cuts.
Employing a Router for Precision Edges
Accurate and smooth edges are the results of using a router. Firstly, clamp the material tightly to a stable workbench to avoid movement. Choose the right router bit for your edge profile, making sure it is sharp and in good condition. Set the router depth to cut the material, and do a test cut on a scrap piece before proceeding with the project. Move the router along the edge in a smooth, consistent motion, applying just enough pressure to avoid tearing or uneven cuts. For safety, always wear safety goggles and ear protection when using the tool.
Utilizing a Hole Saw for Perfectly Round Cuts
When you are dealing with acrylic, a clean and round cut can only be achieved through proper preparation and use of the right tools. A hole saw is one of the best cutting tools for this purpose. Secure the acrylic sheet on the workbench using clamps; this will keep it still while you cut. Now, locate the center of the intended circle with a marker, and drill with a small bit to make a pilot hole. Get a hole saw of the right size for your drill and make sure it is sharp and compatible for acrylic.
Keep the drill on a moderate speed to prevent the acrylic from overheating. This overheating may lead to melting or cracking of the material. Use light and steady pressure, and if necessary, take breaks to let both the material and the tool cool down. After completing the cutting process, edges can be smoothed with sandpaper or a deburring tool to achieve a high-gloss finish. To avoid injuries from sharp edges and acrylic splinters, always wear protective gear, i.e. goggles and gloves.
Step-by-Step Process for Cutting a Clean Circle
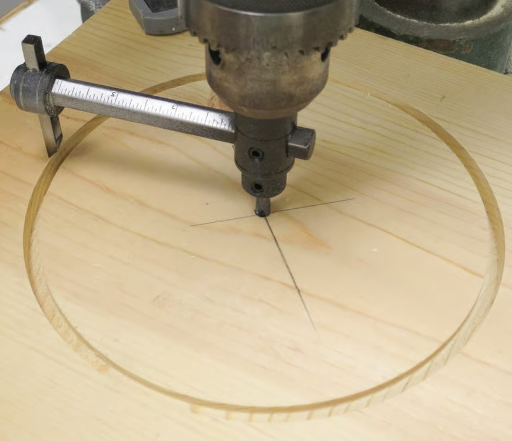
- 1
Select the Right Tools: Choose a circle cutter, hole saw, or drill with a compatible acrylic material hole saw attachment for each. Keep your tools sharp and in good condition. - 2
Draw the Circle: A Marker or a grease pencil can be used to mark the size and position of the circle that you intend to cut on the acrylic sheet. - 3
Acrylic Sheet is secured: The acrylic sheet should be placed on a stable, flat surface and held tightly in place with clamps. This will eliminate any movement during the cutting operation. - 4
Pilot Hole (if necessary) is drilled: For the larger circles drill a small pilot hole at the center of the marked circle to guide your cutting tool. - 5
The Circle Cutting: Start cutting at a moderate speed with the selected tool. Apply gentle, consistent pressure to prevent the acrylic from cracking or overheating. - 6
Make Breaks to Cool Down: If the acrylic gets too hot, stop and let it cool down to avoid warping or melting. - 7
Edging to be Smoother: After cutting the circle, use abrasive paper or a deburring tool to smooth out any rough or sharp edges for a clean finish. - 8
Clean the Work Area: Clear the surface of all acrylic shavings and debris to maintain safety and organization. - 9
Safety Gear to be Worn: During the entire process, it is essential to wear proper safety gear, such as goggles and gloves, to protect yourself from sharp edges and debris.
Marking the Circle on Plexiglass
For precise marking of a circle on plexiglass, initially take the measurements and find the center of the area that you plan to work on. After that, either use a compass or a round object that is of the exact size to draw the circle outline. Make sure to use a very light and non-permanent marker or a grease pencil that can be removed easily afterwards. If you want even more accuracy, confirm the measurements and the markings again before moving on to the cutting part.
Setting Up Your Multi-Tool or Jigsaw
The first step in cutting plexiglass with a multi-tool or jigsaw is to prepare and check the equipment by fitting a cutting blade designed for acrylic or plastic materials. The next step is to ensure the blade is well fitted onto the tool according to the manufacturer’s instructions. To prevent the plexiglass from cracking or melting due to excessive heat, switch the tool to a low or medium speed. Before cutting, a strong clamp is used to hold the plexiglass firmly onto the work surface so it does not move during the cutting process. Besides, make sure to wear goggles and gloves always to keep yourself safe from the debris and have clean hands for an accurate cut.
Executing the Cut Safely and Effectively
You should start the cutting process only after your workstation is organized, and all necessary materials are available. The cutting should be performed with a careful and regular motion. The first step is to move the equipment along the line you made beforehand. Avoid pressing down too hard, as this may lead to cracks and rough edges. Please allow the equipment to do its job, and ensure the blade stands straight up and down on the surface, so the cut is sharp and accurate. If the material gets too hot, just stop for a minute to cool it off and keep the edges nice and clean. When you are done cutting, the next step is to use sandpaper with a wonderful grit to smooth out the roughness, making it safer and nicer. Always check your cut before proceeding with the following steps to ensure it meets your requirements.
Finishing Touches After Cutting
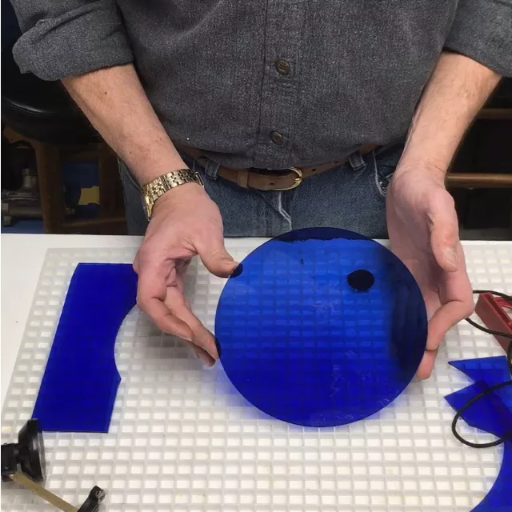
Once you are done with the cut, thoroughly clean the surface to get rid of any dust or debris. If needed, a protective coating or polish may be applied to the material’s durability and appearance. Smooth the edges and then check for accuracy to ensure the cut fits your project specifications. Good finishing will improve the functionality and the beauty of the product at the same time.
Deburring the Edges for a Smooth Finish
Plexiglass cutting has to be followed by deburring of the edges which is a crucial step for the application of a smooth and professional finish. First, take fine-grit sandpaper, usually 180 to 320 grit and sand in a consistent motion along the edges very gently. A deburring tool or file can be used for more precision and to remove rough or uneven areas effectively. Keep the motion steady and do not press hard as this could cause chipping. After the edges have been smoothed out, gently wipe them with a soft cloth to remove any residue. This not only improves the look but also reduces the chances of cuts or injuries while working with plexiglass. When deburring is done appropriately, it provides a safe and polished finish suitable for any project.
Cleaning the Cut Plexiglass
I start the process of cleaning the cut plexiglass with a soft, moist cloth to remove any dirt or small debris left after cutting. In case there are any hard residues, I take a little soap mixed with water and gently clean the surface, avoiding scratching it. I make it a point never to use abrasive cleaners or rough materials since they would surely ruin the plexiglass. After cleaning, I rinse the surface with clear water and dry it with a lint-free cloth for a polished finish.
Options for Sealing or Framing the Cut Piece
To get the cut plexiglass with a clean and professional-looking finish, there are different ways of sealing or framing it:
- Edge Sealing: Using a clear acrylic edge sealant is intended to keep the edges free from moisture, dust, or dirt. The procedure is mandatory if the piece will be outdoors during harsh weather or in hot and wet conditions.
- Using a Frame: Plexiglass can be neatly placed into a frame that is either pre-made or custom-made. Frames made from wood, metal, or plastic have the advantage of supporting the structure while also improving the aesthetic value of the piece.
- Polishing the Edges: The application of the high-grading technique will, of course, result in a smooth and polished look. This means the edges must be fine-grit sandpapered and then finished with a polishing agent. This practice gets rid of the roughness and encourages a gloss finish.
The best option, based on the purpose and appearance of your plexiglass piece, should be selected to ensure the best results.
Reference Sources
- Caltech – Working with Acrylic: This document provides detailed instructions on working with acrylic, including cutting circular blanks using tools like a band saw. Read more here.
- University of Wisconsin-Stevens Point – How to Make a Viewscope: This guide discusses the challenges of cutting plexiglass in a circle and offers practical advice. Read more here.
- USDA Forest Service – Guide for Fabricating and Installing Shallow Ground Water Monitoring Wells: While not specifically focused on cutting circles, this guide includes relevant information on working with plexiglass materials. Read more here.
- Top Acrylic Sheet Manufacturers and Suppliers in China
- Guide for Laserschneiden Acryl
Frequently Asked Questions (FAQs)
What is the best method for making a circular cut in plexiglass?
The circular cut in plexiglass is best performed with either a CNC router or a jigsaw fitted with a blade having fine teeth. The outcome will be similar with both machines that will make clean cuts. If the plexiglass piece is large, using a bandsaw is also an option. Always take it slow while cutting to avoid distortion and achieve a clean edge.
Is it possible to use a table saw for circle cuts in plexiglass?
The primary purpose of a table saw has always been straight cuts; however, if you own a circular cutter jig, you can modify it for circle cuts. Nevertheless, this technique will require careful setup to be really precise. You can also consider the jigsaw and CNC router that are the best tools for those kinds of cuts.
How do I prepare plexiglass before cutting?
To get plexiglass cutting-ready, start by clearing the surface and making it dust-free and debris-free. After that, masking tape should be applied on both the top and bottom sides of the area where you will cut. By doing this, you will minimize chipping and get a smoother edge. Now, using a scribe or a marker, mark the cutting line with high precision.
What blade is better for cutting plexiglass?
Carbide-tipped or fine-tooth blades, recommended explicitly by IT, are for cutting plastic and plexiglass. These blades will help reduce vibrations and provide a smoother surface as a result. In case of using a jigsaw, check the blade’s suitability for cutting thin acrylic sheets.
Can I cut plexiglass with only hand tools?
Not only that, but you can also cut plexiglass with hand tools like a utility knife or jigsaw, but cutting with a scoring and snapping technique for straight cuts with a utility knife might work. Jigsaw or handheld routers are more appropriate for circle cuts. Slowing down is essential when cutting to prevent crack formation.
What are the benefits of using a CNC milling machine for cutting plexiglass?
When a CNC milling machine is used for cutting plexiglass, it gives precision and repeatability along with much longer service life. It can even produce the most complicated shapes and cuts without getting tired or needing to stop. Plus, the machine makes fewer mistakes when it is controlled automatically which makes sure that all cuts are the same thickness. This is very Helpful when working with detailed designs or big batch productions.
Ready to Start Your Project?
With the right tools, techniques, and safety precautions, cutting perfect circles in plexiglass is an achievable skill for both beginners and experienced DIYers. Remember to work slowly, maintain proper tool maintenance, and always prioritize safety throughout your project.