One of the most critical things to learn when dealing with clear acrylic sheets is how to make strong and seamless bonds. Regardless of your project being a DIY one, a display creation with full details, or a structure assembly of the highest-quality standards, the proper application of glue on acrylic is the very thing that guarantees both pretty and long-lasting results. The present guide is an exhaustive source of information regarding gluing of clear acrylic covering all aspects from picking suitable adhesives through teaching application techniques that yield perfect results. At the end of it, you’ll be equipped with practical insights not just to make your acrylic projects sturdy but also great to look at. Let’s dissect the art and science of gluing acrylic for polished, professional results.
Understanding Acrylic and Its Properties
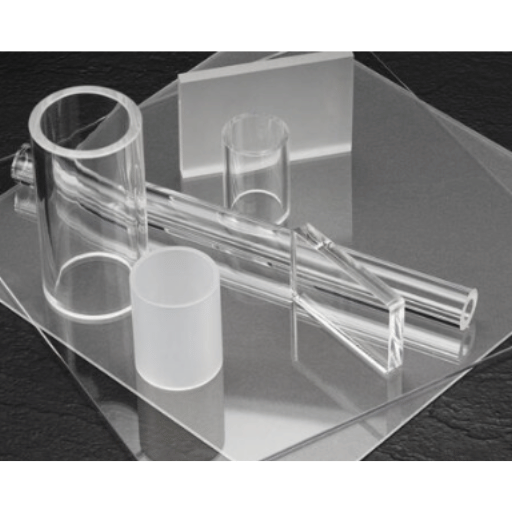
Acrylic is an easy-to-work-with, light, and very durable and transparent material. It is mainly recognized by the names plexiglass or PMMA (polymethyl methacrylate). Acrylic has a lot of positive characteristics, such as great clarity, resistance to impacts, and being able to last through all kinds of weather, so it is very suitable for a wide range of applications, e.g., signs, display units, and home improvement projects. On top of that, acrylic is very easy to cut, form, and join, which brings all sorts of creative possibilities to the table. However, it has the downside of being scratched more easily than glass, and thus, it is necessary to pay attention to the handling of the material during the project so as to preserve its good looks.
What is Acrylic Plastic?
Acrylic plastic, otherwise known as polymethyl methacrylate (PMMA), is a material that is very light and has the property of resisting shattering. This is why it is very often used as a substitute for glass. Its properties such as transparency, durability, and ease of processing make it the ideal material for uses like, for example, lighted signs, aquariums, and protective barriers. Even though it scratches more easily than glass, it is still a material that has great versatility and functionality for both artistic and industrial purposes.
Benefits of Using Clear Acrylic
Key Advantages:
- Outstanding Transparency: Allows for up to 92% light transmission, providing crystal-clear visibility that is almost identical to that of glass
- Lightweight Yet Strong: Five times lighter than glass but ten times tougher, reducing breakage risks and enabling easier handling and installation
- Great Versatility: Can be shaped and formed through cutting, molding, and other processes to accommodate different design and functional requirements
- UV Resistance: Provides durability for both indoor and outdoor applications, ensuring long-lasting and attractive solutions
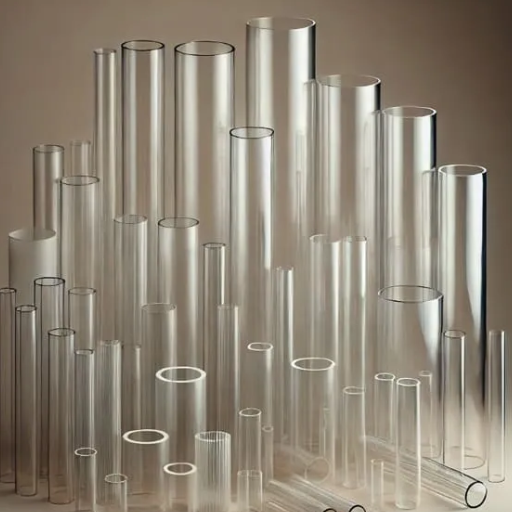
Common Applications of Acrylic Sheets
Acrylic sheets are utilized in a range of industries because of their excellent strength, ease of use, and transparency. The most common areas of application are advertising, display cases, protection against the elements, fish tanks, skylights, and even furniture design. Due to their lightness and resistance to ultraviolet rays, they are perfect for outdoor ads, building glass, and decorative panels.
Choosing the Right Adhesive for Acrylic
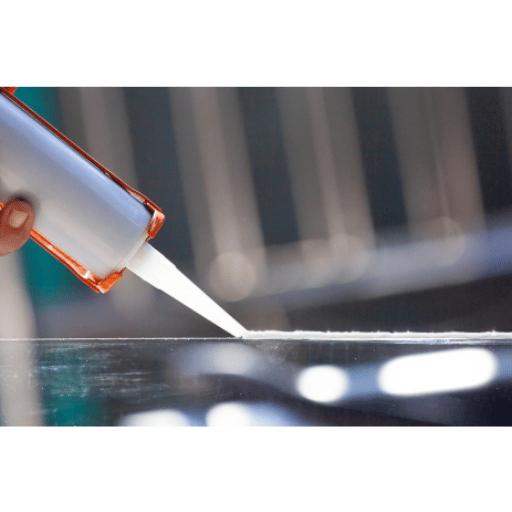
It is necessary to select the right adhesive for acrylic in order to produce powerful and lasting bonds that do not harm the material. Among the types of adhesives that can be used, solvent-based ones, like Weld-On 3 or Weld-On 4, are the most effective, because they create a chemical reaction with the acrylic and therefore become part of the material. For non-structural or even temporary applications, double-sided acrylic tape might be a simpler alternative. Always check if the adhesive is suitable for acrylic to prevent cracks or clouding. Good surface preparation, which includes cleaning and drying, is very important in getting the best adhesion possible.
Types of Adhesives for Acrylic
| Adhesive Type | Best For | Key Features |
|---|---|---|
| Solvent-Based Adhesives (Weld-On 3, Weld-On 4) |
Structural joins | Forms very strong and smooth bonds through chemical reactions; creates permanent connections |
| Double-Sided Acrylic Tape | Non-structural or temporary applications | Simple and safe solution; easy to apply without chemical reactions |
| Epoxy Adhesives | Versatile bonding with durability requirements | Compatible with different surfaces; resistant to environmental factors |
Note: It is crucial to choose an adhesive that is specifically meant for acrylic compatibility to avoid damage or clouding and ensure that surfaces are cleaned and prepped accordingly for the best results.
Comparing Epoxy and Weld Adhesives
Epoxy Adhesives
- Versatile and easy to apply
- Suitable for environments requiring durability
- Resistant to different factors
- Compatible with different surfaces including acrylic
Weld Adhesives
- Forms chemical bonds
- Creates smooth and permanent connections
- Preferred for structural integrity
- Best for high stress applications
Decision Guide: The choice depends on whether the emphasis is on ease of application and versatility (epoxy) or superior strength and permanence (weld adhesives).
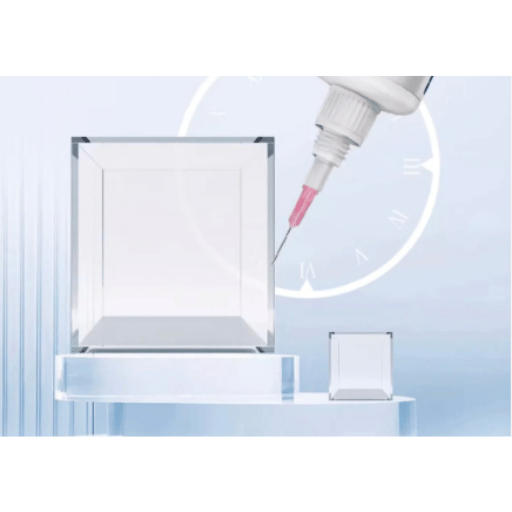
Optically Clear Adhesives: Why They Matter
Optically clear adhesives are very important in those applications where transparency and optical purity are very important. They create a bond that is not only invisible but also seamless which makes them perfect for the areas of displays, touchscreens, and optical products. These adhesives, by reducing the haze effect and increasing the light transmittance of the total, are still able to provide the strongest support with the added benefit of being impervious to the environmental factors. Their application with great accuracy makes both functional and aesthetic aspects in areas of industry where clarity is of great importance.
Preparing Your Acrylic for Gluing
It is important to prepare properly in order to get a strong bond when gluing acrylic. As a first step, use a soft, lint-free cloth and a cleaner that is safe for acrylic to clean the acrylic surfaces meticulously, so that no dust, oils, or residues are left behind. Do not use any strong chemicals or abrasive materials that could potentially harm or scratch the surface. After cleaning, let the acrylic get absolutely dry before the adhesive application. For the best bonding light, the edges should be sanded a little to give a rough texture which helps in getting a good grip for the adhesive. During the preparation, always be careful with the acrylic so that no contaminants that might weaken the adhesive’s effectiveness are introduced.
Cleaning the Acrylic Surface
✓ Proper Cleaning Checklist:
- Use a non-abrasive mild cleaner
- Apply with a soft cloth for dusting and residue removal
- Avoid harsh chemicals that may cause scratching
- Do not use rough materials
- Ensure the surface is completely dry before proceeding to next steps
Cutting and Shaping Your Acrylic Sheets
For the cutting and shaping of your acrylic sheets, precision instruments such as a fine-toothed saw for straight cuts or scoring knives for thinner sheets are the best to use. For curves or detailed designs, a jigsaw with a specific blade would be a good option. Always hold the acrylic tightly and take your time to avoid any breaks or chips. Once you’ve done the cutting, get the edges smoother by means of sandpaper or a polishing machine for a perfect finish.
Ensuring Proper Fit for Bonding
For the joining process to be successful, make sure you first measure and align your acrylic pieces properly. Then, use clamps or supports to maintain the position of the pieces and be sure that no gaps exist between the surfaces. If necessary, make adjustments and also test the fit before applying the adhesive to get a bond that is seamless and durable.
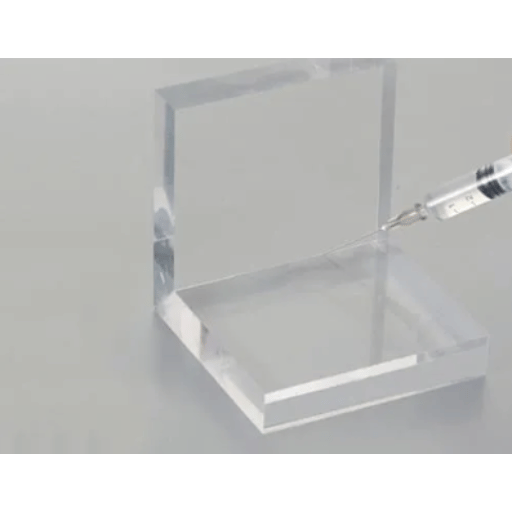
The Gluing Process
To start the process of acrylic gluing, the first step is to apply the glue on the edge where the two parts join. Choose a high-quality acrylic glue, like a solvent-based adhesive, which fuses the surfaces together and provides a strong, long-lasting hold. For consistent coating, make use of an applicator bottle fitted with a needlepoint tip for accuracy. Then, press the acrylic pieces together tightly, first making sure they are positioned correctly so as not to cause any dislocation, and then if necessary use clamps or tape to hold them. The adhesive must be allowed to cure completely according to the manufacturer’s recommendations, which usually means a period of 24 to 48 hours, so as to obtain the utmost bonding strength. If you want optimum results, don’t move or put any tension on the joint during the curing period.
Step-by-Step Guide to Glue Acrylic
Prepare the Surfaces
Dust, grease, or fingerprints are unfortunately very common on acrylic materials. Hence, use a lint-free cloth and a mild cleaner to clean the acrylic pieces very thoroughly. Then, make sure the surfaces are completely dry before moving on to the next step.
Apply the Adhesive
Take the needlepoint tip applicator bottle and apply acrylic adhesive thoroughly along the edges or the surfaces that you want to bond. Do uniform application and refrain from excessive adhesive.
Align and Bond
Once the adhesive is applied, right away push the acrylic parts together. Misplacement is very likely if you do not align them perfectly. Place the pieces in position and secure them with clamps or tape.
Cure the Adhesive
According to the manufacturer’s instructions (generally, it is 24–48 hours), let the adhesive cure. In this curing period, do not move or put stress on the joint.
Inspect the Bond
After the curing process, examine the bond for strength and alignment. If there is any excess adhesive, have it trimmed or sanded for a polished finish.
Using a Clamp for a Strong Bond
A clamp is used to guarantee a powerful attachment by uniformly applying the pressure throughout the adhesive joint in the process of curing. Place the clamp in a way that the pressure is applied evenly on the surfaces that are being bonded together. Do the adjustment of the tension with great care so that over-tightening is avoided, which could either lead to the elimination of excessive adhesive or the change in the shape of the materials.
Tips for Applying the Adhesive
💡 Expert Tips:
- Clean the Surfaces: Make sure the two surfaces are totally clean and free from dust, oil, or any other material for a stronger connection.
- Apply Evenly: Lay the adhesive on the surface evenly to prevent weak areas. A brush or applicator can be of assistance.
- Use the Right Amount: Refrain from applying too much adhesive, as excess glue might ooze out and weaken the connection.
- Adhere Quickly: Quickly get the materials together after applying the adhesive to avoid curing before time.
- Allow Proper Curing: For optimum results, respect the curing time recommendations of the adhesive manufacturer.
Finishing Touches and Best Practices

Inspect the joint for any excess glue that may have leaked out during application after the adhesive has completely cured. Use a plastic scraper for a clean finish and a razor blade if you feel comfortable but take extreme care not to scratch the acrylic surface. Polishing the edges with fine-grit sandpaper or a plastic polish can further improve the appearance and give a professional look you desire. Always be careful when touching the bonded piece so that the joint is not unnecessarily stressed. To ensure long-lasting durability, regularly clean the acrylic using a gentle, non-abrasive cleaner and prevent the acrylic from coming in contact with harsh chemicals or high heat.
Cleaning Up Excess Adhesive
To rid up extra glue, first take a plastic scraper or a soft cloth and carefully take off the glue before it gets completely cured. In case the glue has set hard, then apply a very mild solvent that is suitable with acrylic like isopropyl alcohol and use it in a very little amount to melt the leftover glue. Do not use rough tools or strong chemicals as they may ruin the acrylic surface. Afterwards do the final touch by cleaning with a soft, dry cloth to get a shiny outcome.
Allowing Proper Cure Time
⏱️ Important: Cure Time Guidelines
The correct curing time is very important to assure the glue gets to its peak strength and durability. Check the manufacturer’s instructions for the exact curing times, as these may be different depending on the adhesive type and the environmental conditions.
Average curing time: 24 to 72 hours for complete cure
During this time, make sure to keep the joint area undisturbed and stress-free for the best outcome.
Testing the Bond Strength
For evaluating the bond strength, it is recommended to either apply pressure slowly or do a stress test according to the eventual use of the bonded materials. Appropriate equipment like a tensile tester should be used or alternatively, pressure can be applied manually with caution to check if the bond remains as strong as anticipated. It is also important to wait until the adhesive has completely cured before testing, so that accurate results can be obtained. In case the bond breaks, the selection of adhesive, substrate preparation, and curing conditions should be reviewed for possible betterment.
Reference Sources
- Danielle Wethington – A Comprehensive Guide to Gluing Acrylic
Describes different types of glues and their pros and cons for acrylic projects. - TT Plastic Land – How to Glue Acrylic Together: A Complete Guide
Offers expert methods, the best glues, and detailed instructions for strong and invisible bonds. - AC Plastics Inc. – How to Glue & Weld Acrylic Sheeting
Mentions the process of acrylic sheeting welding using cement solvents for strong joints.
Frequently Asked Questions (FAQs)
How long does it take for the glue on acrylic to dry?
The drying times are based on the type of adhesive used, however, generally speaking, most solvent-based glues do set quickly, within few minutes, and they are completely cured in a range of 24–48 hours.
How can I make sure that there are no bubbles in between the glued acrylic sheets?
Distribute the glue properly and place a clamp over the glued area to ensure strong adhesion while the glue is drying.
What are the tools needed for the acrylic glue process?
You will potentially require applicator bottles, clamps, and a scraper or sandpaper for the preparatory surface work.
What is the process of preparing acrylic sheets for gluing?
First, use a lint-free cloth to clean the surfaces and check that they are completely clean i.e. dust, grease or debris, as that will be the perfect condition for adhesive.
What are the main differences between gluing and welding acrylic?
The gluing process involves the application of glue, while the welding process uses solvent cements that effectively melt and join the acrylic parts into one.