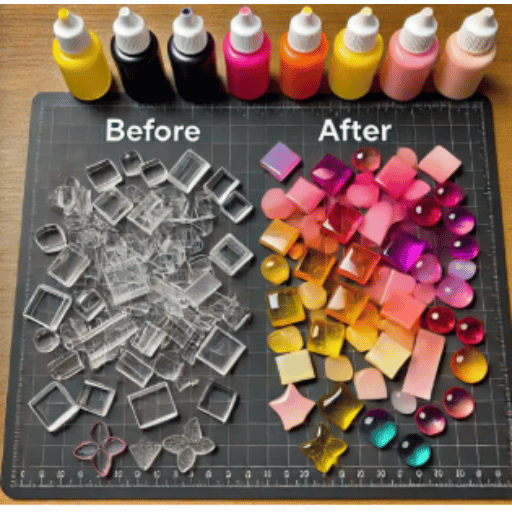
Acrylic sheets and plastics are versatile, tough, and commonly used in various projects such as crafts and decorations, as well as professional designs. Nevertheless, their natural look is not always perfect for your artistic imagination. The process of dyeing acrylic and plastic gives a distinctive way to personalize their appearance, thus enabling the use of bright colors and amazing effects that can raise the standard of any project. This tutorial will lead you to the method of dyeing acrylic sheets and plastics step by step, making sure that you are provided with the necessary tools and techniques to obtain beautiful, professional-quality results. No matter if you are a DIY fan or a pro creator, this article will be your complete source to know how to turn dull plastics into art pieces.
Understanding Acrylic and Its Properties

Acrylic is a plastic that is light, strong, and has good quality. Its clarity and versatility are the main features that make it popular. Oftentimes, people resort to acrylic instead of glass because of its resistance to breakage and its optical clarity. Acrylic being easily handled in cutting, shaping and coloring is one of the reasons why it is favored for many artistic and industrial applications. Its glossy surface makes it easy to obtain uniformity in color during dyeing process, which guarantees bright and constant results. Also, it being able to withstand UV light and environmental factors makes it applicable in both indoor and outdoor locations.
What is Acrylic?
Acrylic is a superior thermoplastic material that is light in weight, strong, and versatile, and its outstanding optical properties plus the fact that it cannot be broken make it a preferred alternative to glass. Acrylic can easily be processed, shaped, cut, and colored, thus making it a great material for arts, industries, and architectural projects. Besides, its resistance to all weather conditions and ability to withstand UV rays have made it a great choice for both interior and exterior decorations.
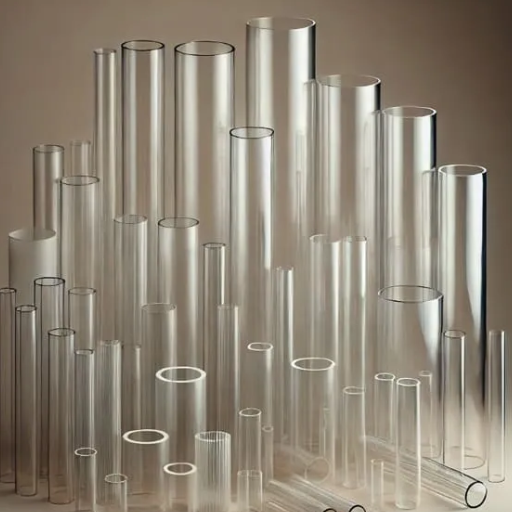
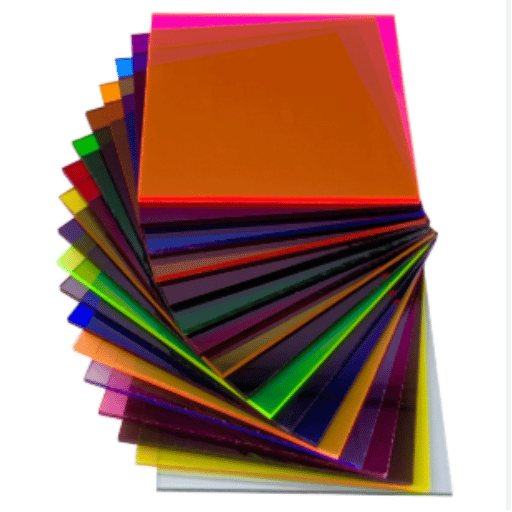
Types of Acrylic Sheets
Acrylic sheets are available in various kinds depending on the purpose to be served. The majority of the types which are most popular are as follows:
1. Clear Acrylic
It is characterized by its remarkable transparency and is mostly used in place of glass.
2. Colored Acrylic
Comes in a large variety of colors, very suitable for the purpose of decoration.
3. Frosted Acrylic
Has a stained-glass-like look that provides better privacy, yet it does not block the light.
4. Mirrored Acrylic
It reflects the light and is mainly associated with the modern interior design and display of products.
5. Textured Acrylic
Has a design or rough surface for artistic or practical reasons.
6. Impact-Resistant Acrylic
Durability has been increased to that of the tough applications.
Key Insight: Acrylic sheets of each type can be used in a particular way and thus bring versatility to the different industries.
Why Dye Acrylic Plastic?
The dyeing process of acrylic plastics not only increases their beauty and utilities but also opens up a spectrum of bright and personalized colors that are adjustable according to the designer’s needs. The technique is extensively applied in industries like the creation of gay and striking components in the signage, interior designing, and brand products. In addition, dyed acrylic still has its longevity and light diffusion quality, which enables it to be used for both aesthetic and functional purposes.
Preparing to Dye Acrylic

The best outcome when dyeing acrylic is determined by proper preparation. First of all, the acrylic surface should be thoroughly cleaned with a mild soap and water solution to get rid of any dust, grease, or debris. After that, the surface should be wiped off completely with a lint-free cloth to make sure no particles come between the dye and the acrylic. If it is needed, the acrylic can be slightly sanded with fine-grit sandpaper to make the dye stick better, but it is a must that the surface is smooth and scratch-free. After the preparation, make sure you have the correct dye type, for example, alcohol-based or fabric dye, which is specifically made for acrylic materials, and a suitable workspace with good ventilation for the dyeing process.
Materials Needed for Dyeing Acrylic
Tools Required for the Process
- ✓ Heat source (for instance, stove or heat gun) to heat the dye solution
- ✓ Thermometer to keep an eye on the temperature of the dye solution
- ✓ Timer to measure the time of dyeing
- ✓ Tongs or clamps for safe handling of the acrylic
- ✓ Drop cloth or protective covering for the working area
Safety Precautions and Tips
- Ventilation: Always make sure that the place where you are working is well-ventilated so that fume inhalation is avoided.
- Personal Protection: To keep the dye from getting on your skin or in your eyes, put on gloves, an apron, and goggles.
- Non-Reactive Tools: To prevent any chemical reactions, always use non-reactive tools and containers.
- Heat Safety: Keep a safe distance from heat sources and monitor the dye solution temperature very carefully.
- Workspace Protection: To avoid stains or spills, cover your workspace with a drop cloth.
- Safe Handling: Always use tongs or clamps when handling the acrylic to prevent burns or accidents.
Methods for Dyeing Acrylic Sheets
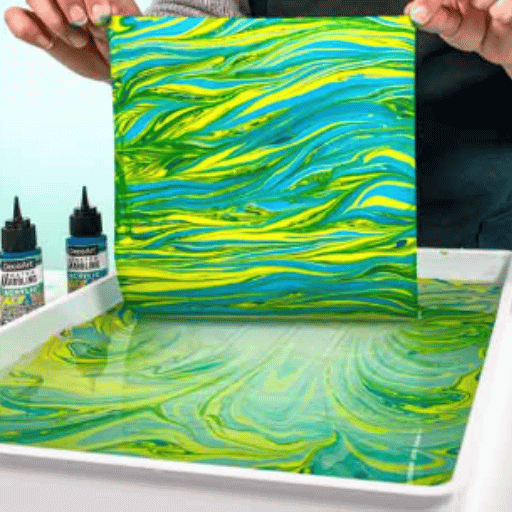
1. Immersion Dyeing
The prepared acrylic sheet is lowered into a dye bath with a mixture of hot water and alcohol-based dye. The heat is kept constant at about 150°F to allow the color to be absorbed evenly. The dye is stirred from time to time to prevent spots and when the required color is reached, the sheet is taken out. It is then left to dry completely before being used again.
2. Brush Application
If the user wants to create elaborate or standard patterns, he can use a clean brush to apply the dye directly. For best results work in small areas to guarantee accuracy and avoid streaks. Deeper shades may require multiple coats, thus allowing each layer to dry first before applying the next.
3. Spray Application
A dye gun or an aerosol dye can be used to get a uniform surface coating. This technique is the best for both gradient effects and large area covers. It is important to spray in continuous smooth moves so as not to cause uneven color buildup.
Pro Tip: The different methods each have their own pros and cons depending on the result you want, therefore the choice should be made according to the project requirements.
Using Water-Based Dyes
Water-based colors are multifunctional and eco-friendly which is why they are widely used in many industries. These colors are able to enter the pores of the materials easily resulting in vivid and homogeneous results. For best results, the surface should be cleaned and sanded to allow proper absorption. The dye should be applied uniformly with a brush, sponge, or spray, and the work should be done quickly in order not to have streaks. Water-based colors dry up quickly but they can be made wet again with water for mixing or touching up, thus giving the user the flexibility of getting the perfect finish. A protective topcoat should be applied to the surface always sealing it to protect the color and increase its life.
Utilizing Alcohol-Based Dyes
Dyes based on alcohol penetrate very rapidly to make porous surfaces more colorful and rich with little grain raising. These dyes being excellent for their deep and even finishes are still considered mainly for their fast drying time. To use, the surface must be clean and smooth, then the application has to be done with a lint-free cloth, brush, or spray for precision. Work quickly as dyes based on alcohol dry so fast that blending becomes difficult. For corrections or a layered effect, once dry, further coats can be applied. Lastly, the dyed surface should be sealed with a topcoat suitable for protection of the color and enhancement of its longevity.
Spray Painting Techniques for Acrylic
In order to get the best possible results, it is advisable to first prepare the surface by cleaning it thoroughly and making sure it is dry. It is recommended to use a primer made especially for acrylics in order to get a smooth base. The spray paint can should be shaken well to make sure that the paint is mixed evenly throughout. The can should be held about 8-12 inches away from the surface and light, even coats should be applied in a sweeping motion to prevent drips and to get the desired uniform coverage. The drying time of each layer should be allowed before the next one is applied, and a sealant should be used at the end for durability and a polished look.
Step-by-Step Guide to Dyeing Acrylic
Step 1: Prepare the Workspace
The first step is to select a proper workspace that is well-ventilated and is not prone to getting dirty. Also, cover the surface with some kind of protective material to avoid direct contact with the dye or dripping over the floor or the surface. Once done, collect all the tools needed for the dyeing, including the dye, gloves, brushes, or spraying equipment.
Step 2: Clean the Acrylic Surface
The surface of the acrylic piece should be cleaned rigorously by washing it with soap and water to get rid of all kinds of dirt, grease, or fingerprints. After that, let it dry thoroughly before you begin applying the dye.
Step 3: Choose the Dye Type
Dye can be chosen based on the requirement of the project, if an even coloring is desired, then go for water-based dye, or if more bright results are favorable then choose an alcohol-based dye. Just make sure that the dye is good for acrylic materials.
Step 4: Apply the Dye
For intricate sections brush can be used, for smooth transitions, a cloth and for extensive areas, a spray gun can be utilized. Dyeing should be done in thin and even layers with the drying procession of the previous coat followed before the application of the next coat.
Step 5: Set the Color
Place the acrylic under fresh air or apply a low-temperature heat tool to accelerate the drying procedure, which is a method of setting the color. Furthermore, a smooth surface is achieved through this process.
Step 6: Seal the Acrylic (Optional)
In case your project needs extra strength then don’t hesitate to use a clear sealer that will eventually protect the dyed area and will also prolong its lifespan. As a rule of thumb, it is important to follow the manufacturer’s instructions for getting the finest results.
Success Tip: By virtue of following these steps you may get professional and lasting results, because dyeing acrylic is definitely a piece of cake.
Preparation of the Acrylic Sheet
First of all, take a lint-free cloth along with a mild cleaner and clean the surface of the acrylic sheet perfectly to get rid of all dirt, oils, and residues. This is an important step for the dye to stick evenly. After that, if the surface is very smooth you can use super-fine sandpaper to give it a little abrasion for better dye penetration. Finally, the surface must be wiped again to eliminate dust particles, and then it will be ready to start the dyeing process.
Applying the Dye: A Step-by-Step Process
Finishing Touches for Dyed Acrylic
Once the acrylic sheet has dried thoroughly, look for any uneven spots or flaws. If necessary, gently rub the surface with a soft, lint-free cloth to improve shine and smoothness. A clear acrylic sealant could be applied to provide more protection and longevity which would also prevent corrosion and damage. Keep the finished piece in an environment where it will not be exposed to direct sunlight or harsh conditions for a long time, so its vibrant look lasts a long time.
Advanced Techniques for Experienced Crafters
1. Layered Dye Applications
Applying layers of dyes is the technique to be used if one desires to create unique and multi-dimensional effects on the surface of the material. Do not rush. A color gradient or pattern can be constructed by adding one layer after the other only after the previous one has completely dried.
2. Masking for Precision Designs
Create a design using masking tape, stencils, or vinyl cutouts that isolates sections on the acrylic surface. This gives room for very clear designs and patterns in one area while the rest remains undisturbed.
3. Heat Setting for Vibrancy
The acrylic must be heated carefully using a heat gun set to low or by putting it in a warm and well-regulated environment after dyeing. This not only makes the dye to penetrate deeper but also to light up the colors.
4. Airbrushing Techniques
For advanced crafters, airbrushing dye on acrylic gives smooth gradients and extremely detailed designs. This method calls for steady control and adequate ventilation.
5. Embedding Acrylic Dye
Dyeing and casting can be combined by incorporating small dyed acrylic pieces into clear resin molds. This method is great for making custom jewelry or art pieces as it creates the effects of layers within a transparent medium.
Expert Note: These advanced methods can elevate your crafting projects, allowing for intricate and professional results when working with dyed acrylic.
Creating Ombre Effects on Acrylic Plastic
For the process of making ombre effects on acrylic plastic, the very first thing to do is to choose dyes or paints that are compatible with acrylic and to have a blending tool, for instance, a sponge or an airbrush, ready. Apply the hues bit by bit, mixing them together at the meeting point to get a perfect gradient. Move slowly and allow the previous layer to dry before the application of the next one; this will help you to have better control of the whole process. Perform on a trial piece before the actual one to improve the skills and get a nice finish like a pro.
Mixing Colors for Custom Shades
To create unique colors on acrylic plastic through mixing, start with the primary colors and slowly introduce little bits of the secondary colors to find your preferred tint. A palette or mixing tray can be used for trials, and keep track of the amounts used for uniformity. Always check the mixture on a test piece to confirm the outcome before using it on your main project.
Layering Techniques for Depth and Texture
Acrylic plastic can be given a three-dimensional and textured look by the application of paint in thin, semi-transparent layers, which are dried one by one. Use lighter shades as the base and slowly develop darker colors or highlights to give the surface a more dimensional aspect. In addition to the overall visual effect, the use of sponges or textured brushes as tools would allow creating unique patterns and effects.
Reference Sources
1. Polymershapes – Use Cases of Colored Acrylic Sheets
The paper points out the usage of colored acrylic sheets in various fields of applications, foremost being building up and illuminating the skyline by means of colored acrylic sheets.
Source: Polymershapes
2. Jumei Acrylic – Creative Strategies for an Effective Acrylic Sheet Brand Display
Outdoor displays and branding with colored acrylic sheets as a new and creative source of integration of light are among the proposed ideas for the usages of colored acrylic been used.
Source: Jumei Acrylic
3. Polimertecnic – Acrylic Sheets: The Ideal Choice for Signage and Advertising
In this article, the writer draws attention to the multiple and different ways acrylic sheets can be used in promoting, advertising, and suchlike creative applications.
Source: Polimertecnic
Frequently Asked Questions (FAQs)
What are the typical ways to color acrylic sheets?
Ways that are very typical are spray painting, dying, screen printing, and using colored adhesive films.
Is it alright to use ordinary paint for coloring acrylic sheets?
Yes, however, for the best results, it is advised to use acrylic-based paints due to adhesion and durability issues.
What is the process of dying an acrylic sheet?
Place the sheet in a dye bath that is heated and contains either fabric dye or specialized acrylic dye, and make sure the coverage is even.
Is it possible to add color to acrylic sheets while retaining their transparency?
Indeed, translucent dyes or films can be used to keep the transparency and at the same time add color.
What equipment is necessary for coloring acrylic sheets?
Paintbrushes, spray guns, heating devices (for dyeing), and personal protective equipment are some of the tools that may be required.
Conclusion
Dyeing acrylic sheets and plastics opens up a world of creative possibilities, allowing you to transform ordinary materials into vibrant, customized pieces for any project. By following the preparation steps, choosing the right dye method, and applying advanced techniques, you can achieve professional-quality results that enhance both the aesthetic appeal and functionality of your work. Whether you’re a DIY enthusiast exploring new crafts or a professional designer working on commercial projects, mastering the art of dyeing acrylic will expand your creative toolkit and enable you to bring your artistic visions to life with confidence and precision.