
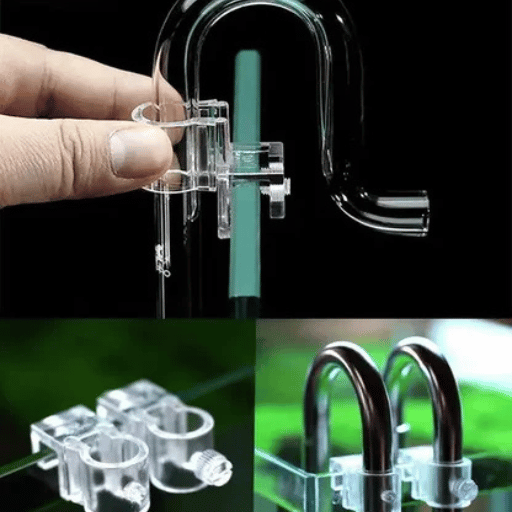
An acrylic lily pipe is a very trendy and simple option offering an attractive appearance and enhanced functionality to the aquascaping enthusiast. Such pipes, elegantly designed, possess not only the quality of smooth water movement but also a great aesthetic appeal, and the attraction is to remain in stark contrast to the underwater scene. While store-bought lily pipes are quite expensive, creating your own acrylic lily pipes can be the most rewarding and cost-effective solution. This detailed guide covers the steps to providing you with the know-how and means to create customized lily pipes specifically made to cater to all your needs. So, whether you are someone experienced in the art of maintaining an aquarium or you are just after designing with whatever misses your hand, this article will be both helpful and insightful toward recognizing design potentials for your aquarium.
Introduction to DIY Acrylic Lily Pipes

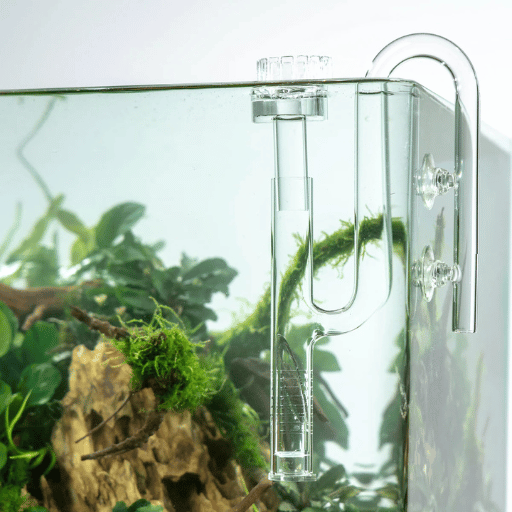
Self-fabricated acrylic lily pipes are personalized devices to improve water circulation and filtration in the aquarium. These pipes are made with very durable and flexible acrylic tubing. This offers an alternative to typical Glass Lily Pipe, giving a smaller and smoother flow in circulation cover with probable breakage. The acrylic lily pipes are crafted in that way as to have customization on design/dimensions so they work just the way they were intended for in some filtration systems because of the intended design of the tank. This progressive road helps reduce your spending on more expensive manufactured products. Fans of fish aquariums would be very happy to have products that are effective and carefully designed to meet the best possible water conditions.
Defining Acrylic Lily Pipes
Acrylic lily pipes are highly engineered aquarium aesthetics, their main intent is to facilitate smooth water flow within a tank. These sturdy and lightweight acrylic pipes are used to draw water into or out of filtering systems, thus efficiently creating a good circulation, which keeps water clear. Acrylic lily pipes, being flexible and less likely to break upon impact, can be custom-made via aquarium dimension or effect drastically different from touchy glass lily pipes. Its smoothened designs would greatly diminish turbulence and make for an even distribution of nutrients and gas exchange, making it as if mother-nature herself were maintaining the balance of aquatic health.
Importance in Planted Aquariums
To keep optimal growth and health of the plants, planted aquaria depend highly on the efficient circulation and distribution of water, nutrients, and CO2. Acrylic lily pipes make a significant contribution by maintaining smooth water flow and eliminating dead spots where nutrients might store. The ability to distribute CO2 gas uniformly also ignites more vigorous growth of aquatic plants with more attractive colors produced by photosynthesis. Whilst combining functionality and beauty, acrylic lily pipes are at the very heart of maintaining a thriving planted aquascape.
Benefits of DIY Acrylic Lily Pipes
Lily pipes of acrylic made by oneself offer a couple of advantages to aquascaping enthusiasts. The first advantage is their cost, which is much less than buying ready-made lily pipes. Also, the pipes could be specifically tailored to the length and layout of the tank so that the flow and return are perfectly calculated to ensure optimum circulation and distribution of nutrients. Acrylic lily pipes are stronger and hold fewer chances of breaking so that they are longer-lived. Building one’s own pipes might also stimulate creativity, as it opens up a chance to experiment with unique designs that accentuate functionality and aesthetic aesthetics within the aquascape.
Materials Needed for DIY Acrylic Lily Pipes
Assembling DIY acrylic Lily Pipes requires the following:
- Acrylic tube: Clear, food-grade, and heat-resistant; must be of the requisite diameter (compatible with your aquarium filtration system).
- Heat gun: Enables the bending of the acrylic tubing simply and safely.
- Pipe cutter or hacksaw: For cutting the acrylic tube accurately.
- Sandpaper: Both medium and fine grits are necessary for smoothing the edges of the tubing that is cut.
- Silicone tubing: Connects your acrylic lily pipes securely with the filter.
- Marker or tape: For marking bending points; increases the accuracy of the bends during the shaping period.
- Bending jig or mold: Important for acquiring more consistent and accurate bends.
Important Note: Remember to properly scrutinize and clean any tools utilized and verify that the materials are of high standards. This is really important for the eventual safety and efficiency of using your DIY creation inside the aquarium.
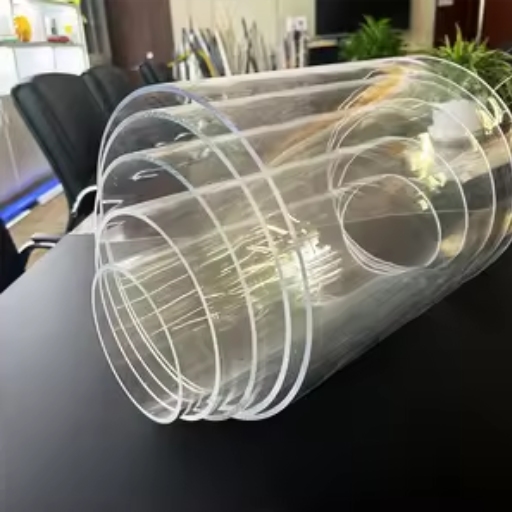
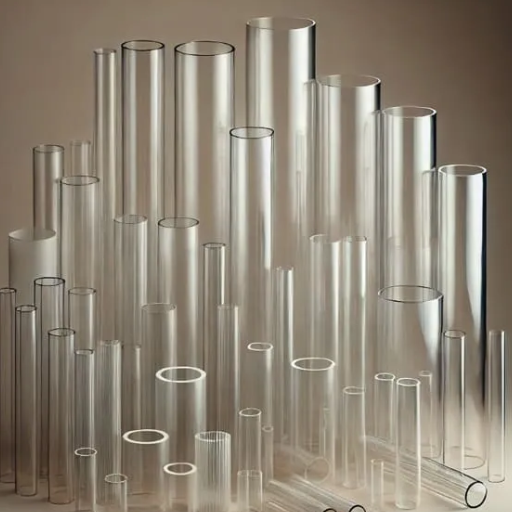
Acrylic Tubing
With many advantages like clarity, strength, and ease of customization, the acrylic tube is widely used in aquascaping. Their true application is in the formation of such things as lily pipes and flow-modifying elements for aquarium filtration systems. Properly prepared and shaped, an acrylic tube ensures a smooth, flowing water medium and adds to the aesthetic appeal. Complementary to this point is ensuring high standards of accuracy when cutting and bending so that function and appearance can both be guaranteed to their full potential. Any imperfection could disrupt water dynamics or damage the uprightness of the structure in the long term.
Bending Springs and Heating Tools
Spring back and annealing tools are absolute necessity for achieving accurate and uniform bends in acrylic tubes. Bending springs actually provide an internal support to the tube, thereby opposing deformation or collapse as in the process of bending. Meanwhile, heating tools, such as heat guns or strip heaters, are employed to create a consistent softening of the material along the area of bending to give a uniform shape without cracking. Poor results can be attributed to varied heating or overheating of the plastic, thereby weakening its structural strength. Proper use of these tools therefore gives a smooth and flawless bend that perfectly fits the functional and aesthetic demands in professional aquarium systems.
Other Essential Supplies
Good acrylic work with precision and accuracy requires the invaluable addition of some specialty tools and supplies. One very essential tool is the clamp set, which holds parts tightly in place during cutting, heating, and assembly. Good quality adhesives, especially solvent-type cements, make extra-strong bonds that can endure extended use and pressure. Protection provided by safety glasses and gloves, which are resistant to heat, is very important for purposes of shielding. Precision measuring tools, including calipers and rulers, also form part of the workshop’s arsenal, and such tools ensure correctly sized and aligned components. A harmonization of specialized tools and technique ensures professional exhibitions meeting industry friends.
Step-by-Step Instructions for Creating DIY Acrylic Lily Pipes

Step 1: Mark and Measure Acrylic Tubing
Employ a marker or some tape for delineating the lengths and bending points along the acrylic tubing. These markings must intersect with the aquarium measurements for proper fitting and aesthetic appeal.
Step 2: Prepare the Bending Spring
Introduce the bending stainless steel spring inside the tube at the marked bending region. This will prevent the tubing from collapsing or deforming during the bending and heating process.
Step 3: Heat the Acrylic Tubing
For heating, the heat gun is employed, and consistent heating is applied across the marked bending area. Keep the heat gun moving along the length of the tube to distribute the heat evenly, avoiding overheating or scorching of the acrylic. Test for softness: it should become soft and flexible without bubbling.
Step 4: Shape the Bend
With the tubing being pliable, you should therefore gently bend it around the bending jig or mold to the desired angle. Hold it until it dries and becomes solidified. You should strive to make the bend as soft and kink-free as possible to ensure proper flow of water.
Step 5: Cut and File the Edges
Trim the “slightly oversize” end off the acrylic tubing with a cutting tool to length so it is a snug fit to the DIY acrylic lily pipe formed. Use fine sandpaper to grind the sides to remove sharpness and create a smooth finish to use in your aquarium.
Step 6: Attach the Tubing to the Filter
Affix with suitable fittings the completed DIY acrylic lily pipes of aquarium to the outflow of your external canister filter, ensuring that there is no gap in either.
Step 7: Test for Functionality
After complete fabrication, test the lily pipes with actual water flow to make sure that there are no obstructions and leaks. At this stage, any adjustments that need to be made can be done.
These tips concerning crafting your own acrylic lily pipes should result in gorgeous tubing that glues aesthetics and efficiency to your aquarium.
Preparing the Acrylic Tubing
In the process of preparing the tubing, we should first measure the acrylic tubing and cut it with high accuracy using fine-tooth saws or a rotational cutter according to the required measurement. Once the cut tubing has been obtained, the sharp edges should be smoothed out using sandpaper, ensuring that the acrylic tubing runs free of any burrs or rough edges created in the cutting so as to avoid disruption in water passage and unwanted scraping damage. At this stage, uniformly heat the tubing under a heat gun or controlled bending equipment, ensuring a consistent softness without inducing warping or bubbles from overheating. The tubing with great care should be bent at the angles excepted in the correct manner to ensure that the tubing will fit perfectly for the aquarium. Cool the shaped tubing to room temperature for hardening and to prevent it from deforming when it is being handled. All these steps must be done with great care to make sure that the final acrylic lily setups function well and that they integrate seamlessly into the system.
Heating and Shaping Techniques
It is extremely necessary to use a regulated heat source, such as a heat gun or bending station, for heating acrylic tubing. The uniform heating to avoid uneven heating on the outside, which will go on to compromise the structural integrity should be conducted while maintaining a constant distance between the heat source and the tubing. Continuous rotation of the tubing would help soften it uniformly-in addition, a shaping jig or template should be used to produce precise angles of bend. The temperature should be closely monitored as overheating can lead to bubbling or distortion of the surface of the acrylic material, not to mention the risk of cracking if excessively bent. The performance of these techniques helps all create professionally shaped acrylic products with maximum endurance and aesthetic value.
Final Assembly and Installation
Ensure that during final assembly, components are free from contaminants and properly placed at the dedicated positions. Secure fittings using cumbersome tools to ensure proper alignment and prevent distortion of material due to overtightening. Before the fitting, always evaluate the stress factors. Always ensure the tolerances and environmental conditions are kept in check while carrying on the installation-temperature, loading capacity etc. In order to validate post-assembly design, surplus inspections needed to look for problems or types of deviation and their immediate corrections should be applied. This phase helps in instilling an impeccable, standardized attitude for efficient system operability and long-term system reliability.
Pro Tips for a Crystal-Clear Finish
1. Polish the Edges Well
Once you are done cutting the tube, smooth out the edges using fine sandpaper and then shine them up to near transparency so that they fade into the final design line.
2. Buff with a Microfiber
Take a microfiber cloth and clean the surface of your lily pipes to get rid of fingerprints, smudges, and microfine scratches.
3. Use Heat for Clarity
Apply heat with caution, directed at the surface of the acrylic, which melts away minor imperfections, thus improving the clarity significantly. Take care not to overheat.
4. Avoid Chemical Haze
Do not use cleaning agents with chemicals, as these will leave a cloudy residue. Use only acrylic-safe cleaning solutions to maintain the luster.
5. Handle with Care During Installation
If ever touching the polished sides, do it as little as possible and wear gloves to avoid oils and dirt from creating a dull finish.
Avoiding Kinks and Bubbles
To reduce twist and bubble risks in acrylic applications, all handling, surface preparation, and ambient control must be carefully controlled. Acrylic sheets should be stored in a stable environment and kept dry; this will save the acrylic from unwanted buckling or warping. Keeping all situations under control in terms of adhesive and laminate film application could also be construed as a technical option regarding avoidance of inconsistent control. Fortunately, using equipment designed for such purposes (for example, a squeegee or roller) balances the pressure force very effectively to push the air out smoothly. In addition, the workstation should be devoid of dust and anything that could contaminate the surface, which, like air particles, can be trapped under the surface and interfere with the surface uniformity. This careful handling guarantees the physical integrity and visual appeal of the acrylic material.
Finishing Techniques for Clarity
When finishing, use micro-polishing to get the clearest possible clarity, removing defects that accompany the reportage and focusing the heads of tools and their resolution so clear layers can be discerned. Polishing compounds should be of high quality and used with a soft consumable-free cloth or machine buffer, using uniform pressure and fast speed without movements. In the category of edge-finishing, the best tools that come into play are diamond-tipped cutters and flame polishers to produce smooth, perfect surfaced edges. By utilizing such but controlled lighting, the piece has been observed for any perfectness or deficient uniformity. These meticulous processes of constant attention to detail result in the greatest overall clarity and a finish comparable to an expert.
Maintaining Your DIY Lily Pipe
It is crucial to provide optimal performance and longevity for your DIY lily pipe by engaging in its proper maintenance. Cleaning should be routine and achieved using a fitting brush for cleaning purposes and mild (non-abrasive) cleaning agents to hinder the buildup of biofilm and other debris. Examine the bodies of the pipe itself for any conspicuous signs of wear or damage as this can manifest in tension and stress at the joints and bends. Make sure that a constant water flow is maintained by checking for any signs of blockage or obstruction. Periodically disassemble and reassemble the setup to verify its tightness and maintain the health of your aquarium ecosystem.
Frequently Asked Questions (FAQs)
What is lily pipe?
The lily pipe is an aquarium gadget dedicated to enhancing water flow and filtration while promoting the beauty of an aquascape.
What are the reasons for accessing acrylic in DIY lily pipes?
Quick to deal with, strong as timber but light, and easy to customize.
What exactly must be the necessary tools for making the foundation of an acrylic lily pipe?
Such as: a method of warm rods, acrylic tubes, a pipe bender, sandpaper, and any kind of saw or saw that helps in cutting applied materials.
What are the main advantages in manufacturing acrylic lily pipe by the DIY process?
DIY acrylic lily pipes are extremely cheap and may tailor them to their own specifications and tastes for the hobbyists based upon the aquarium situation at that time.
What is the way to bend the lip of acrylic tubing using the lily pipe?
To give an even temperature to the tube by the heat gun, then very cautiously bend it into shape from the pipe or the like.
Reference Sources
- Aquatic Plant Central – Guide to Home-Made Acrylic Lily Pipes, Drop Checkers, etc.: This is a forum thread dealing with the adventures people go through and tips on making DIY acrylic lily species, and some accessories concerning aquariums.
- The Planted Tank – Lily Pipes: Why Not Just Use Acrylic?: A discussion of the benefits and procedures to make DIY acrylic lily pipes for aquariums.
- Urban Aquaria – Product Review: Acrylic Lily Pipe Set: A review on these acrylic lily pipes, standing out by design specifications, functionality, and efficiency toward braceless tanks.
- LinkedIn – What is Lily Pipe? Uses, How it Works & Top Companies: Discussion on lily pipes and their function in aquarium movement and filtration.