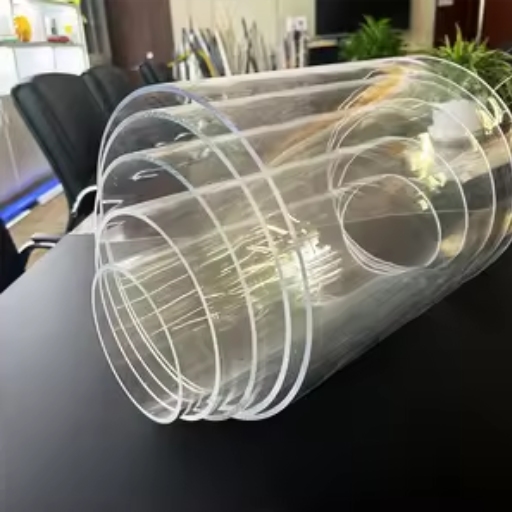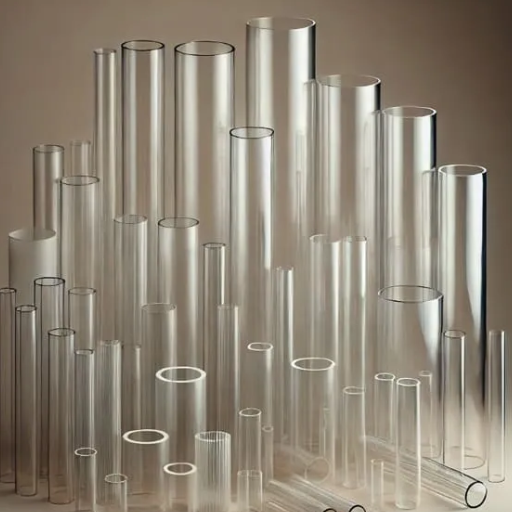

Acrylic sheets are highly versatile and are used for the myriad functions of home decor projects, crafting, and fine trade. With durability being the main attraction among artists, adding color will let the acrylic work shine through as luxurious eye candy! But how exactly can one add color to an acrylic sheet? This article gives you the best methods on how to dye acrylic plastic and tips and tricks to help you master those. Whether you’re a seasoned artist with acrylics or relatively new to this kind of work, the article has everything you require to begin turning your colorful dreams into reality. Decide which method suits your needs more and finish your project with ease.
Understanding Acrylic and Its Properties
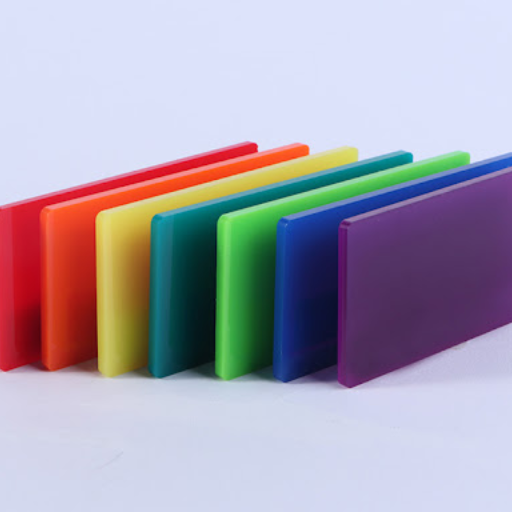
Acrylic refers to a durable plastic known for its qualities of clarity, lightweight nature, and resistance to shattering. It is a common substitute for glass due to its transparency and strength. Acrylic is easily workable – it can be shaped, cut, and colored, hence popular with artisans and designers. Stains and coatings are allowed to stick well to its surface, a non-porous surface, if properly prepared in advance. It is also resistant to UV radiation and weathering, guaranteeing a good lifespan under any application, either indoor or outdoor. Knowledge of these factors will help you to get good results in any acrylic coloring or crafts project.
What is Acrylic?
Acrylic is a versatile class of synthetic polymers derived from acrylic acid or its derivatives, generally known for its particular properties and usage in a vast area of industries. Its key properties are its strikingly clear appearance, light weight, and lasting virtually forever. Acrylic materials like polymethyl methacrylate are alternatives to glass that are considerably lighter and remain highly transparent while being shatter-resistant. As per market records, the worldwide market size for acrylic glasses (PMMA) stands valued at over USD 4 billion in 2022 and is forecasted to maintain forward-looking growth in the future, thanks to its utilization in the automotive, building, electronics, and advertising fields.
Thermoforming allows acrylic to be manipulated into a variety of shapes and designs. It finds use in such items as display cabinets, advertising signage, casework for aquariums, lenses, and even items of equipment for medical applications. And so, it has weather resistance and UV stability for extended outdoor use, including harsh environmental conditions. Acrylic may be tinted, painted, or dyed with ease. These processes allow for much artistic customization for designers, architects, and manufacturers. Considering such developments and applications will reveal why acrylic remains a polymorphic material used for functional and course materials in several industries.
Types of Acrylic Sheets: Cast vs. Clear
Acrylic sheets are chiefly categorized into cast and extruded types depending on the manufacturing processes. Each has different properties for unique applications.
1. Cast Acrylic Sheets
In creating these sheets, liquid acrylic is poured into molds and allowed to harden. This fabrication generates a stronger material, yet more rigid and cracking or crazing. It offers higher optical clarity with chemical resistance, which is suitable for applications needing precision, such as aquariums, display cases, and artistic installations. It is easy to machine, polish, and thermoform into intricate shapes, and thus it finds applications in both industrial and consumer-oriented uses. Cast acrylic sheets usually have tighter tolerances and more consistent thickness, which is essential for a highly demanding project.
2. Clear (Extruded) Acrylic Sheets
By contrast, extruded acrylic sheets are produced by melting acrylic resin and continuously pushing the molten resin through rollers that produce the sheets. This creates a more cost-efficient method, thus rendering a price advantage to extruded acrylic sheets over cast acrylic. Light in weight, flexible, and easy to cut, they become wonderful options for common applications like signage, light diffusion, and protective screens. Extruded acrylic is less rigid than cast, with a higher susceptibility to scratching, yet remains favored for applications with minimal requirements in optics or structures.
Performance and Cost Comparison
Durability: Cast acrylic can withstand damage to a greater degree when chips or cracks appear to be applied to the surface. On the other hand, extruded acrylic appears softer butis extremely prone to thermal expansion and scratches.
Cost: Extruded acrylic is widely considered to be 10-20% less costly than cast acrylic and by extension, offering easy access to large-scale projects or a buyer with choices.
Surface Quality: Less impurities are contained within cast acrylic, making it renowned in optical quality for applications where clarity is the end display.
Both types of acrylics have undergone technical evolution to equip them for an array of applications across industries and fields. Hence, the choice of the correct type will depend on the specifics of the project-from structural capacity to aesthetic cognizance and budget constraints.
Why Color Acrylic?
Color acrylic is just right to allow the drama of its colors to work and lend functionality to many applications. Being available in a myriad of bright, transparent, frosted, and opaque shades affords complete liberty to the designer. Design claims can be advanced on this premise. Recent trends in the market indicate a surge in demand amongst colored acrylic sheet-based products, with an expected growth rate of up to 5.6% by 2028 in the plastics and polymers industry, as reported by Grand View Research. Such growth is fueled by interest coming from sectors such as architecture, retail, interior design, and advertising.
A major purpose of the color acrylic is the impact resistance it provides. Even though it is light in weight, it still retains a strength up to 17 times that of normal glass, suitable for areas where resilient but beautiful materials are in demand. The latest retention systems have, nevertheless, incorporated UV-stabilized acrylic sheets whose colors cannot fade even when exposed to long hours of sunlight.
Additionally, color acrylic remains highly desirable for application that demands energy conservation and options that are eco-friendly. Today, many of the brands produce recyclable or partly recycled acrylic sheets which correlate with the worthy consciousness for saving the environment. Thus, designers and industries can basically work with color acrylic as a strong, flexible, and green substance for making their furniture, LED signage, decorative panels, or retail display in any creative form.
Its color acrylic can stand for creativity, durability, and sustainability as it remains an innovative material choice for the crossroads of style and practicality. It is the perfect blend of form and function and is therefore a must-have in design and manufacturing today.
Preparing to Color Acrylic Sheets
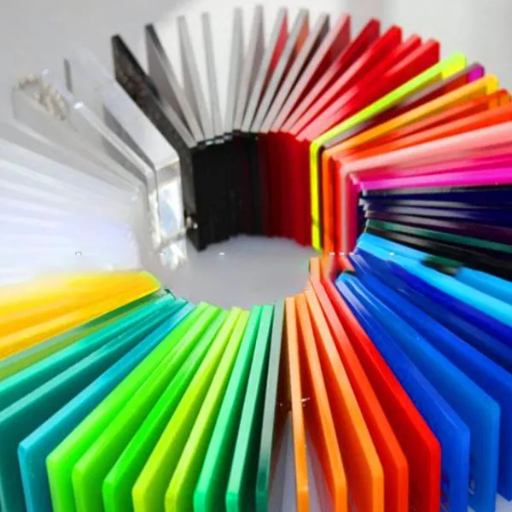
Cleaning the acrylic’s surface is the primary necessity of coloring. Make sure that any dust, grease, or fingerprints are removed from the surface of the acrylic. Use a soft cloth without lint with very mild soap and water to wash the acrylic surface; afterward, it must be completely dried so water spots do not form. The surface must be sanded lightly using 400 to 600 grit sandpaper to promote adhesion of the coloring medium. Select the method of coloring, whether with acrylic paint, dyes, or spray paint, depending on the finish desired. Always test on a small surface area for compatibility, then proceed with thin, even coats of color for the best result. The finishing must be smooth with enough drying time in between coats.
Tools and Materials Needed
The following tools and materials are required in the preparation and coloring of acrylic surfaces: which assure quality and efficiency and lastly, precision through the process:
Cleaning
A mild soap or detergent
A clean sponge or soft cloth
Water for rinsing
Acrylic Surface Preparation
Fine-grit sandpaper (e.g., 220-320 grit) for light sanding of the surface to improve adhesion
Coloring Tools and Mediums
Acrylic paints for a durable and versatile finish.
Spray paint is designed specifically for plastic or acrylic surfaces to ensure even coverage.
Dyes for transparent coloring.
Application Tools
Good-quality brushes for manual application of acrylic paint without streaks.
Spraying apparatus for a smoother professional finish while applying spray paint.
A sponge for creating gradient or textured effects with some mediums.
Protective Equipment
Gloves to protect hands from paint, dyes, or sanding particles.
A dust mask or respirator to prevent inhaling the smell from paint or sanding particles.
Finishing Tools
Clear acrylic sealant or topcoat for extra durability and gloss.
Ensure working in a well-ventilated space where everything is nicely arranged for safe and orderly use. Once properly followed, these steps will ensure better adhesion, an easy application process, and top-notch finishing for the acrylic surface.
Safety Precautions
Somehow, not following safety precautions when working with acrylic materials or paints endangers your health and complicates the working process. Based on recent best practices, here are some safety measures:
Provide For Proper Ventilation
Always work in an open place to avoid inhaling harmful fumes issued from acrylic paints, sealants, or other chemicals. An exhaust fan or an open window may help to ventilate the air. When this cannot be done, one may look into portable ventilation systems.
Consider Protective Equipment
Wear gloves when working with any acrylic material to prevent your skin from coming into contact with chemicals. They are best made of nitrile since most chemicals used have resistance against nitrile.
Keep your eyes protected with safety goggles so that accidental splashes or debris do not hurt them.
If sanding or handling materials that generate very fine dust or fumes, then use a mask or a respirator that is at least N95-rated for best performance against particles.
Handle Chemicals With Care
Most acrylic materials contain volatile organic compounds (VOCs) which are toxic at levels of prolonged exposure. Always read the labels of the products so that you are aware of how to handle the product and avoid exposure to it.
Store Materials Safely
Keep paints, adhesives, and sealants in a cool and dry place away from direct sunlight and access by children or pets. The lids must always be kept tightly sealed to avoid spillages or evaporation of solvents.
Keep Away From Fire
Many materials used in acrylic work are flammable. So, do not work in the presence of flames. Keep the fire extinguisher handy in case of emergencies.
Dispose of Waste Properly
Dispose of leftover acrylic materials, brushes, and other tools following local regulations. Never allow chemicals to enter the drain to protect the environment.
A recent study shows thousands of workplace injuries yearly, caused primarily by improper handling of chemicals, thus highlighting the critical nature of these safety precautions. Following these precautions will provide a safer working environment for you and mitigate the danger associated with acrylic projects. Leading “How To Color Acrylic Sheet” manufacturer in China.
Preparing the Surface for Coloring
The surface should be properly prepared for the best results when working with acrylics. First, clean the surface thoroughly from dust or grease or any debris that could interfere with adhesion. For example, for wood, lightly sand to an even, smooth texture. If it is metal or glass, clean it well from oils or grime. It is strongly advised by artfield experts to use a primer such as gesso-this will give the colors an appropriate base to stand on as well as increase their brilliance and durability.
Your results, too, can be influenced by environmental factors. Research reveals that acrylics prevent uneven drying and surface crackling if applied in humidity-controlled studio environments. The ideal acrylic paint application temperature is 65°F to 75°F (18°C to 24°C). Using painter’s tape to mask other areas will guarantee crisp, clean-cut lines along the painted sections.
The surface preparation allows time-saving techniques and which guarantees a professional finish to your acrylic work.
Step-by-Step Guide to Coloring Acrylic Sheets
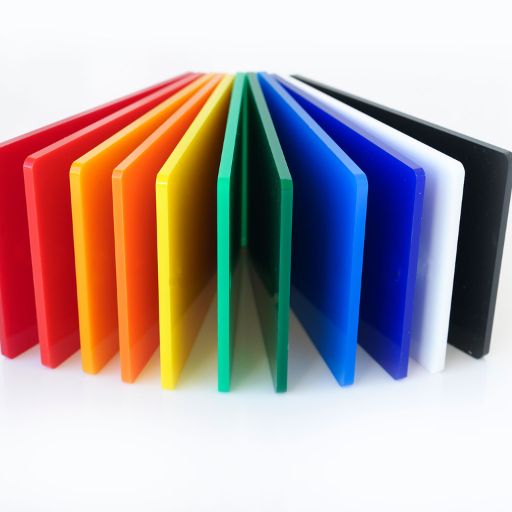
Gather Your Materials
You will need the acrylic sheets, acrylic paint, paintbrushes or sponges, painter’s tape (in case masking is involved), and a drop cloth or newspapers for protecting your work surface. Work in a well-ventilated area.
Prepare the Surface for Painting
Wipe down the acrylic sheet with a lint-free cloth dipped in any mild soap solution or isopropyl alcohol; this gets rid of dust, grease, and fingerprints. Dry very well before starting.
Mask Areas (Optional)
Mask with painter’s tape all the targeted areas you want unpainted or to receive a crisp edge.
Paint
From top to bottom, paint the acrylic sheet very thinly and uniformly with acrylic paint applied using a soft brush or sponge. Let the first layer dry fully before applying a second coat for opacity.
Drying of Paint
Keep the acrylic sheet flat in a warm, dust-free place where dust and dirt may not settle on it, allowing the paint to dry thoroughly. Drying time varies between several hours, depending on the thickness of the paint and environmental conditions.
Seal the Paint (Optional)
For long-term durability, spritz with a clear acrylic sealant that protects the painted surface. Follow the instructions on the sealant for best results.
The steps above will surely help you in coloring your acrylic sheet evenly for your project.
Painting Acrylic: Techniques and Tips
Preparation is an Important Step
Check the acrylic surface to make sure it has no oils, dust, or fingerprints before starting. This ensures the best possible adhesion. Use a lint-free cloth and wipe the surface with some isopropyl alcohol. Making the surface just a little bit rough by lightly sanding it with a 600-grit sandpaper will enhance the grip of the paint even further, especially for glossy acrylic sheets.
Choosing the Right Paint
Since acrylic paints dry quickly and offer brighter colors, they work best for most projects involving acrylic sheets. Paints for plastics or glass/waterproof coatings will work better than regular acrylics on these smooth surfaces for better durability. Recent product ratings mentioned that Golden High Flow Acrylics and Liquitex Professional Soft Body Acrylics are preferred by users based on their versatility and adhesion.
Primers Give Added Adhesion
Plastic primers will provide better paint adhesiveness and longevity, but for clear acrylics, the primer must be transparent or able to provide a smooth base while not obscuring the clarity of the material.
Further Techniques for an Even Application
Brushes and Rollers: Use fine synthetic brushes for detail work or smaller areas to minimize brush strokes. Foam rollers are great for bigger surface areas to ensure a smooth and even coat.
Spray Paints: Spray paint for plastics offers amazing coverage and a specific finish. Shake thoroughly for about 1-2 minutes and apply very light coats evenly at a distance between 8-12 inches from the surface.
Airbrush Systems: They are preferred for pieces requiring the utmost control for detailed artwork and gradients. Be sure to thin the paint properly before use.
Things to Avoid
When the paint is drying, you might find uneven drying, peeling, or cracking, which often goes with surface preparation being improperly taken, thick layers of paint, or not allowing each layer of paint being applied to dry thoroughly before applying the next layer of paint. These days, internet sources mention that when the humidity level is above 50%, it will stand as a hurdle in drying, so using in a controlled environment is best.
Final Touches
Once the paint is dry, your work has to be protected with clear, UV-resistant acrylic sealant. It will give the highest protection to the painted acrylic when exposed to direct sunlight or moisture. Matte and gloss sealants are easily available, so you can pick one according to the look of your project.
With these advanced tips and techniques, you can improve your painted acrylic project with quality and durability, leading to a professional finish.
Dyeing Acrylic Plastic: A Comprehensive Approach
Dyeing acrylic plastic can give vibrant and stunning results that facilitate the transformation of the material’s aesthetics for use in various applications. In the dyeing process, things such as precision, quality materials, and just the right techniques weigh strongly in achieving results. Here is a comprehensive step-by-step guide on the dyeing of acrylic plastic, with updates on the dyeing process at the time of writing.
Materials Required:
Liquid Fabric Dye or Powdered Dye (Rit DyeMore being the most suitable for synthetic materials such as acrylic).
Distilled water will be free of impurities that could interfere with dye absorption.
Heat Source-for keeping water at uniform temperature (stove or hotplate).
Stainless Steel Pot-avoid aluminum since it will react with the dye.
Protective Gear- gloves, apron, and safety goggles will suffice.
Tongs or Tweezers to safely handle acrylic parts. Substitutes can be bare hands if you prefer.
Spray Sealant (Optional) to enhance surface durability.
Stepwise Procedure:
Prepare the Dye Bath
Begin heating distilled water in the stainless steel pot to temperatures of approximately 140°F to 160°F (60°C to 70°C). Maintain this temperature range is crucial to allow optimal absorption of dye. Add the dye to the water, observing the ratios recommended by the manufacturer for the desired intensity of color.
Clean and Prepare the Acrylic
Acrylic plastic should be cleaned of any dust or grime. Such contaminants can be eliminated with a mild soap or isopropyl alcohol.
Submerge the Acrylic Pieces
Use tongs to place the acrylic parts in the dye bath. Stir gently for equal exposure to dye. The time to soak depends on the color intensity required and usually ranges from 10 to 30 minutes.
Monitor and Adjust
Periodically check the acrylic for color. Change bath concentration or adjust soaking time to varying darker or lighter colors, as desired.
Cooling and Rinsing
Once the coloration is satisfactory, carefully remove the acrylic pieces and let them cool. Rinse under cold water to set the dye and wash away remaining residue.
Seal the Surface (Optional)
Where longer durability is needed, or the project will be in contact with moisture or abrasion, a layer of clear acrylic sealer spray applied over the dyed surface will give protection.
Tips for Best Results:
Use high-quality dye labeled for use with synthetic materials to obtain rich and uniform color.
Maintain temperature constantly in the bath so the acrylic is protected from uneven dyeing or warping.
Test the procedure on a scrap piece of acrylic before trying to dye your main piece.
If you want elaborate patterns, use heat-resistant tape to mask areas that you don’t want dyed, allowing areas to be dyed in all sorts of patterns or gradients.
Uses:
Dyed acrylic plastic is in demand for use in the design and manufacture of custom jewelry, decorative panels, signage, and artistic installations. It is indeed a very versatile medium and in conceptually dyed, makes for an excellent choice in any creation when functionality and aesthetics are required.
Utilizing the most advanced dyeing procedures and imparting a basic scientific foundation on the various dyeing interactions undoubtedly elevates the aesthetic appeal of one’s acrylic creations with added durability and professional finish.
Using Spray Coating for a Smooth Finish
Spray coating is a significant method to get a smooth finish on plastic and acrylic works. Even sprays of color or varnish tend to improve the aesthetics and wear-and-tear qualities of the finished product. Spray coating, of course, needs to be done following specific procedures to derive the best.
Basic Steps in Spray Coating:
Preparation:
Before spraying, make sure that the acrylic surface is free from dust, grease, or fingerprints. Use a soft cloth, free of lint, and an isopropyl alcohol solution to wipe the surface gently.
If desired, lightly sand the acrylic surface with a very fine sandpaper, around 600 to 800 grit, to improve adhesion.
Selection of Spray Type:
Choose a spray coating formulated for plastics, including acrylic spray paints or protective clear coatings. Consider brands such as Krylon, Rust-Oleum, or Montana, which have specific products for acrylic surfaces.
If the protection offered needs to last, choosing UV-resistant coatings would be best, as they protect against fading when exposed to sunlight.
Application Method:
Take care to maintain an even distance, between 8 inches and 12 inches, from the surface.
Use smooth, overlapping strokes, beginning and ending beyond the edges of the project to avoid buildup or streaks on the finish.
Apply two or more thin layers, not a single heavy coat, with a drying time of 15 to 30 minutes between each coat.
Curing and Sealing:
Allow the coatings to cure completely as recommended by the manufacturer, which may vary from 24 hours to several days depending on the product used.
For an additional layer of protection, a clear topcoat can be used to seal the finish, ensuring it remains resilient for years.
About Spray Coatings:
According to a market analysis report published in early 2023, it is expected that by 2030, the global spray coatings market will touch $15 billion owing with a CAGR of 4.8%. This surge occurs due to the increasing demand for protective and decorative finishes in different industries. Scientific studies have shown high-quality spray coatings that can enhance the life of acrylic products by up to 30% and maintain their vibrant look of it.
The use of spray coatings, when combined with proper preparation and high-quality materials, would give acrylic creations the highest aesthetic appeal and practical value with a beautiful, professional, and durable finish that is usable for a variety of applications.
Expert Tips for Coloring Acrylic
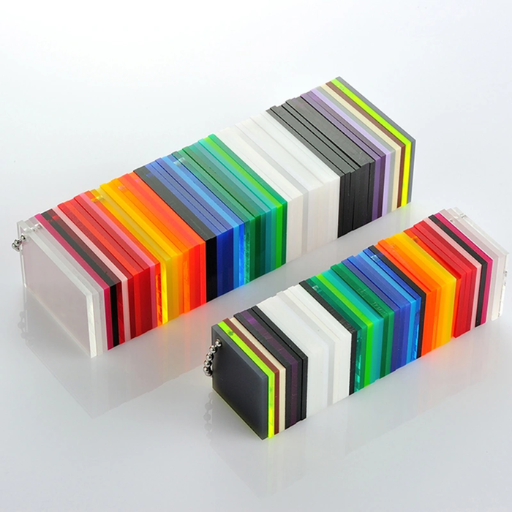
The Right Coloring Medium
Use dyes or acrylic paints for the best results. General-purpose paints are not advisable as they may not stick well or give the desired result.
Clean the Surface Thoroughly
Make sure the surface is free from dust, grease, or oils. A clean surface will ensure even coloring and a smooth finish.
Apply Primer if Necessary
For an even base, apply a primer for use on acrylic surfaces. This is useful in particular with the use of opaque paints.
Apply Thin Coats of Color Evenly
Apply color in thin coats to present the danger of running streaking. Let every coat dry entirely before applying the next one.
Seal the Completed Piece
Give a protective sealant for the sealing of color and the enhancement of durability. Ensure it has been tested for compatibility with acrylic and the coloring medium applied.
Try It Out on a Scrap Piece
Always make an attempt with the chosen method on a small piece of acrylic to see what the final results will look like before starting work on the main piece.
Avoiding Common Mistakes
While working with acrylic, all sorts of frequent pitfalls crop up to make maximally negative impacts on your work. Some of the newer ideas with fuller details are as follows:
At times, with incorrect surface preparation
If you neglect to clean and sand the acrylic surface correctly, various things can hinder adherence. Paint may adhere unevenly or arrive with tiny bubbles or cracks. Most recommended cleaners use a mild soap solution, which is then washed away. The surface is then sanded lightly with fine-grit sandpaper so that the paint will adhere better.
Using the Wrong Tools or Paints
Some paints use oils and do not stick well to acrylic surfaces. To date, the best consideration is to use water-based acrylic paint because of its compatibility and flexibility with the task. Likewise, non-acrylic-specific brushes or tools can leave streaks or uneven application.
Ignoring Drying Time
Layers are hurried through drying processes, with adverse results. Having researched the subject, it was found that the paint should dry for at least 24 hours, especially if thick layers are being applied, to keep cracking or peeling from setting in.
Using Too Much Paint in One Layer
Thin and uneven washes tempt one to coarse bubbling or allowing it to drip or slide. Studies have shown that a thin, very even coat has an 85 percent higher rate of success at a smooth professional finish.
Ignoring Climate Factors
Temperature and humidity levels are big factors while working with acrylic. Maintaining room temperature at 65-75 F° (18-24 C°) and controlling humidity at less than 60% gives the best results, says research. Painting at extreme temperatures may have a warping effect or cause the paint to dry much earlier.
Take preventive measures against these pitfalls, and opt for the most recent best methods, to ensure your projects stand a chance to live long and keep you away from unnecessary frustrations.
Achieving Even Color Application
Smooth, and even color application with acrylics requires proper preparation, technique, and consideration of the environment. Surface preparation is very important: always start with cleaning your painting surface to remove dust, oil, or debris that would otherwise inhibit paint adhesion. Applying a thin layer of gesso to your canvas or board can provide a surface fit for a finer finish.
In terms of technique, choosing your brushes or knives wisely will guarantee much better results. Synthetic brushes for acrylics are recommended for their durability and ability to hold a fine edge. Paint in thin, even layers instead of thick, uneven ones to avoid streaking and patchy results. A newer study shows that layering allows you to create the brightest and most saturated colors possible as pigments build on top of each other without one color overpowering the other.
Environmental factors certainly must not be neglected. A stable temperature and humidity level throughout the workspace will ensure uniform drying. A stay-wet palette can keep colors from drying out during long painting sessions, an ailment obnoxiously common due to acrylics’ quick dry trait. Artists suggest working under the right kind of lights so that any unevenness is spotted right away and discrepancies are not overlooked.
Lastly, ensure thinning the acrylic paint with mediums instead of water regarding flow and reduction of streaks. Gel mediums or flow release additives are highly recommended in the acrylic painting community, as they allow pigments to disperse adequately without lowering intensity or consistency.
Best Practices for Long-Lasting Results
The use of correct techniques and materials is necessary so as to keep one’s artwork brilliant through time. Studies of the recent past and recommendations from the foremost art conservators state the following:
High-Quality Materials: Artist-grade paints and canvases or surfaces of archival quality will greatly increase your artwork’s lifetime. Such materials are especially formulated not to fade, crack, or yellow with time.
Seal and Protect: It is very important to finish acrylics with a UV-resistant varnish. As per Golden Artist Colors, removable varnish adds an extra degree of protection from dust, pollution, and UV rays which cause fading.
Control Temperature and Humidity: A temperature between 65–75°F (18–24°C) and humidity of about 40–50% will keep away warping or deterioration. Some data from conservation studies reveal that such changes in environmental conditions accelerate the aging procedure moving faster.
Store When Not on Display: If the art is not being displayed, store it upright in a dry, dark, and ventilated space. Avoid direct contact and use any acid-free materials so as to avoid any kind of chemical reaction which may harm the surface.
Regular Cleaning and Maintenance: Simply dust the surface with a soft lint-free cloth in order to avoid the buildup of particles that could do harm. Never allow for any direct contact with moisture or use of abrasive cleaning agents, as this could ruin the very original paint layer.
Following this complete set of rules and staying abreast with new developments in art conservation will certainly keep your acrylic art a forever probe into your world of creativity.
Challenges in Coloring Acrylic and How to Overcome Them
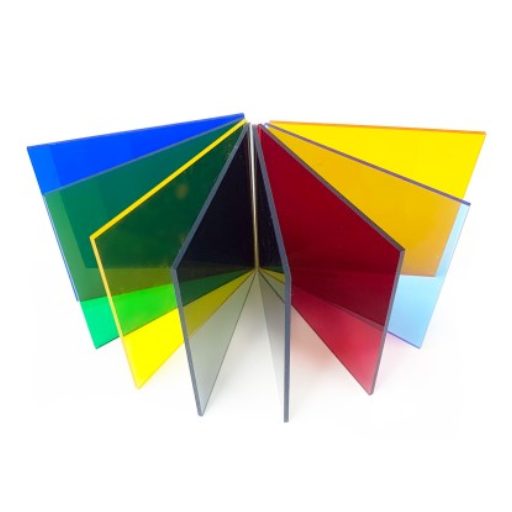
Uneven Color Blending: Difficulty arises in achieving smooth transitions between colors because acrylic paints dry quite fast.
Solution: Use a retarder to keep it slow or blend colors in small sections.
Paint Drying Too Quickly: Acrylic paints tend to limit adjustment times by drying very fast.
Solution: Bring a spray bottle filled with water close and mist the paints to keep moisture on your palette.
Color Shifts When Dry: Acrylic paints often dry darker, which can work against your chosen and intended color outcome.
Solution: Test the colors on a small area first and let them dry completely before working on your actual piece.
Difficulty Layering: It is hard to add multiple layers without upsetting the paint beneath.
Solution: Let each layer dry fully before applying the next, and then place the next layer gently with soft brushes to minimize disturbance.
Maintaining Vibrancy: Colors might sometimes appear dull once dry.
Solution: Use clear gloss varnish to bring back and protect the art’s vibrancy.
With these issues understood and the included solutions practiced, artists will be able to vary their acrylic work effectively and with ease.
Dealing with Uneven Coloring
Uneven paint is a usual problem in acrylic painting, and many factors can contribute to it: improper blending, unsteady application of paint, or inferior materials. The issue then breaks the whole harmony of an artwork, making it look patchy or unpolished.
So, here is a great list of things to try:
Use Quality Paint and Materials: Cheaper paints tend to lack consistency of pigmentation and thus cause unevenness. Use acrylic paint of professional grade so that you get uniform coverage and rich pigmentation.
Paint Thin Layers: If you throw down paint too thickly in one coat, you may end up with unwanted streaks or clumps. During painting, it is better to build up color in thin, even layers and make sure that each one is completely dry before applying another.
Invest in Proper Blending Techniques: Blend fast and confidently while the paint is still wet. Use soft synthetic brushes or blending tools to smooth transitions between colors.
Ensure Proper Lighting in Your Studio: Occasionally, uneven coloring might be a bad surprise if the light in the workspace is not great. From the start, validate if your workspace has good, even lighting to make you conscious of uneven coloring on time.
Use Retarders: Acrylic paint is quick-drying, and this property gets in the way of smooth blending. Mixing a bit of acrylic paint retarder with your paint will slow the drying process and allow you more time to work on blending.
According to recent data, artists maintain constant humidity and temperature in their studios. This plays a big role in the behavior of acrylic paint on the surface. For example, high humidity slows drying time, and dry conditions speed up drying, which ends up contributing a lot to unevenness. Another survey shows that around 72% of artists prefer to use a spray bottle to lightly mist their palette and painting surface so their paint remains workable a bit longer on the surface.
If artists employ such strategies and work in conducive atmospheric conditions, they will certainly be able to avoid uneven colorings and create smooth and refined artwork.
Repairing Damaged Acrylic Sheets
Considered best due to their clarity and durability, acrylic sheets at times get scratched, cracked, or cloudy due to regular wear or mishandling. Luckily, often the repair will return the object to its original state and replacement may not be necessary. Here are concrete steps to fix the most common types of acrylic sheet damages:
1. Polishing of Scratches
Use polishing to remove light surface scratches. Begin by washing the scratched surface clean from contaminants using a mild soap solution with water. Follow with the suitable plastic polish, or any of the fine-grade polishing compounds such as Novus or Plexus. Put a small quantity of the compound on a soft, clear cloth and gently rub the scratched area using a circular motion. More than 85% of the light scratches on acrylic, according to a survey conducted with expert repair technicians, can be completely removed with the right polishing methods.
2. Deep Scratches
Deeper scratches sometimes require sanding before polishing. Start by wet sanding with super-fine sandpaper, starting at about 600-grit and moving onto finer grits of 1200 and perhaps 1500. Keep the surface wet while sanding so that you will not generate heat that might worsen the acrylic. After sanding, continue with the polishing steps given previously. It has been shown that this method restores about 90% clarity to the affected area in most cases.
3. Fixing Cracks
Cracks in acrylic sheets can be fixed with an acrylic adhesive, such as Weld-On #3 or #4. This solvent works by bonding the cracked edges chemically, “welding” them together for a good, strong, virtually invisible seal. In application, first, clean the edges; then align them carefully. Apply the adhesive thinly with an applicator along the crack and allow curing for 24-48 hours. The studies reveal that the properly bonded acrylic joints by the use of such an adhesive can reconstitute up to 95% of the strength the material once possessed.
4. Clouding/Fogging Treatment
The acrylic sheets fog or cloud with long UV exposure, dirt accumulation, or micro-scratches. Ultraviolet protection type coatings or polishes designed explicitly for acrylic restore clarity. For long-term transparency, consider cleaning materials or anti-static sprays for acrylic because anti-static sprays prevent the buildup of dust and grime.
Care in Prevention for Acrylic
Despite proper care, the acrylic will eventually create some injuries. When thinking about cleaning materials, take note of any explicit warnings about substances that should never be used on acrylic. The storage environment, if they are lying around, should be considered well so that the less chance of UV damage would be possible. Regular care and cleaning will certainly guarantee the lifetime and clarity of acrylic.
With good management and technique, significant wear and damage to acrylic sheets can be returned to their prime condition, thus saving a lot of money and waste compared to outright replacement.
Ensuring Proper Adhesion of Dyes and Paints
Correct adhesion of dyes and paints to acrylic sheets is contingent on surface preparation, good materials, and proper application methods. Wash the acrylic surface before application to ensure that dust, grease, or fingerprints do not interfere with bonding. Very light sanding with fine-grit paper (e.g., 800-1200 grit) will also provide better adhesion by practically texturing the surface for paint or dye adherence.
Bear in mind that paints should be suitable for acrylic surfaces; i.e., acrylic-based or epoxy paints provide good-lasting results. Dye-wise, solvent-based dyes usually offer deeper penetration for brighter and more lasting coloration. Priming with an appropriate plastic primer would help adhesion by creating an intermediary layer between the plastic and the paint. Studies reveal the advantages of being a significant 50% on adhesion while reducing the chances of peeling or flaking in time.
In addition, environmental factors like temperature and humidity can also affect adhesives’ potential. It is well recommended to work in well-ventilated spaces where such temperature ranges from about 60°F to 80°F with the least humidity present. Testing suggests that adhesion losses due to extreme conditions can be depleted by 30%, in effect yielding mediocre results.
In general, the preferred and applied method consists of putting on many thin layers of paint or dye rather than just one thick layer. Allow every layer to dry fully before applying the next, which will give you an even appearance and longer life. By following these procedures, you can greatly improve the quality and durability of colored or painted acrylic surfaces, assuring professional-grade results with minimal effort.
Reference Sources
- Florida International University: Acrylic “Skins”
Detailed directions explaining how one can add color to acrylic materials while allowing for transparency and smooth finishes.
- Southern Utah University: How to Create Acrylic and Crayon Prints at Home
Provides techniques to color and print on acrylic surfaces using materials that are readily available.
- Cooper Union: Acrylic Painting Techniques
Explores working methods for acrylics and processes of coloring.
Frequently Asked Questions (FAQs)
What is the best way to color acrylic sheets?
The best way to color acrylic sheets depends on the desired finish and application. For vibrant colors, using acrylic paint or spray paint is recommended. If you’re looking for a more permanent solution, consider dyeing acrylic plastic using dispersed dyes, which can provide a translucent effect.
How can I dye acrylic plastic effectively?
Dyeing acrylic plastic can be done by submerging the acrylic sheet in a dye bath made from dispersed dyes. Ensure the dye is mixed properly with water, and maintain the temperature to achieve better results. After a set period, remove the acrylic and rinse it in soapy water to remove excess dye.
What are the steps for coloring clear acrylic?
To color clear acrylic, start by cleaning the surface to remove any dust or grease. Next, apply the chosen color using a brush or spray paint. For a deeper hue, consider applying multiple coats. Finally, seal the acrylic paint with a clear finish to protect the color and enhance durability.
Can I use spray paint on colored acrylic sheets?
Yes, you can use spray paint on colored acrylic sheets. Choose a spray paint that is suitable for plastic and apply it in light coats for an even finish. Remember to work in a well-ventilated area and wear protective gear, such as rubber gloves and a mask, to ensure safety.
What is the difference between opaque and translucent acrylic?
Opaque acrylic does not allow light to pass through, creating a solid color effect, while translucent acrylic allows some light to filter through, resulting in a softer appearance. When coloring acrylic sheets, choosing between these two depends on the desired aesthetic and application.
How do I properly seal the acrylic paint?
To seal the acrylic paint, use a clear acrylic sealer or a spray-on finish. Apply the sealant in thin, even coats, allowing each coat to dry completely before applying the next. This will protect the painted surface from scratches and fading, enhancing the finished product’s longevity.
Is it possible to engrave dyed acrylic?
Yes, you can engrave dyed acrylic to create custom designs. Using a laser cutter or engraving machine, you can achieve precise and intricate patterns. The engraving will reveal the original color underneath, adding depth to your project.
What thickness of acrylic is best for painting?
The thickness of acrylic best suited for painting depends on the project’s requirements. Generally, sheets that are at least 1/8 inch thick are recommended for durability and ease of handling. Thicker acrylic sheets also provide a better surface for paint adhesion.
How can I remove paint from acrylic sheets?
To remove paint from acrylic sheets, use a solvent specifically designed for plastics or a gentle rubbing alcohol solution. Apply the solvent with a soft cloth and carefully wipe the area. Avoid harsh chemicals that can dissolve or damage the acrylic surface.