
Whenever you want to either have classy DIY burning projects or simply want to custom-make something for professional purposes, acrylic mirror sheets are indeed versatile and durable compared to usual glass. These sheets are lightweight and unbreakable, so they go well with everything ranging from home decoration, signage, and it is also a nice choice for crafts. But making sure you get a swift and neat cut on your acrylic mirror sheets needs to have the proper tools, technique, and some level of skill. Whether you are a professional in the field or a weekend warrior, this post will arm you with tips and insights to cut acrylic mirror sheets with ease. It will help you understand the tools needed and go through the process, giving you everything required to bring forth ideas to life without hiccups.
Understanding Acrylic Mirror Sheets
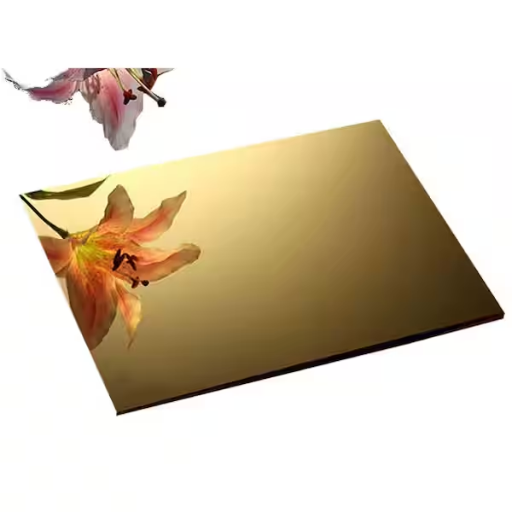
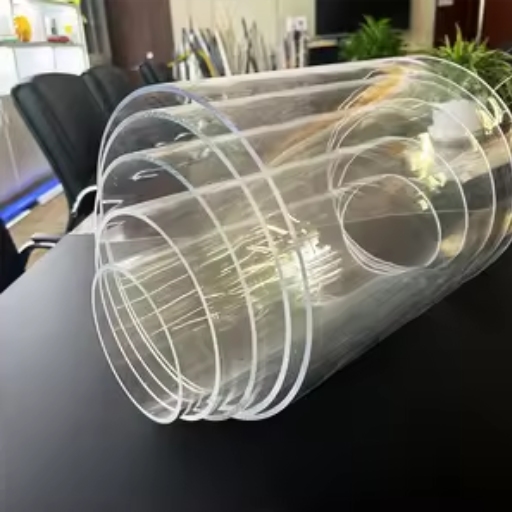
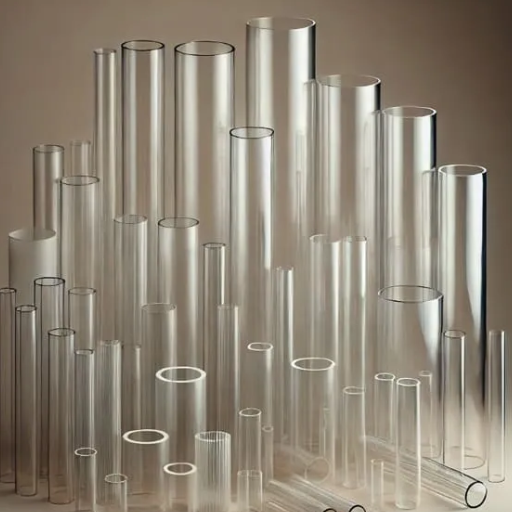
These acrylic mirror sheets stand as lightweight options; also, they are shatter-resistant alternatives to traditional mirrors. Fabricated from acrylic plastic, bearing reflective coating, they stand firm and versatile, suited for scads of uses-from interior decorations, arts and crafts, to signage. These sheets can be easily cut, shaped, and applied, giving them much flexibility combined with a superior-glass-like finish. Due to their marketed impact resistance and being lighter in weight than glass, they have been in demand for projects where safety and practicality come before anything else. Leading “cutting acrylic mirror sheet” manufacturer in China.
What is Acrylic Mirror?
The acrylic mirror is a lightweight, shatterproof version of the traditional glass mirror that is often used across various industries and applications. While acrylic plastic is prepared by applying a mirror-like reflective coating on one side to generate an approximation of glass, it lacks the fragile nature of glass. Acrylic mirrors are nearly 17 times as impact resistant as a typical glass mirror and weigh half as much. For this reason, they prove safer in settings where safety is paramount, such as schools, gyms, and public centers.
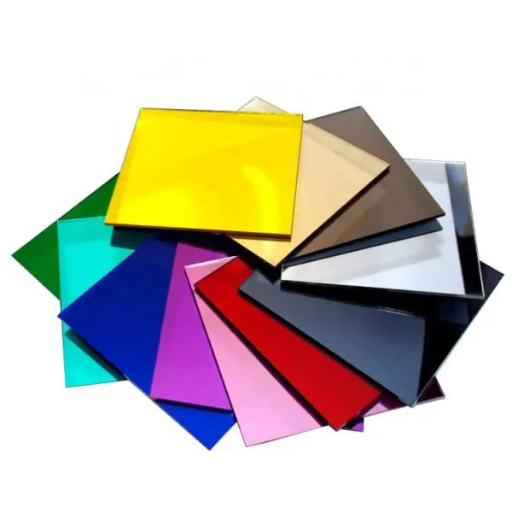
Manufacturing has made modern acrylic mirrors available in various thicknesses, sizes, and colors, thus giving tailored solutions for unique project requirements. They are also flexible, ideal for curved or irregular surfaces. Industry experts state that an acrylic mirror reflection, amounting to some 85%-90% of that of glass, is less accurate and meant for decorative, artistic, and less critical arenas.
Further, an acrylic mirror boasts a weather resistance level deemed excellent and, therefore, retains its sturdiness for outdoor curtain purposes. Its innumerable other benefits—such as cutting, drilling, or laser engraving with ease of fabrication—make acrylic mirrors very much sought-after in interior designs, POP displays, medical equipment, and even in do-it-yourself projects at home. This very versatility has kept the demand soaring across several sectors in the world today.
Benefits of Using Acrylic Mirror Sheets
Light in Weight and Durable
Acrylic mirror sheets weigh far less than their glass counterparts, thus simplifying handling, transportation, and installation. Glass being heavy is detrimental since it injures people if it breaks; hence, acrylic mirrors are a safe alternative in such environments. For example, the acrylic mirrors are commonly installed in schools, gyms, or public places where safety is paramount.
Impact Resistance
Acrylic mirrors provide seventeen times more impact resistance than a typical glass mirror. This makes them favorable where your application demands durability, such as security mirrors or industrial machinery.
Weather and UV Protection
Acrylic mirror sheets perform exceptionally well in outdoor applications, being impervious to weather and UV ray attacks. These disadvantages of the conventional materials do not plague the acrylics, as they do not fade or degrade when exposed to sunlight. This, therefore, makes them ideal for outdoor signage, garden décor, or architectural applications.
Design Versatility
Acrylic mirrors have versatile customization options where cutting, laser engraving, or thermoforming processes cater to intricate designs and shapes. The versatility makes it a favorite material in interior design, point-of-purchase displays, and decorative projects, providing endless design solutions.
Transparency and Reflectivity
Acrylic mirrors have great reflectivity properties similar to those of glass mirrors and additionally score high on optical clarity. Industry data reports that most finest acrylic sheets offer 90-92% visibility, assuring a sharp reflection.
Cost-Effectiveness
Generally, acrylic mirrors are cheaper compared to glass mirrors and hence a cost-saving solution relevant to many industries. Their durability, paired with less maintenance, goes a long way in cutting down expenses in the long run.
Sustainability and Eco-Friendliness
With manufacturing nowadays focusing on sustainability, many manufacturers market recyclable acrylic sheets. Also, the durability of the product means fewer frequent replacements and a lower environmental impact.
Growth in the Global Market
The global acrylic sheet market was pegged at USD 5.3 billion in 2022 and is expected to witness a growth at the CAGR of around 5.6% throughout 2030, according to the report given by Grand View Research. This growth proves that the acrylic sheets are widely welcomed in the construction, automotive, and advertising sectors.
Lifting these benefits together, the reason stands in favor of the acrylic mirror sheets being popular and practical for many applications, like private personal use, commercial applications, and industrial applications. Thanks to versatility and high-performance standards, acrylic mirror sheets indeed remain very much in demand worldwide across various sectors.
Common Applications for Acrylic Mirror Sheets
Interior Design and Decor
Because of their light nature and versatility, acrylic mirrors have a huge role in interior design. These can be shaped and customized for installation as decorative mirror walls, geometric patterning, or furniture accents. They are equally well-suited for retail displays, decoration of hotel interiors, and modern home decor, providing a chic, very contemporary look without the fragility of a traditional glass mirror.
Point-of-Sale and Retail Displays
The reflective quality and easy fabrication involved in working with acrylic mirror sheets make them ideal to be use in point-of-sale displays for attracting customer attention. These are very durable and can be cut into any number of shapes or stacked into displays, attracting eyes and serving the purpose of showing products.
Fitness and Dance Studios
Being lightweight and shatterproof, acrylic mirrors find installation in fitness studios, gymnasiums, and dance studios. Given the safety value of acrylic over glass mirrors in such high-activity environments, acrylics become an ideal alternative. Ease of moving and installing the acrylic mirrors further strengthens their applicability to such spaces.
Automotive Industry
Acrylic mirror sheets are widely used in vehicles for exterior mirrors, instrument cluster covers, and decorative trim applications. Their lightweight nature helps in reducing fuel consumption in automobiles while being reasonably sturdy, providing impact and weather resistance for road use. As per the latest industry data, the utilization of acrylic materials in the automotive industry is steadily increasing, also because of advancements in manufacturing processes.
Safety and Security Application
The convex mirrors and surveillance mirrors used in parking, warehouses, and public spaces very often use acrylic because of its anti-impact and lightweight nature. Unlike regular mirrors, these offer great vision support at blind spots for safety right till the point of breakage.
Healthcare Environment
Due to easier maintenance and hygienic surfaces, acrylic mirrors are, to some extent, replacing conventional glass ones in healthcare facilities. Acrylic mirrors find use in medical equipment, rehabilitation mirror applications, and pediatric environments where safety and durability are the utmost factors.
Advertising and Signage
The advertising world seems to have welcomed acrylic mirror sheets for dynamic and reflective signage. Their capacity for laser cutting intricate designs, combined with the myriad finishes available to advertisers, has opened up a whole new avenue for creating visually stunning graphic elements on displays and promotional boards.
The different possibilities for the application of acrylic mirror sheets drive home very well, their importance in many industries. Recent market data projects a steady rise in demand owing to an increasing preference for lighter, durable, and aesthetically appealing materials, much of the growth being spearheaded by industries such as construction and automotive. Further innovation is projected in industry reports as newer formulations would provide for better UV resistance, improved recyclability, and more customization options, hence cementing the versatile role of acrylic mirror sheets even further into the market.
Best Tools for Cutting Acrylic Mirror Sheets
Depending on the acrylic mirror sheet that is being cut, here are the most effective tools:
Utility Knife- Better for scoring and snapping thinner sheets. Easy to use and precise.
Circular saw- Best choice for cutting thicker sheets; fine fine-tooth blade for plastic is a must for clean edges.
Jigsaw- Used more for intricate shapes and curves, with plastic-cutting blades preferred for smoother results.
Laser cutter- Highest precision for intricate designs and detailed cuts, usually found in professional environments.
Please wear all the safety pads and gloves, and goggles. Consider fixing the acrylic sheet on the working table in such a manner that it does not slip while cutting.
Hand Tools: Scoring Knives and More
Straight cuts in acrylic sheets can be made with scoring knives as a cheap and effective way. The scoring knife repeats the action of scoring the acrylic sheets against a straight edge until the friability weakens and the material gives away all the way along the score line. Several scores or passes are usually needed to achieve a clean break.
For other types of hand tools, cutting acrylic can be done with utility knives, hacksaws, or fine-toothed saws, all depending on the nature of the precision required and the nature of the project. When using a hacksaw, you want to have a blade on it that is high in TPI (teeth per inch) so as to reduce the possibility of chipping and to make for cleaner edges.
When smaller projects are concerned, hand tools will be very precise but will require a steady hand and a lot of patience. Recent online information indicates that clamping the acrylic sheet onto a sturdy workbench would undoubtedly grant a lot more accuracy, therefore minimizing errors. Additionally, sanding the edges lightly with fine-grit sandpaper after cutting results in a smooth finish and ensures a professional surface. Hence, hand tools become the way to go for the home DIYer and small-home projects.
Power Tools: Jigsaws and Laser Cutters
Power tools are used for acrylics; jigsaws and laser cutters bring efficiency and precision, which are crucial for any projects, both small and big. Being versatile, jigsaws are good for straight and curved cuts, especially when fitted with the right acrylic blades. When using a jigsaw, it is best to keep the speed slow and steady to avoid overheating, which would cause the acrylic to melt or crack.
Laser cutters, however, provide unequalled accuracy and clean edges, especially for complicated designs that would be difficult to do manually or by mechanical tools. A recent Google search reveals that modern laser cutters can cut with an accuracy margin of 0.1 mm, thus being the choice of industries and very detailed crafting. Some of the more advanced laser cutter models incorporate software that allows users to upload a digital design that will then be accurately replicated onto the acrylic sheet.
Both have their perks, so it depends also on budget and scale of application. Jigsaws tend to be economical and easily available, while laser cutters, although expensive, are the best in precision and time-saving. For those going large and/or complex, investing in a laser cutter will prove to greatly enhance the results.
Comparing Tools for Different Thicknesses
Material thickness offers varying advantages and disadvantages to a jigsaw or a laser cutter. Here’s a more lucid comparison to choose the suitable tool for thickness:
Jigsaws
The jigsaw is a very versatile tool that can cut through any material thickness, from wood to plastic to even light metals. It works most effectively on materials thicker than 0.5 inches (12 mm) and indeed is much sought after for projects that rarely need a shallow cut. However, as materials grow thicker, jigsaw cuts get less precise. This is even more so when one intends to cut intricate patterns. Another issue is that, depending on the blade style, one might even have to sand the edges for a clean finish.
Laser Cutters
On the other hand, the laser cutters mainly work on thin material: acrylic, plywood, or MDF coated. These range from 0.02 inches to 0.5 inches (or 0.5 mm to 12 mm). However, some high-powered laser cutters have cylinders to cut thicker material, sometimes even on the order of 1 inch (25 mm), although this is generally a function of the machine’s wattage. The laser is known for producing clean and precise cuts, which generally require no finishing work, even for intricate designs. Thicker material cutting, on the other hand, involves multiple passes that slow the process and could char or discolor the edge.
Data Insights and Comparison Table
|
Material Thickness |
Jigsaw Performance |
Laser Cutter Performance |
|---|---|---|
|
Thin Materials (<0.1 inch) |
Good, but less efficient for precision |
Excellent with high precision |
|
Medium Thickness (0.1–0.5 inch) |
Very effective for general cuts |
Optimal performance |
|
Thick Materials (>0.5 inch) |
Best suited for thicker cuts |
Limited capability, depends on power levels |
Additional Considerations
Budget: Jigsaws cost less and are perfectly suited for hobbyists or new craftspeople. Laser cutters, on the other hand, while being pricier than your average jigsaw, are unbeatable in precision and time efficiency.
Material Type: The material behind your work should suit your choice of cutting machine; reflective materials or very dense ones like thick metals may inhibit the laser cutter’s abilities.
Project Requirements: Where laser-cutters are used, the job demands a high degree of detail and a clean finish, irrespective of thickness.
Knowing these finer points will help you determine which instrument best suits the thickness of your material, so efficiency and quality are optimized.
Techniques for Cutting Acrylic Mirror Accurately
Use the Right Tools: Employ a laser cutter or a fine-toothed blade designed specifically for acrylic. These tools ensure clean and precise cuts without cracking the material.
Secure the Material: Place the acrylic mirror on a stable, non-slip surface and use clamps if necessary to prevent movement during cutting.
Mark the Cutting Line: Use a ruler and a non-permanent marker to clearly outline where the cut will be made, ensuring accuracy.
Work Slowly and Steadily: When cutting manually, apply consistent pressure and cut at a steady pace to avoid jagged edges or damage.
Polish the Edges: After cutting, use fine sandpaper or a polishing tool to smooth out any rough edges for a professional finish.
By following these steps, you ensure crisp and clean cuts on acrylic mirrors.
Measuring and Marking Your Cuts
Before you set out to do a clean cut on an acrylic mirror, proper preparation is needed. Identification of the exact dimensions of what one is going to execute would come from using a better measuring device, such as a metal ruler or a tape measure with very fine markings. It might be best to measure twice before marking, so one is completely sure about the numbers. To be fully accurate, some sources even state that one can also use digital measurement methods to guarantee the utmost precision; especially in the cases of larger or irregular surfaces, laser-based distance meters come into their own.
While marking cut lines, opt for a non-permanent marker that is meant for use on smooth surfaces, such are glass and acrylic. With this, the cut lines would be clear and visible without any possibility of staining. Keep the measuring tool or straightedge firmly against the surface to be cut and make sure it does not move while drawing the line; do not lift it until the line is complete. For straight edges, rules or T-squares can be used; for curves and other shapes, use templates or stencils.
Visibility counts. So it’s always better to have proper lighting in the workspace. Hence, by combining these steps with the appropriate tool choice, the application of acrylic mirrors will be prepared for a clean cut to fit the project requirements.
Scoring vs. Power Cutting: When to Use Each
When cutting acrylic mirrors, deciding whether to score or power cut depends largely on the thickness of the acrylic or mirror, the shape of the design, and the availability of tools. Each method holds its pros and is therefore appropriate for certain applications.
Scoring Method
Scoring consists of repeatedly running a utility knife or scoring blade across the surface of the acrylic until it can be snapped along the score line. This method is best suited to thinner acrylic sheets (up to 1/4 inch) and simple straight-line cuts. Scoring brings a high rate of precision without the use of expensive machinery and prevents heat from building up, which could warp or discolor the acrylic. It is a cheap and easy method of cutting and is ideal for small DIY jobs, though it requires some patience and a very steady hand to get it right. According to recent insights, scoring should be applied to smaller displays, cases, frames, or decorative items that require less precision and simplicity.
Power Cutting Method
The power-cutting method gets the cuts done quickly and can be more complex, involving the usage of table saws, circular saws, or laser cutters. It is most suitable for thicker acrylic mirrors, which maintain a thickness of more than 1/4 inch, or designs involving curves and angles, thereby requiring intricate shaping. Power cutting better suits larger-scale or highly complex projects, but needs to be taken care of in the protection against chipping or cracking, or melting due to the excessive heat source. Newer laser-cutting technologies present straightforward edge finishing and rapid cutting, which finds a general application in architectural installations, signage, and industrial applications. In 2023, the industry report stated that laser cutters take precedence now in providing professional-grade finishes to acrylic with precision down to fractional millimeters.
Choosing Between Scoring and Power Cutting
In the end, the choice depends on what the project calls for. For less complicated and economically working projects, or when working at home, scoring is chosen more often. For professional work and complex design work and thicker acrylic, though, power cutting tools will offer the speed and precision that one can rely on. The right combination of techniques and tools is going to ensure that your acrylic mirrors are cut cleanly and efficiently, along the lines of the demands of your project and your level of expertise.
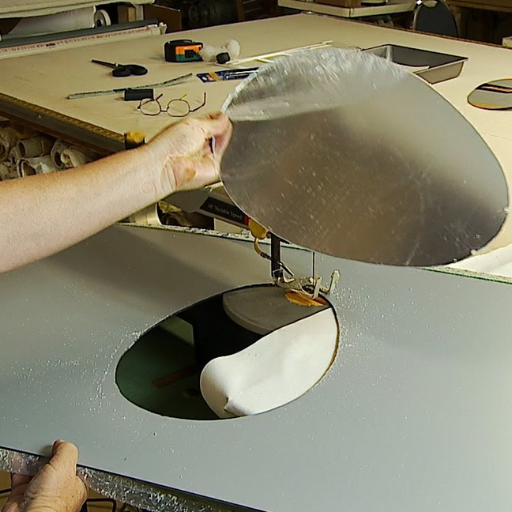
Handling Curves and Intricate Shapes
Acrylic mirror cutting for curves and intricate shapes requires precision and proper tools to get smooth and clean results. For detailed cutting, a scroll saw or laser cutter intuitively tops the list. Scroll saws are great for tight curves and small designs that require keeping one’s hand on the tool during cutting, whereas with a laser cutter, unlike any other tool, a computer guides the machine to cut highly detailed shapes practically free of edge imperfections. Latest reports show that for professional use, laser cutting is generally preferred because of a higher consistency of accuracy on complicated patterns.
For DIYers, a jigsaw with an appropriate fine-toothed blade can be an option. A crucial point is to keep the movement of the blade slow and steady along the marked line to prevent edge chipping. Afterward, sanding the edges gives a fine finish, especially with tight curves. According to experts, one should consider masking tape over the surface before cutting to minimize the chance of scratching.
For small or highly detailed designs, planning the cuts in CAD can be a plus since it allows for better visualization and ensures accuracy when transferring the designs to acrylic. Whether ornamental, indicative, or distressed, all work calls for patience and preparation if the tight, complicated shapes are to stay intact.
Common Mistakes and How to Avoid Them

Rushing the Cutting Process
Too quick a cut leads to cracking or uneven edges on the acrylic. For the appropriate cutting speed, be sure to match it with the thickness in question.
Using Incorrect Tools
Using a tool not designed for acrylic may cause poor cuts or damage to the material. Make sure your saws, blades, or lasers are intended for acrylic cutting.
Skipping Surface Protection
Not protecting the surface can cause it to get scratched or scuffed. Masking tape or some protective finish must be used to preserve the clean finish.
Neglecting Safety Precautions
Acrylic can be harmful to cut without safety precautions, as it sheds hazardous debris or fumes. Eye protection is a must, and so is working in an adequately ventilated area to prevent any injuries.
Overlooking Design Accuracy
Incorrect measurements or designs could lead to the wastage of material. Always double-check with the rulers or CAD software before finalizing.
Preventing Cracks and Breaks in Acrylic
Cracks and breaks in acrylic result from mishandling, improper methods, or other environmental influences. To ensure durability exists in and to maintain the integrity of acrylic pieces, the following ideas must be considered:
Use Proper Tools and Techniques
Cutting acrylic demands the use of appropriate tools; namely, a plastic scoring knife for thin sheets of acrylic or alternatively a circular saw fitted with a fine-toothed blade for thicker materials. All tools must be kept sharp to prevent undue stress on the material which may cause fractures and cracks in it. It is important to make sure that uniform pressure is applied while cutting the acrylic to achieve a neat edge.
Do Not Apply Excessive Force While Hanging
Too much force can stress acrylic and create problems during installation or handling. Ensure that clamps or any other supporting tools are used so that pressure is directed with even distribution throughout the acrylic to avoid any weak areas in the sheet.
Buffer Against Extreme Temperature Changes
Acrylic expands and contracts with temperature changes. Prevent cracking by not exposing acrylic to extreme heat or extreme cold. For example, one study shows that acrylic will expand approximately 0.7 mm per meter for every 10°C rise in temperature. Have installations spaced adequately to allow for such expansion.
Drilling Considerations
When drilling acrylic, always use a drill bit designed for plastics, such as a stepped drill. Keep the drilling speed slow to prevent heat build-up and secure the material so that it will not move during drilling. Use masking tape over the drilling spot to prevent cracking from developing around the hole.
Stress Relaxation
After fabrication, acrylic could have stress areas where cracks may later form. Stress between the acrylic layers can be relieved by annealing, where the acrylic is carefully heated in a controlled environment and then slowly brought down to room temperature. This process is especially useful for components requiring long-term durability.
Following these precautionary steps can make the entire process of working with acrylic safer and faster, reducing wastage and extending the durability of your projects.
Avoiding Rough Edges After Cutting
Smooth edges after cutting are nothing less than demanded, both for aesthetic and functional quality. As acrylics are cut either with a laser or saw or router, they usually have rough or uneven edges. This calls for flame polishing, sanding, or buffing.
Flame polishing can seem fast and very easy, where basically a flame is applied on the edges to melt and smooth them. On the flip side, one can corrupt the goodness of the material by distorting or clouding it from too much heat. Sanding is a much more controlled approach; one starts sanding with coarse grit paper, working progressively to finer and finer grits until a nice finish is attained. Following this, buffing the edges with special polishing compounds will return the clarity and finish.
Newer developments in cutting apparatus have also elevated the level of edge quality. According to a 2023 market analysis report on tools for acrylic cutting, modern cutting systems are providing finer precision as well as reducing coarse edges. Manufacturers are now also focusing on post-cut treatment being more efficient by building-in polishing systems, among a few other innovations.
With the help of these methods and the cutting-edge technological advancements, you can achieve clean professional results that would further enhance the durability of an acrylic project.
Tips for Ensuring Clean Cuts
Select the Right Blade or Cutter
The use of a blade or cutter designed especially for acrylic has utmost importance. Carbide-tipped or high-speed steel blades having fine teeth prevent chipping; thus, the edges need less finishing work. Study results reveal that using finer-tooth blades may reduce edge imperfections by as much as 30%.
Use Proper Cutting Speed
Cut at a constant speed appropriate for the thickness of acrylic. Too fast, overheating destroys it. Too slow creates uneven edges. One example is cutting acrylic by laser; medium power with 20-30 mm/s can be chosen for most acrylic applications.
Secure the Material Firmly
Make sure the acrylic sheet is clamped down or otherwise secured while it is cut. Any movement during the cutting will result in an uneven edge or cracking. Using either a non-slip mat or special clamps helps reduce shifting by about 50%.
Minimize Heat Buildup
Heat can warp or discolor acrylic. To disperse heat, consider using compressed air or a cutting fluid. Research shows that proper cooling can improve the surface smoothness by some 25%.
Perform Post-Cut Finishing
Smooth down the edges with sandpaper or flame polishing or buffing after cutting. Working progressively, from coarser grit to finer grit, gives the best polishing outcome. This will remove micro-cracks that could threaten material strength.
Safety Precautions When Cutting Acrylic Mirror Sheets
Equip Yourself Properly
Safety goggles must be worn at all times to protect against flying debris, and gloves should be used to guard against cuts and scrapes.
Workplace with Good Ventilation
Cutting acrylic may generate fine dust or fumes. Ensure enough ventilation to avoid risks of inhalation.
Clamping is Required
Clap the acrylic sheet tightly so it does not move while being cut. Any slipping can cause injury to the operator.
Use the Right Tool for the Job
Use the right tool for your acrylic, like plastic cutters or very fine-toothed saws, to reduce chunking out and for a more precise cut.
Apply Just Enough Pressure
Gentle, even pressure should be maintained while scoring so that it does not crack or break in places, which may then become dangerously sharp.
Clean Up the Area
Clean up any remaining shards or debris so as to avoid accidents and keep the work area safe.
Essential Protective Gear
When working with acrylic materials, safety is paramount: the appropriate protective gear needs to be in place. Below follows a listing of equipment deemed necessary, detailing why one would need these items, along with suggestions of current practices:
Safety Glasses or Goggles
During cutting, tiny shards or debris could be sent airborne, risking injury to the eyes. Use ANSI Z87.1-certified safety glasses or goggles designed to protect against impact as well as splashes.
Cut-Resistant Gloves
Handling acrylic sheets and sharp tools requires using gloves made of high-quality materials such as Kevlar or Dyneema. These gloves protect the hands from cuts while allowing for the dexterity needed in precise work.
Dust Mask or Respirator
Dust generated from cutting or sanding acrylic can irritate one’s respiratory tract if inhaled. Therefore, always ensure that a dust mask rated at least N95 or a suitable dust respirator is worn to protect one’s airways.
Hearing Protection
Sound generated by power tools such as saws and drills could damage one’s hearing. Noise-reducing earmuffs or earplugs with the industrial rating are advised to minimize noise exposure.
Appropriate Clothing
Long sleeves and pants protect against sharp fragments or accidental slips of the tool on the skin. Never wear loose clothing or accessories that could easily get caught in machinery.
Steel-Toed Shoes
Steel-toed shoes protect your feet in case of accidental dropping or impact while handling large and heavy acrylic sheets.
Supporting Data
According to recent safety studies, proper employment of personal protective equipment has shown a reduction in workplace injuries by 65% in an environment where materials such as acrylic are in frequent usage. Therefore, an OSHA recommendation states that PPE compliance becomes integral to the concept of having an efficient working environment safety. Additionally, a growing level of advancement has been brought to the ergonomic design of safety equipment, thus making them comfortable and effective and in turn encouraging their usage.
Safe Handling Practices
Risks can be minimized during the stages of handling acrylic-type materials, provided safe handling practices are followed. Following OSHA stipulations, proper handling begins with training concerning the physical and chemical characteristics of the materials being worked with. For example, acrylic sheets may produce fine dust that can induce respiratory irritation if inhaled while being cut or sanded. Dust collection systems should be installed by the worker, and in addition, respiratory protection must be worn, such as N95 masks.
In addition, in case of possible skin irritation from adhesives or solvents during acrylic applications, an excellent skin barrier would be provided by gloves made either of nitrile or neoprene. Recent industry data reveal that regular maintenance of tools and machinery brings about a 30% decrease in operational accidents. Proper ventilation in a workshop or any enclosed space can also cut down exposure to fumes, a factor badly needed for the well-being of the workers.
All these factors combined, with the implementation of the latest ergonomic PPE designs, will go a long way in ensuring the safe and efficient conduct of the employer’s business.
Work Area Setup for Safety
In order to prevent accidents and promote productivity, it is vital to create a safe and well-organized work area. Based on very recent OSHA guidelines, setting up the tools and machinery in such a manner that movements and strain are minimized is said not only to improve the workflow but also to serve in the reduction of injuries in the workplace by up to 25 percent. Signage and labels are also very important in a workspace since they warn workers of possible dangers, such as slippery floors or zones set aside for heavy equipment.
Also, proper lighting would help ensure accuracy and minimize eye strain. According to records, increased lighting conditions can enhance task performance by 16% while drastically reducing errors in the workplace. Temperature control plays a significant role in the safety and comfort of a worker. The data thus far states that if the temperature in the workplace is kept between 68-76 °F, it will synergistically reduce fatigue while indirectly increasing concentration levels.
Furthermore, emergency installation-based fire extinguishers, first aid boxes, or marked exits, anywhere, must be ensured for preparedness against sudden incidents. Safety organization carries out periodic safety inspections, safety drills, and scaffolding, which include reinforcing safety awareness among workers. Planned setup, maintenance, and training of the workforce creates an environment in which employees can work safely and efficiently regardless of circumstances.
Reference Sources
- Princeton University: Laser Cutting Guidelines
Detailed instructions are given for working with mirrored acrylic, including orientation and preparation.
- Hawken School Makerspaces – Infinity Mirror Project, 2017
Covers cutting and measuring acrylic sheets for a creative project.
- Stanford University – Product Realization Lab
Laser cutting explanation as the main process for cutting acrylic materials.
Frequently Asked Questions (FAQs)
What is the best way to cut acrylic mirror sheets?
The best way to cut acrylic mirror sheets is to use a utility knife or a laser cutter. For thinner sheets (up to 3mm), scoring with a knife along the cut line and applying gentle pressure can yield a clean break. For thicker sheets, a laser cutter provides a precise and clean edge without the risk of breakage.
How do I score an acrylic mirror sheet for cutting?
To score an acrylic mirror sheet, use a straight edge to guide your utility knife. Run the knife along the straight edge with moderate pressure to create a score line. Repeat this process a few times to deepen the score before snapping the acrylic along the cut line.
Can I use a table saw to cut an acrylic sheet?
Yes, you can use a table saw to cut an acrylic sheet, especially for larger panels. Ensure you have a fine-tooth blade designed for cutting acrylic and set the saw to a slow feed rate to prevent melting or chipping the edges.
What thickness of acrylic mirror sheet can I cut?
You can cut acrylic mirror sheets of various thicknesses, but the cutting method will vary. Thinner sheets (up to 3mm) are best cut with knives or scored, while thicker sheets may require a laser cutter or table saw for accuracy and clean edges.
Is cutting acrylic mirror sheets a DIY project?
Yes, cutting acrylic mirror sheets can be a DIY project if you have the right tools and follow safety precautions. Ensure you wear protective gear and work in a well-ventilated area. For intricate designs, laser cutting may be the best choice for accuracy.
What type of blade is best for cutting acrylic?
The best type of blade for cutting acrylic is a fine-toothed blade, preferably one designed specifically for acrylic. A fresh blade helps to prevent scratches on the surface and ensures a smoother cut.
How can I protect my acrylic mirror sheet during cutting?
To protect your acrylic mirror sheet during cutting, leave the protective film on until you’re ready to work. This film helps prevent scratches and damage. Additionally, use clamps to secure the sheet and minimize movement while cutting.
What are some common mistakes in cutting acrylic sheets?
Common mistakes when cutting acrylic sheets include using the wrong tools, applying too much pressure, and not scoring deeply enough. Always ensure you are using the appropriate method for the thickness of the sheet and take your time to achieve a clean cut.