Aquarium ownership is a curious and gratifying hobby that brings the sweetest natural touch to your space. To maintain a clean and healthy environment for aquatic life, you need the right tools and equipment. Clear filter tubing and hoses for aquariums are among the most essential components in this process. They keep the water fresh, oxygenated, and free from harmful debris. This comprehensive guide will lead you through the process of choosing tubing and hoses, covering why they are important parts of the filtration system, the performance aspects to consider, and how to ensure compatibility with your tank and pump for happy fish and healthy plants.
Understanding Aquarium Filter Tubing
Aquarium filter tubing plays an essential role in the water cleanliness process by allowing water to flow throughout the filtration system. Using the right tubing for your aquarium ensures trouble-free water transfer, reliable filtration, and prevents leaks or blockages that could hurt aquatic life. When choosing tubing, compatibility with your filter’s inlet and outlet sizes should be the most critical consideration. Other important factors include fish-safe materials, durability, and resistance to kinking. Materials like silicone or PVC are excellent choices. Additionally, properly maintained and cleaned tubing not only helps with performance but also extends the filter’s lifespan.
💡
What is Clear Tubing and Its Purpose
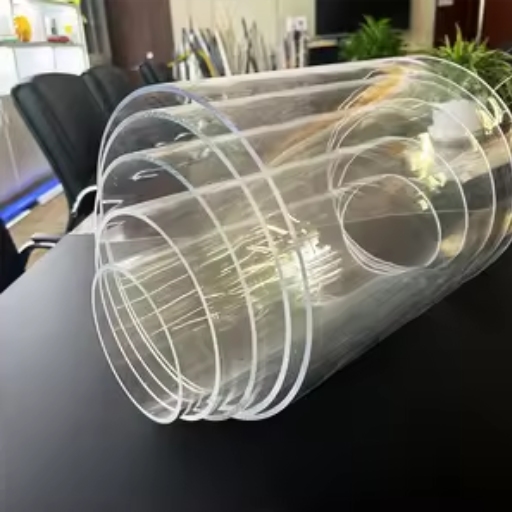
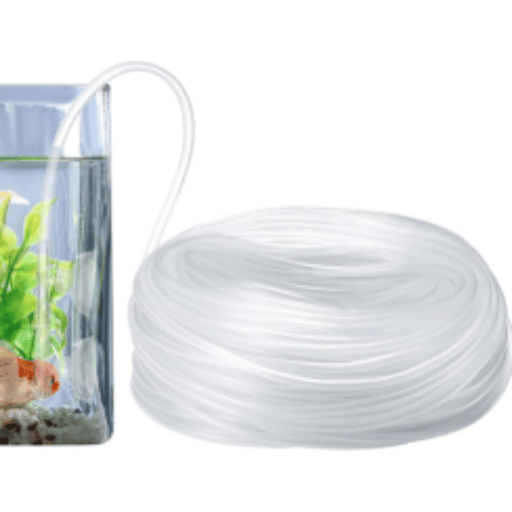
Clear tubing, also known as flexible or transparent pipe, is a popular material used for water transfer in aquariums, pools, and other aquatic systems. Its main function is to enable smooth water circulation that can be visually monitored, making it easy to detect any blockages. Made from materials such as PVC or silicone, clear tubing is wear-resistant, non-hazardous, and kink-free, making it beneficial for the safe and efficient operation of aquatic environments.
Types of Aquarium Filter Tubing and Hose
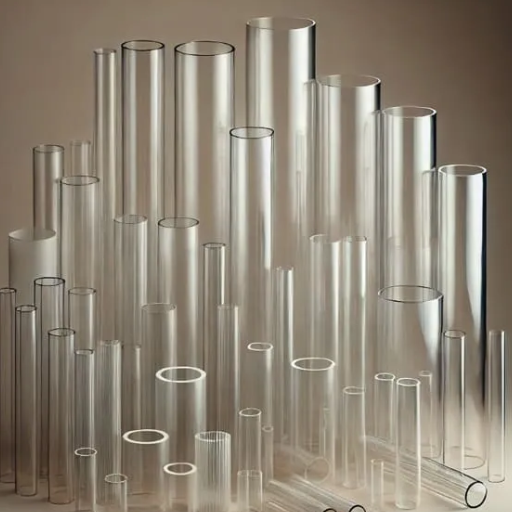
1. PVC Tubing
PVC tubing is both durable and cost-effective, making it one of the most commonly used materials in aquarium filters. It resists kinking and works effectively in both freshwater and saltwater systems.
2. Silicone Tubing
Silicone tubing is prized for its flexibility and softness. It performs even better than PVC where space is limited and tight arrangements are necessary. It also resists rubbing and wear.
3. Corrugated Tubing
This tubing features a ridged design that increases flexibility. It’s optimal for systems requiring intricate curvatures, though it can be more challenging to clean thoroughly.
4. Reinforced Tubing
With added strength built into its structure, reinforced tubing is commonly used for larger systems or pumps with powerful water flow requirements.
Each type offers unique advantages, giving hobbyists the opportunity to choose the best option for their particular aquarium requirements.
Benefits of Using Clear Tubing in Aquariums
- ✓
Neutral Appearance: Maintains focus on the fish and aquascape without visual distraction - ✓
Easy Maintenance: Clogs, debris, and algae buildup can be easily detected and cleared efficiently - ✓
Versatile Application: Suitable for both freshwater and saltwater tanks - ✓
Multiple Sizes: Available in different sizes to suit various filtration and water flow needs
Choosing the Right Tubing for Your Aquarium
Picking the right tubing for your fish tank requires taking several specific factors into account to achieve optimal performance and compatibility with your filtration system. The right choice ensures efficient water flow, prevents leaks, and minimizes maintenance issues.
Key Factors to Consider When Selecting Filter Tubing
| Factor | Consideration |
|---|---|
| Diameter | Must match filter inlet and outlet sizes for proper fit and optimal water flow |
| Material Safety | Choose non-toxic materials like silicone or PVC to prevent contamination |
| Durability | Select strong materials that resist wear and tear for longer service life |
| Flexibility | Kink-resistant tubing minimizes flow disruption and system strain |
| Transparency | Clear tubing allows easy detection of blockages and debris buildup |
| Cleanability | Easy-to-clean designs reduce maintenance time and frequency of replacement |
Comparing Rigid vs. Flexible Tubing
Rigid Tubing
Best For:
Fixed installations requiring precise alignment with minimal movement
Advantages:
- More uniform flow
- Less likely to bend or collapse under pressure
- Precise system alignment
Flexible Tubing
Best For:
Systems with changing setups and versatile applications
Advantages:
- Versatile for many purposes
- Withstands repeated bending
- Harder to crack
- Easy to route around obstacles
Recommendation: Analyze the specific requirements of your system to find the right match between rigid and flexible tubing.
Common Materials: Vinyl vs. Silicone vs. PVC
| Material | Key Characteristics | Best Applications | Considerations |
|---|---|---|---|
| Vinyl | Lightweight and economical | General-purpose applications | May harden gradually over time |
| Silicone | Highly flexible with excellent temperature resistance | Medical, food-grade, and high-temperature applications | Premium pricing |
| PVC | Strong, chemical-resistant, and flexible | Heavy-duty and industrial purposes | Balance of cost and performance |
Selection Tip: Your final decision should be based on application requirements, temperature range, and budget considerations.
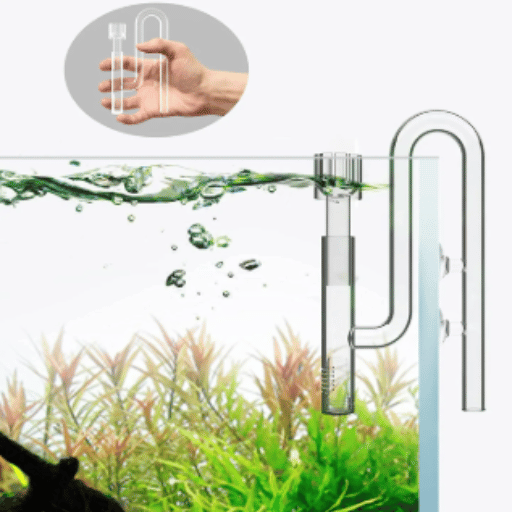
Installation of Aquarium Filter Tubing and Hose
Proper installation ensures optimal performance and prevents common issues like leaks and restricted water flow. Follow these steps for successful installation:
1
Measure and Cut the Tubing
Begin by measuring the distance between your aquarium’s filter inlet and outlet, then cut a length of tubing accordingly. Use a sharp knife or scissors to ensure a clean, straight cut. Make sure the length allows for comfortable connections without excessive stretching or force.
2
Attach to the Filter
Securely attach the tubing by fixing one end to the filter’s inlet and the other to the outlet. Push firmly to create a seal strong enough to prevent leaks. If the tubing feels stiff, dip the ends in warm water briefly to soften them, making attachment easier.
3
Position the Tubing in the Aquarium
Carefully position the tubing in the aquarium, ensuring it’s laid out without kinks or sharp bends that could impede water flow. Use suction cups or clips to keep the tubing properly in place while maintaining a neat, organized appearance.
4
Test for Leaks
Before completing the installation, start the pump to check water flow. Carefully inspect all joints and fittings for any signs of leakage and make necessary adjustments or tightening as needed.
5
Optimize Placement
Ensure there are no blockages in the piping and that it integrates neatly into the tank’s overall design. Proper placement promotes efficient water flow while enhancing the aquarium’s visual appeal.
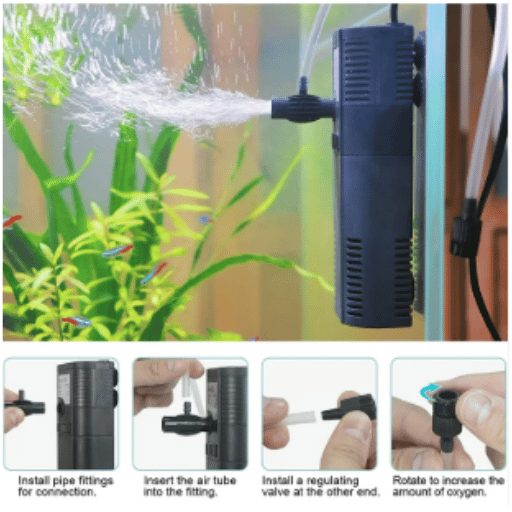
Step-by-Step Guide to Installing Pump Tubing
- 1
Gather Necessary Tools
Prepare all required tools and components including the correct pump tubing, clamps, and any necessary connectors or fittings for your specific pump model.
- 2
Inspect the Tubing and Connections
Carefully examine the tubing for any damage such as cracks or worn-out sections. Verify that all connectors are clean and in proper working condition before proceeding.
- 3
Cut Tubing to Length
Measure and cut the tubing to the required length using a proper cutting tool for clean edges. Avoid making it too short, which would create stretching and stress on connections.
- 4
Attach Tubing to the Pump
Take one end of the tubing and attach it securely to the pump outlet or inlet connector. If necessary, use a clamp to secure the connection and ensure it’s airtight.
- 5
Connect to the System
Attach the other end of the tubing to the corresponding system connector, securing it with clamps to prevent any potential leakage during operation.
- 6
Perform a Leak Test
After completing the installation, start the pump and test the system at the intended operating pressure. Check all connections carefully for leaks. If any are found, tighten fittings or replace damaged components as needed.
- 7
Monitor for Proper Operation
Observe the tubing immediately after startup to ensure it remains properly positioned and intact under operating conditions. Make any necessary adjustments or relocations to optimize performance.
Best Practices for Connecting Tubing
Measure Tubing Precisely
Cut tubing to exact length to avoid slack or overstretching. The right length ensures efficient operation and a neat appearance.
Secure Tight Connections
Use clamps or fittings to connect tubing to the pump and components. This prevents loose connections that may cause leaks or poor performance.
Use Compatible Materials
Ensure tubing material is compatible with your pump and system requirements to prevent damage or premature wear over time.
Regular Maintenance
Frequently check tubing for wear, clogs, or loose connections to maintain optimal performance and prevent system failures.
Maintenance and Care for Filter Tubing
Proper maintenance of filter tubing guarantees smooth water flow and extends the lifespan of your aquarium setup. Regular care prevents common problems and ensures your aquatic environment remains healthy and thriving.
Essential Maintenance Checklist
1
Regular Cleaning
Clean the tubing every 4–6 weeks to prevent algae buildup and blockages. Use a flexible brush to remove debris from the interior surfaces thoroughly.
2
Inspect for Wear and Tear
Regularly examine tubing for cracks, stiffness, or discoloration. Replace tubes showing these symptoms promptly to ensure optimal system performance.
3
Ensure Secure Connections
Periodically check hose clamps and fittings to confirm they remain tight and joints are properly sealed. This prevents leaks and maintains proper water flow.
4
Avoid Kinks or Bends
Position tubing to prevent sharp bends or kinks that can restrict water flow and place strain on your filter system, reducing efficiency.
5
Use Safe Cleaning Products
Rinse tubing thoroughly with warm water only. Avoid harsh chemicals that could harm aquatic life or leave harmful residues in your system.
⚠️ Regular maintenance is vital for an efficient and healthy fish tank filtration experience
Regular Cleaning Tips for Clear Tubing
Monthly Rinse Routine
Rinse tubing with warm water once a month to prevent dirt accumulation and maintain optimal flow rates throughout your system.
Deep Cleaning Stubborn Residues
For more stubborn buildup, use a soft brush to gently clean the interior surface without causing damage to the tubing material.
Regular Inspection Protocol
Periodically check for visible wear and replace tubing when necessary to keep flow and filtration at optimal levels in your aquarium system.
Signs of Wear and When to Replace Tubing
⚠️ Warning Signs That Require Immediate Attention
🔴 Physical Damage
- Visible cracks or splits
- Color changes or yellowing
- Loss of flexibility or hardening
🔴 Performance Issues
- Decreased water flow
- Visible kinks or permanent bends
- Leaks at connection points
🔴 Material Degradation
- Clouding or opacity
- Surface roughness or texture changes
- Algae buildup that won’t clean
⚡ Replace tubing immediately when these issues are identified to prevent harmful effects on your aquarium system and maintain proper filtration
Maintaining Water Quality with Proper Tubing Care
Proper tubing care is essential for maintaining excellent water quality in your fish tank. Regular maintenance directly impacts the health and wellbeing of your aquatic life.
🌊 Prevent Debris Accumulation
Clean tubing regularly to prevent dirt and algae from building up. Blockages can significantly impact water flow and reduce filter efficiency, compromising water quality.
🧼 Use Proper Cleaning Tools
Utilize a soft brush or specialized cleaning tool designed for tubing to remove debris from the interior without causing damage to the material.
🔒 Ensure Proper Sealing
Check that all tubing connections are properly sealed to avoid leaks or contamination. Regular system maintenance protects the health of your aquatic life and ensures long-term success.
Reference Sources
1. Pentair AES – Rigid Clear Tubing
Detailed information about rigid clear tubing applications for aquariums, particularly for microalgae and zooplankton culture tanks.
Source: Pentair Aquatic Eco-Systems
2. Planted Tank Forum – Best Transparent Filter Tubing
Community discussions among experienced aquarists about their preferred clear tubing options for planted tank applications.
Source: The Planted Tank Forum
3. Amazon – Lee’s Flex Aquarium Tubing, Clear
Product specifications and user reviews highlighting clear tubing characteristics for various aquarium setup applications.
Source: Amazon Product Listing